How to test indoor air quality at home means two layers of checks: a continuous monitor for particles, gases, and humidity, plus targeted tests for radon, carbon monoxide, and mold that no consumer monitor can catch.
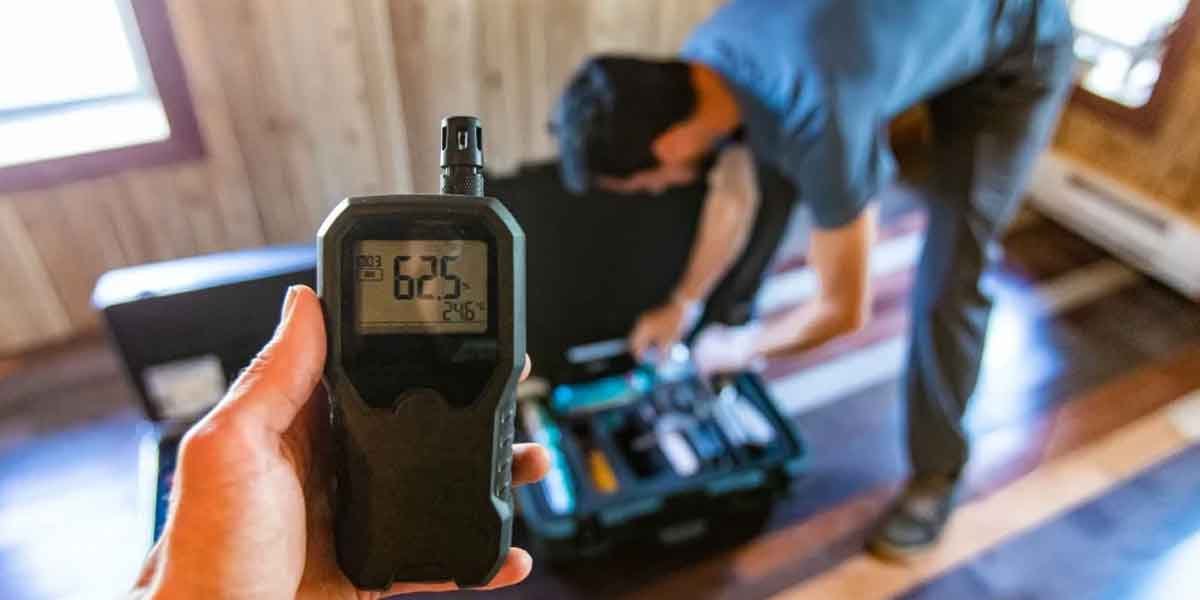
Start with the layer that matches the symptom or worry you actually have, not with the most expensive gadget you can find.
Getting this right without overpaying comes down to matching the tool to the question.
This approach fits a US homeowner after a renovation, before buying a monitor, when allergy symptoms appear, or after moving into a house whose history you don’t know.
What Home Air Quality Tests Actually Measure
Home air quality is not one number. It is a mix of particles, gases, moisture, and radioactivity, and each one needs a different tool, so the first step is matching the test to the pollutant you are worried about.
Two tool families exist. An air quality monitor gives continuous readings for the pollutants it was built to detect, while a test kit captures a sample and sends it to a lab for one-time analysis.
They overlap less than most product listings suggest, which is why the table below sorts them by pollutant.
| Pollutant | Common sources | Symptom clues | Test method | DIY cost range | DIY or pro |
|---|---|---|---|---|---|
| PM2.5 / PM10 particles | Cooking, candles, wildfire smoke, pet dander | Coughing, allergy flare-ups, itchy eyes | Consumer monitor with a laser particle counter | $30–$250 | DIY is fine |
| VOCs and formaldehyde | Fresh paint, new furniture, cleaners, air fresheners | Eye, nose, or throat irritation; headaches | Consumer monitor with a VOC sensor, or a lab air test | $50–$300 | DIY first; lab test if symptoms persist |
| Carbon dioxide (CO2) | Breathing, unvented appliances, crowded rooms | Drowsiness, headaches, poor focus | Monitor with an NDIR CO2 sensor | $80–$250 | DIY is fine |
| Humidity and mold | Leaks, bathrooms, basements, poor drainage | Musty smell, condensation on windows, allergy symptoms | Hygrometer plus a visual moisture check | $10–$50 | DIY first; professional inspection if mold is hidden or large |
| Radon | Soil gas entering through the foundation | None. Radon has no smell and causes no acute symptoms | Short-term kit (2–7 days) or long-term kit (90+ days) sent to a lab | $15–$40 per kit | DIY test; licensed mitigation above the action level |
| Carbon monoxide | Gas furnaces, water heaters, fireplaces, cars idling in an attached garage | Headache, dizziness, confusion that lifts when you leave the house | UL-listed CO alarm on every level | $20–$60 per alarm | DIY install; evacuate and call 911 on alarm |
| Formaldehyde (pressed-wood products) | Particleboard furniture, laminate flooring, some insulation | Eye and throat irritation, especially in new or remodeled rooms | Lab sampling kit or professional measurement | $50–$200 | Professional preferred for accuracy |
The prices above are rough US street ranges, not quotes; regional labor and lab fees move them.
What matters more than the exact dollar figure is the pairing: a monitor answers “is it high right now,” and a kit answers “what exactly is in a captured sample.”
How to Test Indoor Air Quality at Home: A Five-Step Workflow
Here is the practical sequence for how to test indoor air quality at home: define the question, pick the tool, run the test correctly, record and compare the numbers, then act. Skip a step and the result is either misleading or useless.
Gather the prerequisites before anything else: a hygrometer for humidity (around $10–$20), a UL-listed CO alarm on every level if you don’t already have one, and the specific monitor or test kit from the table above.
A first full screen usually lands between $100 and $300 in total, which is why deciding the question first saves the most money.
- Define the question. Are you chasing a symptom, checking a new space, or doing routine monitoring? The answer decides everything downstream. A musty basement is a moisture question, not a VOC question, and buying a VOC monitor for it wastes the money.
- Choose the tool that answers it. Match the pollutant list from the table above to your question. For continuous data, buy a monitor that measures the specific pollutants you care about. For one-time answers, buy the matching test kit. Consumer monitors are not lab instruments, so treat their numbers as trend signals, not courtroom evidence.
- Run the test under the right conditions. Place a monitor away from walls, windows, and direct airflow, at breathing height, in the room where the concern lives. Follow the kit’s instructions exactly, because radon and mold kits are condition-sensitive. Testing radon with windows open produces a reading that means nothing.
- Record and compare. Write down the numbers, the date, and the conditions, then compare them against the standards in the sections below. A single reading is a snapshot; several days of data is a pattern, and patterns are what trigger action.
- Act on the result. A reading above a threshold means a fix, not another reading; source control, ventilation, and filtration are the levers that actually lower pollutant levels.
Every step has a check that tells you the result is usable.
If any of these fails, discard the reading and redo the step, because a clean setup matters more than an extra day of waiting.
- The monitor sat at breathing height, away from walls, windows, and supply vents, for at least a few days.
- The room stayed in its normal state during the sampling period.
- The radon kit followed the closed-house conditions in its instructions.
The most common failure point in this workflow is the tool itself. A cheap monitor with an unstable sensor produces numbers that look authoritative and are not:
“I recently bought a cheap ~$30 air quality monitor on Amazon. It seemed fine at first, but the CO₂ sensor glitched hard; it spiked to over 4,000 ppm for no reason and kept beeping, even after I moved it and let it sit for a while.”
– r/AirQuality, March 2026 (15 upvotes)
Other frequent errors: sampling only one room, testing while the kitchen is cooking or the windows are open, and concluding from one instantaneous spike. If your HVAC was recently installed or modified, ductwork problems can also push particles and odors around the house, which is one of the common air conditioning installation problems that shows up as a sudden change in readings.
Testing Radon, Carbon Monoxide, and Mold
Radon, carbon monoxide, and mold need their own tests because no consumer monitor measures them directly. Each has a simple DIY first step, and each has a boundary that tells you when to stop testing and call a professional.
Radon testing
Radon is a radioactive gas from soil that seeps into homes through the foundation.
It is the second leading cause of lung cancer in the United States, responsible for an estimated 21,000 deaths a year there, and it has no smell, no color, and no symptoms, so the only way to know is to test.
Short-term kits sit for 2 to 7 days under closed-house conditions, then go to a lab. Long-term kits run 90 days or more and give a truer average, because radon levels swing with weather and season.
Follow the CDC’s radon testing guidance on placement: the lowest livable level of the house, away from drafts.
The US Environmental Protection Agency action level is 4 picocuries per liter. Below it, consider a follow-up long-term test; at or above it, stop testing and hire a licensed radon mitigation contractor, because a fan-and-venting system is the standard fix and this is not a DIY job.
Outside the US the numbers differ, because most countries express the limit in becquerels per cubic meter, with the WHO reference level at 100 Bq/m3.
Carbon monoxide testing
Carbon monoxide is the one pollutant that can kill you while you sleep, because it is colorless, odorless, and its early symptoms (headache, dizziness, confusion) are easy to write off.
It comes from incomplete combustion in gas furnaces, water heaters, fireplaces, and cars in attached garages.
The test is an alarm, not a kit. Install a UL-listed CO alarm on every level and outside sleeping areas, replace the batteries on a schedule, and replace the alarm itself by its expiration date.
If an alarm sounds, do not investigate the source yourself. Get everyone outside, call 911, and have the appliance checked by a qualified technician before you return.
Mold checks
Mold needs moisture, so the cheap first test is a hygrometer in the suspect room plus a visual look at walls, ceilings, and under sinks.
Persistent humidity above about 60 percent is the signal to hunt for leaks, not to buy a mold test kit.
DIY mold kits can confirm that spores exist, but they do not identify the species, the toxicity, or the source, which are the three things you actually need. EPA’s guidance is a practical boundary: you can clean up visible mold yourself when the affected area is less than about 10 square feet.
Bigger areas, mold inside HVAC equipment, or mold after major water damage call for a professional inspection.
When DIY Air Testing Isn’t Enough
DIY testing is the right first move for routine monitoring, radon screening, and visible mold under about 10 square feet. It stops being enough when you are chasing health symptoms, hidden mold, or a radon reading at the action level.
| Situation | What to do | Why |
|---|---|---|
| No symptoms, just curiosity | Consumer monitor for PM2.5, VOCs, CO2, humidity | Cheap, continuous data; establishes a baseline |
| After renovation or new furniture | VOC and particle monitoring for a few weeks | Off-gassing peaks early, then fades |
| Musty smell or a small visible mold patch | Hygrometer plus visual check; clean under 10 square feet yourself | EPA’s DIY boundary for small areas |
| Older home, radon never tested | Short-term radon kit now, long-term kit if the first reading is close to 4 pCi/L | Radon has no symptoms; screening is the only detection |
| No CO alarm installed | Install UL-listed alarms on every level now | Life safety comes before any other test |
| Family headaches or asthma flares that ease away from home | Skip DIY; hire an indoor air quality inspector | Symptom patterns need professional diagnosis and source hunting |
| Water damage or suspected hidden mold | Professional mold inspection | Hidden mold needs sampling behind walls, not a home kit |
| Radon at or above 4 pCi/L | Licensed radon mitigation contractor | EPA recommendation; mitigation is not a DIY task |
Cost follows the same boundary. A complete DIY screen, meaning a monitor plus radon and CO checks, lands well under $300 in most US markets.
A professional assessment typically starts in the hundreds of dollars and climbs with lab work, so it makes sense when a question matters more than the budget. The full breakdown of indoor air quality testing cost is covered separately, with the ranges that actually show up on invoices.
The DIY-versus-professional line here mirrors the one in HVAC repair, where the same principle applies: anything involving combustion, refrigerant, or structural work is a licensed contractor’s call, not a weekend project. The DIY vs professional AC repair article draws that line for heating and cooling equipment specifically.
What to Do With Your Air Quality Results
Whatever the test shows, the fix follows the same three strategies in EPA’s guidance on improving indoor air quality: control the source, bring in fresh air, and filter what remains. Keep indoor humidity below 60 percent, ideally between 30 and 50 percent, and retest after you change something.
Source control removes the problem at its origin, and it is the most effective of the three.
That means fixing the leak instead of buying a dehumidifier, choosing low-VOC paint instead of ventilating around it, and banning smoking indoors.
Ventilation dilutes what you cannot remove, so run the bathroom and kitchen exhaust fans, open windows when outdoor air is clean, and keep combustion appliances properly vented. Filtration handles what is left, and a HEPA filter removes at least 99.97 percent of particles at its rated size, which is why it matters most for PM2.5, pollen, and pet dander.
Humidity deserves its own sentence because it connects everything. A space that stays above 60 percent relative humidity grows mold, and the usual culprit is a cooling system running wrong.
If your AC short-cycles, freezes, or never shuts off, the common AC repair problems are often the reason a house feels damp no matter what the dehumidifier says. When the unit itself is old, replacing it is a ventilation upgrade too, and the air conditioning installation cost includes duct sizing decisions that affect how fresh air actually reaches each room.
Retest after any meaningful change: after a renovation, after sealing a leak, after a new filter, or after a mitigation system is installed.
The goal is a pattern that stays inside the boundaries above, not a perfect score on one day.
Start with the life-safety items, because they cost the least and matter the most. Alarms on every level, a radon kit in the basement, and a hygrometer in the damp room will answer most of the questions people actually have, and the number that says “call a professional” is worth knowing before you spend money on anything else.
For more practical projects along these lines, the Home Improvement guides cover the rest of the house.
Nothing here replaces a medical or professional assessment. If anyone in your household has persistent symptoms you suspect are tied to indoor air, talk to a healthcare provider and hire a licensed inspector.
Frequently Asked Questions About Testing Indoor Air Quality
What are the signs of poor indoor air quality?
Common signs include a stale or musty odor, condensation on windows, visible mold, heavy dust, and symptoms like headaches, eye or throat irritation, and allergy flare-ups that improve when you leave the house. None of these proves a specific pollutant, but any of them is a reason to start the testing workflow above.
Can my phone detect air quality?
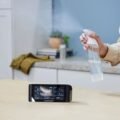
No, phone hardware cannot detect air quality. Its sensors read temperature, pressure, and sometimes light, but not PM2.5, VOCs, radon, or carbon monoxide, and no app can extract those readings.
External monitors that pair over Bluetooth work fine, but the sensors live in the separate device.
How often should I test indoor air quality at home?
Test radon at least once in every home you live in, and rerun it every couple of years or after major foundation work. Test humidity and CO2 continuously with a monitor if you have one.
For everything else, rerun the full how to test indoor air quality at home workflow after a renovation, a water event, a new appliance, or whenever symptoms appear without another explanation.
How do you fix poor indoor air quality?
Follow the EPA’s three strategies in order: control the source, improve ventilation, and use filtration, while keeping indoor humidity below 60 percent. Start with the cheapest fix that applies, such as fixing a leak or venting the dryer outside, and only then consider air cleaning devices.
How do I know if the air in my house is making me sick?
The strongest clue is a pattern: symptoms such as headaches, coughing, or asthma flares that appear at home, improve when you leave for work or a trip, and return when you come back. If you see that pattern, test for CO and radon immediately, then have an inspector look for mold and combustion issues.