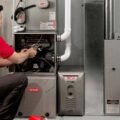
How to install HVAC filters correctly takes about five minutes: turn off the system, slide out the old filter, match its printed size and MERV, insert the new one with the arrows pointing toward the blower, and seal the panel.
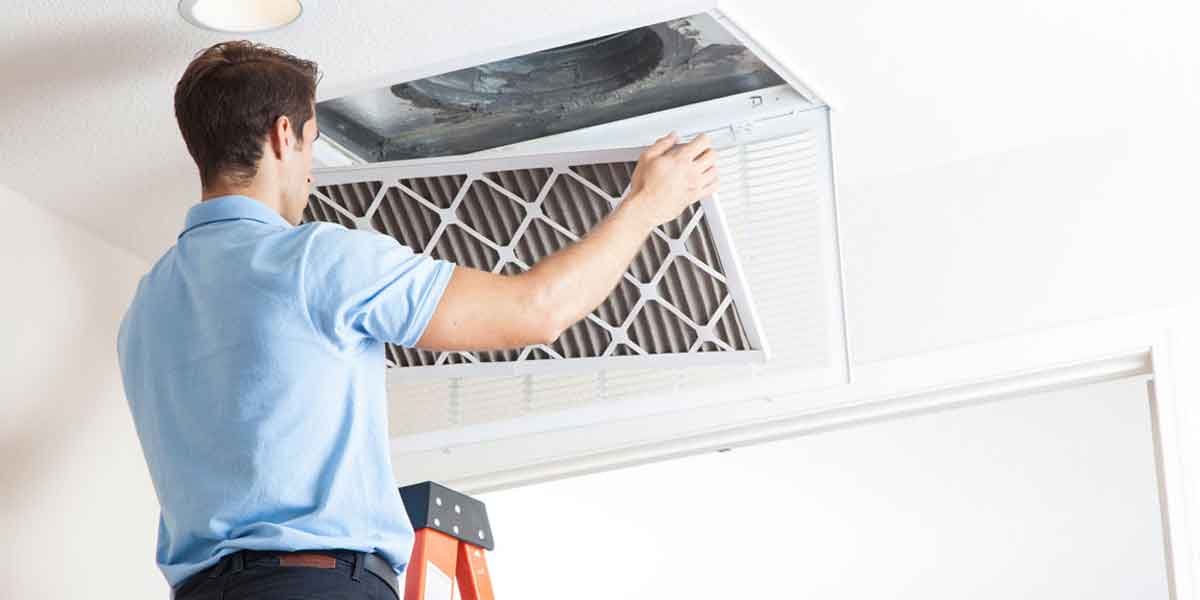
That is the whole job in most ducted homes. Forced-air furnaces and air handlers are the focus, plus return-grille setups.
You will find the tools you need, the direction rule explained, common failure points, and how to verify the install worked. Window units and portable units are not covered.
What You Need Before You Start
You need the correct replacement filter, a few basic tools, and about ten minutes. Most installs fail before the filter goes in, because the wrong size or rating was bought.
Gather these items:
- A new filter matching the printed dimensions on the old frame (length, width, and depth).
- A filter with the same or equivalent MERV rating, unless the equipment manual says otherwise. EPA’s explanation of MERV ratings shows that higher ratings catch smaller particles but also add airflow resistance.
- A vacuum or soft brush to clear dust from the slot while the old filter is out.
- A flashlight, and a marker to write the install date on the new frame.
- A screwdriver only if the access panel is fastened; many panels pull off by hand.
Safety comes first. Turn the system off at the thermostat, the breaker, or the shutoff switch on the unit before opening anything.
For a furnace, wait a few minutes after shutdown so the blower and burner area cool before you reach in.
How To Install HVAC Filters: A Practical Walkthrough
Installing an HVAC filter correctly means finding the right slot, matching size and MERV, inserting the filter with the arrow toward the blower, and sealing the panel. Each step below includes a checkpoint so you know when it is done.
Step 1: Find the filter location
Look for the filter on the return-air side of the equipment. In most single-family homes it sits in a slot on the furnace or air handler cabinet, in a basement, closet, garage, or attic.
In multifamily units and some houses, the filter is behind a return grille mounted on a wall or ceiling. Pacific Northwest National Laboratory’s Building America guide notes that when the furnace is hard to reach, filters belong at the return grilles instead, one per grille.
Checkpoint: you can see the edge of a filter, a marked slot, or a grille that opens.
Step 2: Turn off the system and remove the old filter
Switch off the system at the thermostat or the unit’s shutoff switch. Slide the old filter straight out of the slot, or open the grille and lift it out.
Read the frame before you discard it. The size (for example, 16x25x1) and MERV rating are printed on the cardboard edge.
A phone photo of the frame keeps the numbers handy when you shop.
Checkpoint: you know the exact dimensions and rating of the filter that fits, and the system is off.
Step 3: Clear the slot
Vacuum loose dust from the opening while the filter is out.
Dust that falls into the blower compartment usually gets trapped by the new filter, but a quick pass keeps the area clean.
Checkpoint: the slot is free of debris and you can see the airflow path into the unit.
Step 4: Insert the new filter arrow-first
Hold the new filter so the arrows printed on the frame point toward the blower and air handler, not toward the room. Slide it in without forcing it; a correctly sized filter seats flat with light pressure.
If the filter bends or bunches, stop. A bowed filter lets air bypass the media, which defeats the point of the install.
Checkpoint: the filter lies flat in the slot, arrows toward the equipment, with no visible gaps around the frame.
Step 5: Seal the panel and restore power
Close the access panel fully and press until it seats. Gasketed covers seal best; if the panel has a gasket, make sure it is not folded or pinched.
Restore power and run the system.
Listen at the panel edge for whistling, which means air is leaking around the filter or the cover.
Checkpoint: the panel is flush, no whistle at the seam, and air reaches the vents within the normal time.
Which Way Does the Arrow Point?
HVAC filter arrows point in the direction of airflow, which means toward the blower and air handler. Air travels from the return grilles through the filter into the equipment, so the arrow must face the unit, not the room.
The printed arrow matches the direction air flows when the system runs.
If the arrow points at you as you face the furnace, the filter is backwards.
Three ways to confirm the direction when you are unsure:
- Trace the duct: air moves from the return grille into the furnace or air handler. The arrow should point into the equipment.
- Check the old filter: dust collects on the side that faces the return air. Install the new filter with the clean side facing the same way the dirty side faced.
- Use the blower location: on most furnaces the blower is inside the cabinet below or beside the burner section, and the filter slot sits on the return side feeding it.
A backwards filter still lets air pass, but it strains the blower, pulls dirt into the equipment, and can collapse the media over time. The fix is simply to flip it.
Common Installation Mistakes and How to Catch Them
Most filter problems show up as airflow symptoms days after the install, not at the filter itself. The table below matches symptoms to their usual causes so you can decide whether to re-seat the filter or call for help.
| Symptom | Most likely cause | Fix |
|---|---|---|
| Weak airflow from vents | Clogged filter, or filter installed backwards | Replace the filter; confirm the arrow points at the blower |
| Whistling at the panel | Panel not seated, gasket folded, or filter bypassing air | Re-seat the panel; check the gasket lies flat; confirm filter size matches the slot |
| Dust streaks on ceiling grilles | Air bypassing the filter frame | Verify the filter fills the slot; replace a too-small filter |
| System cycles on and off rapidly | Restricted airflow from a loaded filter | Replace the filter; if it persists, call a professional |
| Filter bows or will not lie flat | Wrong size or wrong thickness for the slot | Use the exact dimensions printed on the old frame |
Two mistakes deserve extra attention.
Buying a higher MERV filter than the equipment is designed for adds air resistance, which PNNL warns can contribute to equipment failure.
The second is forgetting the date. That is how a clean filter quietly becomes a clogged one.
Acceptance Checks: How To Know the Filter Install Worked
An install is correct when the panel seals, the system runs normally, and the filter stays flat with the arrow toward the blower. Use these checks right after the install and again the next day.
- Panel flush and gasket visible: no gap, no folded seal.
- No whistling or rattling at the filter area while the system runs.
- Air reaches the farthest vent within the normal time.
- Filter lies flat in the slot; you can feel the frame edges with no bow.
- System starts and stops normally, with no short cycling.
- Install date written on the frame so the next change is obvious.
One more check a day later: look at the filter’s exposed edge. Even distribution of dust across the media means air is flowing through the whole filter, not around it.
DIY or Call a Professional?
Filter replacement is a safe DIY job for most homeowners. Call a professional when the equipment runs on gas, the filter sits in an inaccessible attic, or you find mold, water, or unusual smells.
Stop and get help in these situations:
- The filter is in a crawlspace or attic with no walkway and no stairs. PNNL recommends a permanently installed walkway for regular access.
- You find mold, standing water, or strong odors around the equipment. Mold and moisture need diagnosis, not a filter swap.
- The system is gas-fired and you are not comfortable around the burner section. Filter access is safe, but anything beyond it is not.
- You need electrical work to reach the filter. The shutoff switch covers filter changes; anything more belongs to a licensed technician.
- The slot fits no standard filter size, or the access panel is rusted, broken, or missing its gasket.
If the filter change does not fix weak airflow, short cycling, or high bills, stop replacing filters and have the equipment inspected.
Repeated filter changes mask a larger problem.
HVAC Filter Installation Questions
Can I install an HVAC filter myself?
Yes, in most ducted homes. How to install HVAC filters yourself takes about five minutes: turn the system off, match the size and MERV printed on the old frame, slide the new filter in with the arrow toward the blower, and seal the panel.
A companion walkthrough, the hvac filter how to install guide, covers the same ground if you want a shorter version.
How do I know if my air filter is in the right direction?
Check the arrow printed on the frame; it must point toward the blower and air handler, in the direction air flows. When in doubt, install the new filter so its clean side faces the same way the dirty side of the old filter faced.
How often should I change HVAC filters?
As a rule of thumb, 1-inch filters need replacement every 1 to 3 months, while thicker 4-inch media filters can last up to about 6 months. Pets, construction nearby, allergy season, and heavy system use all shorten that window; check monthly in those cases.
What happens if I put the filter in backwards?
The filter still passes air, but the wrong orientation strains the blower, lets dirt reach the equipment, and can collapse the media. Fix it by turning the filter around so the arrow faces the unit; no other part of the install changes.
When should I call a professional instead?
Call a professional if the filter is in an inaccessible attic or crawlspace, you find mold or standing water, the system needs electrical or gas work, or a fresh filter does not fix weak airflow and short cycling. Those situations need diagnosis, not another filter change.