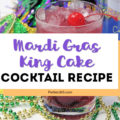
It’s almost time to celebrate Mardi Gras, also known as Fat Tuesday, and if you’re looking for a fun and festive dessert, you’re in the right place! Our colorful Mardi Gras Cake Recipe is easier than it looks and will have your guests’ mouths watering as they compliment your amazing cake decorating skills! Keep scrolling for all of the delicious details…

Mardi Gras is a traditional celebration that kicks off the Christian season of Lent, which begins on Ash Wednesday. You probably think about the crazy parades and parties that are associated with New Orleans when you think about Mardi Gras. However, if you’re anything like me, your Mardi Gras celebration is probably a little more low key and tame with little kids running around! Which is why a simple dessert is called for! And we’ve captured some of the festivity of Mardi Gras in the beautiful colors of this cake.

Mardi Gras Cake Ingredients
The first thing you’ll want to do is gather all of your ingredients and supplies. You’re welcome to make your cake from scratch, but if I’m planning to do a fancy decorating job, I usually opt for a box cake mix and save my time for the frosting!
The specific ingredients are listed in the recipe below, but briefly, here’s what you’ll need for the cake and frosting:
- 2 boxes of white cake mix, eggs, water and oil
- Three 9-inch round cake pans
- 10-inch round cake board
- Butter, sugar, whipping cream and vanilla
- Purple, gold and green gel food coloring
- 3 medium piping bags with round tips
- Small angled spatula
Mardi Gras Cake Directions
After you have all your ingredients and supplies together, start by baking your cakes according to the box directions. You’ll divide your batter into the 3 cake rounds and bake until a toothpick comes out clean. Allow those to cool and once cool, level each cake layer. Finally, place the first cake layer on your cake board before you begin frosting.
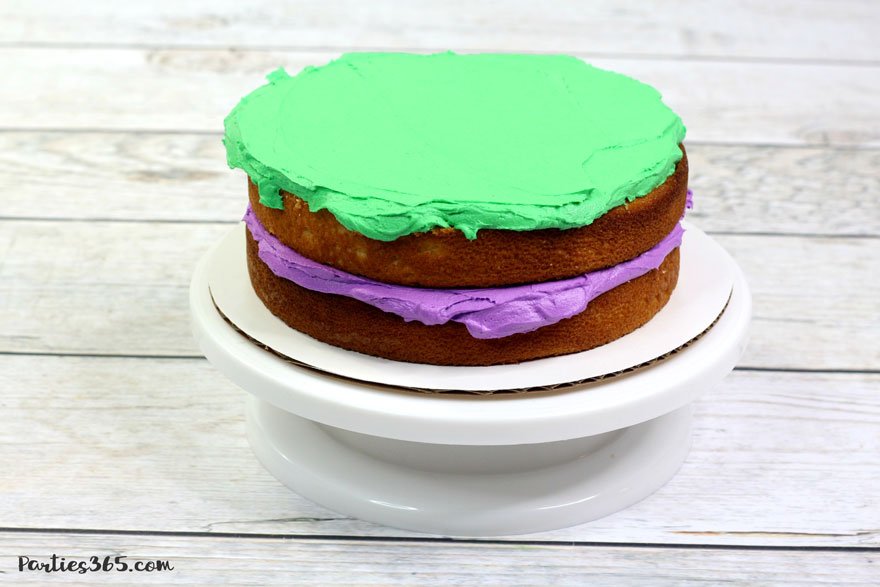
Next, you’ll prepare your vanilla frosting by combing all the ingredients and dividing it into 3 bowls. Add green, purple or gold food coloring to each bowl and mix completely. Scoop about one cup of purple frosting onto the first layer of cake and spread it out evenly.
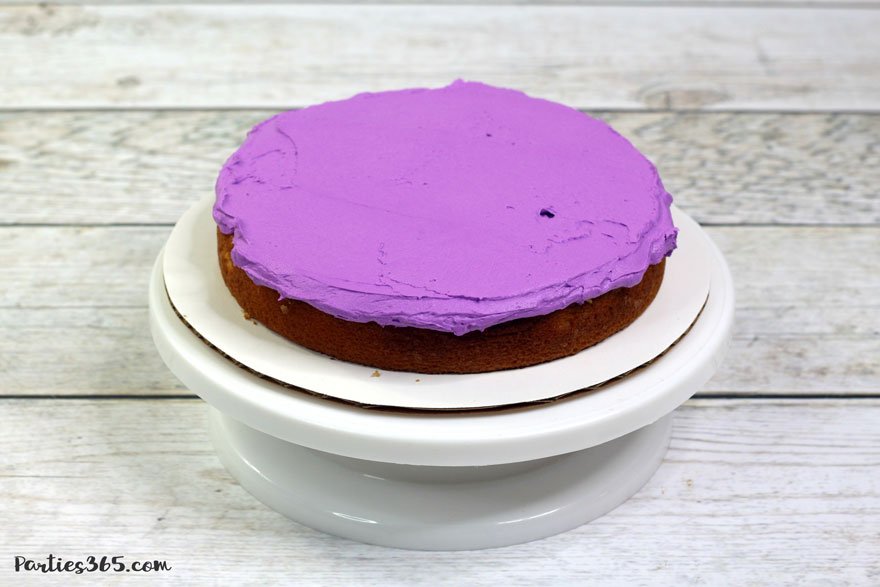
Place the second layer of cake on top of the purple frosting. Next, spread out about one cup of the green frosting. Then transfer the remaining frosting (for each color) into your piping bags. Place the final layer of the cake on top of the green frosting.
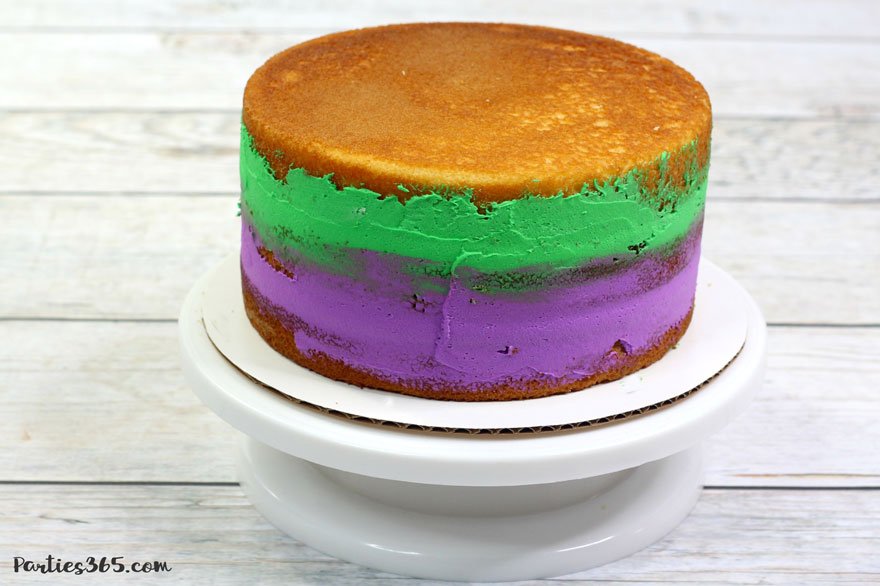
Evenly spread out any frosting that oozed out between the cake layers. Now you’re ready for the special decorating technique! It looks complicated, but I promise it’s not! I used it on my daughter’s mermaid birthday cake and the final result was spectacular!
Grab the purple frosting and pipe a row of dots going from the top to the bottom of the cake. Do your best to make the dots a similar size and try to keep them in a vertically straight line!

Next, grab your spatula and holding it horizontally, apply pressure to the top dot. You want to press hard enough that the dot smushes down, but not so hard that it totally loses its shape. When you reach the crumb coat, pull the spatula away to the side, smearing the dot across the surface of the cake. Repeat the same process down the line until all of the dots have been smeared. It may take you a few tries, but I promise, you’ll be able to quickly and easily perfect your technique!
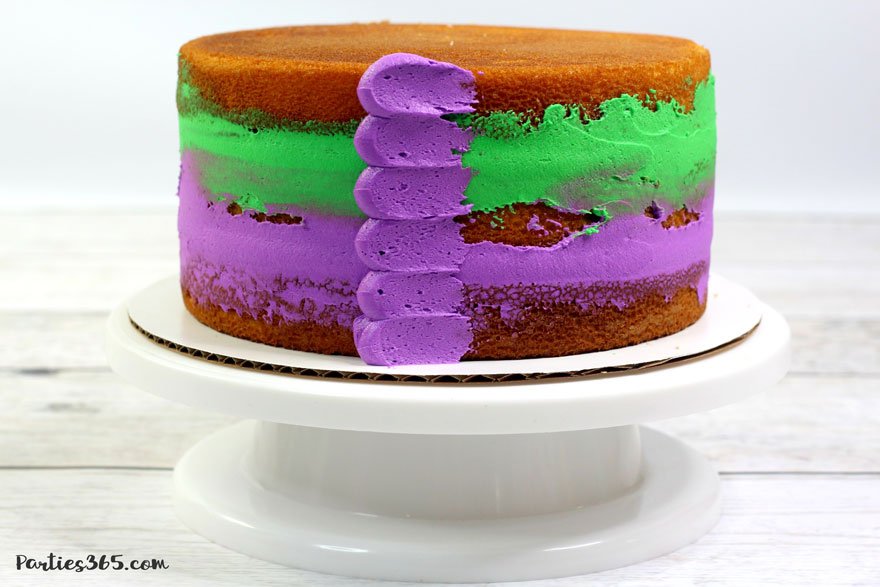
Grab your green frosting and pipe another row of dots so that they overlap the first row of smeared dots. For example, you’d pipe your green dots to the right side of the purple smear in the picture above. Repeat the same smearing process and then grab your gold frosting for the next row. Keep repeating the colors until you’ve made it all the way around your cake. For the final row, you can leave off at your last smear, or pipe a row of dots and leave them un-smeared.

Now it’s time to finish the top of the cake. You’ll repeat the same steps of dotting and smearing going in a circular pattern on the top of the cake. Once you’re done, you can place the cake in the refrigerator to allow the frosting to harden before enjoying!

See… when you first look at this cake it seems a little intimidating, but once the steps are broken down, it’s actually pretty easy, right?! Give it a try for Mardi Gras this year and wow your guests! I know you won’t be disappointed!


Grab the recipe below and be sure to Pin this post for later Mardi Gras baking!

| Servings |
cake |
- 2 boxes White Cake Mix
- 8 Large Egg Whites
- 2 1/2 cups water
- 1 cup Canola Oil
- 3 cups unsalted butter softened
- 6 cups powdered sugar
- 5 TBSP heavy whipping cream
- 2 tsp Vanilla Extract
- Purple, Gold and Green Gel Food Coloring
Ingredients
Cake Ingredients
Vanilla Frosting Ingredients
| |
- Preheat oven to 350 and spray three 9-inch round cake pans with baking spray.
- Using a hand mixer and large bowl, beat all cake ingredients until combined and smooth.
- Divide the cake batter into the three cake pans.
- Place into the oven and bake for 28-32 minutes or until a toothpick comes out clean. Cool completely.
- Level each cake layer before beginning assembly.
- Using a hand mixer and a large bowl, combine the butter, cream, vanilla and powdered sugar until smooth.
- Scoop 3 cups of the frosting into a bowl and add in a few drops of purple food coloring. Mix until combined.
- Scoop 3 cups of the frosting into a bowl and add in a few drops of green food coloring. Mix until combined.
- With the remaining frosting, add in a few drops of gold food coloring. Mix until combined.
- Place the first layer of cake onto the cake board and scoop 1 cup of purple frosting onto the bottom layer and spread evenly.
- Place the second layer of cake on top of the purple frosting and spread 1 cup of green frosting onto the top and smooth evenly.
- Place the last layer of cake on top and smooth any frosting sticking out of the sides evenly.
- Place the remaining frosting into 3 separate piping bags with round tips.
- Using the purple frosting, pipe a vertical row of dots going from top to bottom on the side of your crumb coated cake. Try to keep the dots similar in size and in a straight line.
- Using your angled spatula, hold it horizontally and apply pressure to the top dot. Press hard enough so the dot smushes down, but not so hard that it loses its shape. When you reach the crumb coat, pull the spatula away to the side, smearing the dot across the surface of the cake. Repeat down the line until all of the dots have been smeared.
- Pipe another row of dots using the green frosting so they overlap the first row of smeared dots (e.g., just to the right). Repeat the smearing process.
- Repeat the smearing technique with the gold frosting and then continue on around the cake repeating the same color pattern. For the final row, you can leave off at your last smear, or pipe a row of dots and leave them un-smeared.
- Finish the top of the cake by repeating the same dot/smear steps in a circular pattern on the top of the cake.
- Place in the refrigerator for a few hours or overnight to allow the frosting to harden. Serve and enjoy!