Building a backyard structure can be a daunting financial commitment, but utilizing wood shed building plans free of charge allows homeowners to bypass expensive pre-fabricated kits while ensuring a custom fit for their specific needs. Whether you are looking to season firewood for the winter or organize a growing collection of garden tools, a well-constructed wood shed provides both utility and aesthetic value to any property. By taking the DIY route, you not only save hundreds of dollars in labor costs but also gain the satisfaction of creating a durable asset that can withstand the elements for decades.
Choosing the Right Wood Shed Design for Your Backyard
Answer Capsule: Selecting a wood shed design depends on your primary goal—whether you need high-capacity firewood seasoning or general garden tool storage. Lean-to designs are ideal for space-saving against existing walls, while gable-roof sheds offer superior headroom and traditional aesthetics for standalone structures in larger yards.
Selecting a wood shed design depends on your primary goal—whether you need high-capacity firewood seasoning or general garden tool storage. Lean-to designs are ideal for space-saving against existing walls, while gable-roof sheds offer superior headroom and traditional aesthetics for standalone structures in larger yards. Each design serves a specific functional purpose, and understanding these distinctions is the first step in a successful DIY building project.
Lean-To Sheds for Compact Spaces
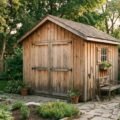
The lean-to shed is the most popular choice for urban and suburban backyards where space is at a premium. Characterized by a single-sloped roof, this design is typically built against the side of a house, garage, or sturdy fence. This configuration not only saves space but also simplifies the construction process, as one wall of the structure is already partially supported by an existing building. Lean-to sheds are particularly effective for storing long-handled tools, bicycles, and seasonal equipment that needs to stay dry but remains easily accessible.
Gable Roof Sheds for Maximum Durability
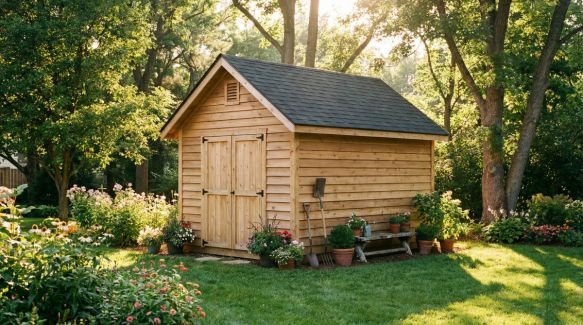
For those who require a standalone structure with more interior volume, the gable roof shed is the gold standard. The two sloping sides of a gable roof meet at a ridge, creating a triangular shape that is exceptionally efficient at shedding rain and snow. This design provides significant overhead space, which can be utilized for loft storage or hanging larger items. Because of its symmetrical load distribution, a gable roof shed is often more durable in regions with heavy snowfall, making it a reliable long-term investment for serious DIYers.
Specialized Firewood Seasoning Sheds
Unlike general storage sheds, a dedicated firewood shed must prioritize airflow over total enclosure. These structures often feature slatted sides and an open front to allow wind to circulate through the stacked wood, which is essential for the seasoning process. According to the Environmental Protection Agency (2024), properly seasoned wood contains less than 20% moisture, which significantly reduces smoke and increases heat output when burned. Building a shed specifically for this purpose ensures that your fuel remains dry while facilitating the natural drying process that raw timber requires.
Essential Materials and Tools for Building a Durable Shed
Answer Capsule: Building a durable wood shed requires a combination of pressure-treated lumber for the foundation and weather-resistant siding like OSB or T1-11 for the exterior. Essential tools include a circular saw, a power drill, a level, and a speed square to ensure every joint is plumb and every cut is precise.
Building a durable wood shed requires a combination of pressure-treated lumber for the foundation and weather-resistant siding like OSB or T1-11 for the exterior. Essential tools include a circular saw, a power drill, a level, and a speed square to ensure every joint is plumb and every cut is precise. Choosing the right materials from the start is the most effective way to prevent future rot and structural failure in any DIY project.
According to the American Wood Council (2024), pressure-treated wood is necessary for any structural components in direct contact with the ground to prevent rot. This includes the floor joists and any support skids that rest on a gravel or concrete foundation. For the walls and roof, standard spruce-pine-fir (SPF) lumber is typically used, provided it is properly protected by siding and roofing materials.
| Material Type | Common Use Case | Key Advantages |
|---|---|---|
| Pressure-Treated Lumber | Floor Joists, Foundation Skids | Resistance to rot, moisture, and insects. |
| T1-11 Siding | Exterior Walls | Aesthetic appeal and structural rigidity. |
| OSB (Oriented Strand Board) | Roof Sheathing, Subflooring | Cost-effective and durable for covered areas. |
| Asphalt Shingles | Roofing Surface | Long-lasting and widely available in many colors. |
Step-by-Step Guide to Using Free Wood Shed Plans
Answer Capsule: Utilizing free wood shed plans effectively involves a systematic approach starting with site preparation, followed by framing the floor, walls, and roof in sequence. Each phase must be double-checked against the bill of materials to avoid mid-project delays and ensure the structural integrity of the finished building.
Utilizing free wood shed plans effectively involves a systematic approach starting with site preparation, followed by framing the floor, walls, and roof in sequence. Each phase must be double-checked against the bill of materials to avoid mid-project delays and ensure the structural integrity of the finished building. This structured method allows even novice builders to achieve professional results without the need for specialized construction experience.
Site Preparation and Foundation
The longevity of any wood shed is directly tied to the quality of its foundation. Before the first board is cut, the site must be cleared of vegetation and leveled to prevent water from pooling beneath the structure. A common and cost-effective foundation for smaller sheds is a gravel pad topped with solid concrete blocks. This setup provides excellent drainage and a stable base for the pressure-treated floor frame, which is the first component to be assembled according to most wood shed building plans free of charge.
Framing the Walls and Roof
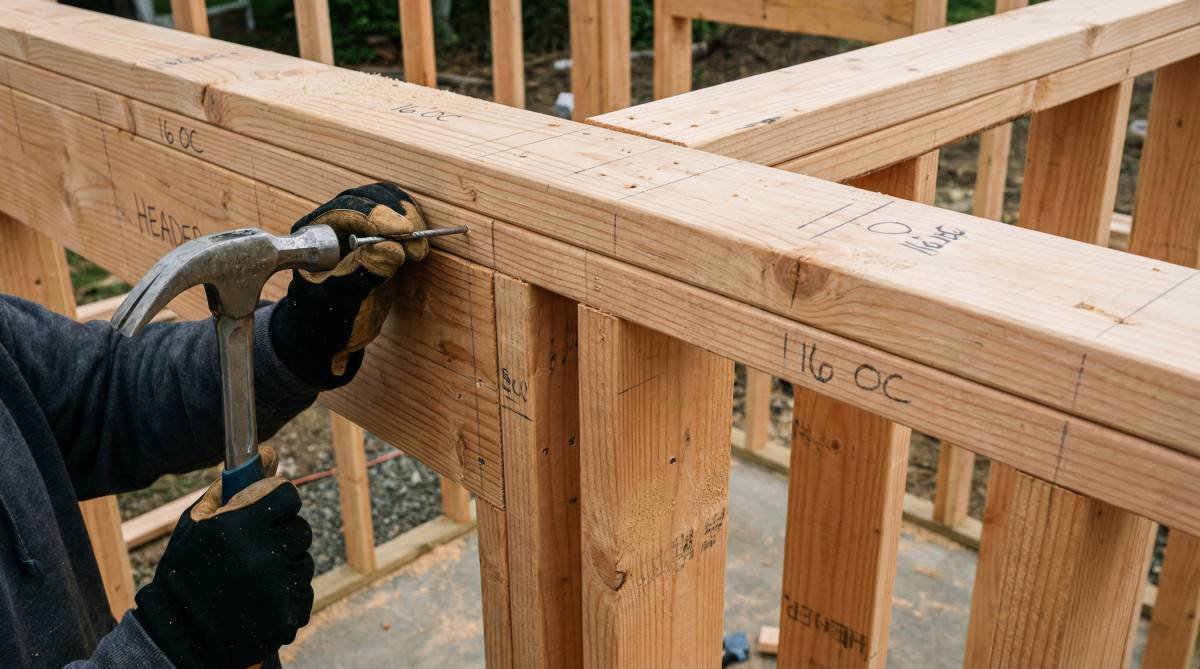
Once the floor is secure and level, the next phase is framing the walls and roof rafters. This is where precision is most critical, as even a small error in measurement can lead to a crooked structure that is difficult to finish. Standard wall framing uses 2×4 studs spaced 16 or 24 inches on center, which provides a strong skeleton for the siding. For the roof, rafters must be cut with a birdsmouth notch to sit securely on the top plate of the walls, ensuring that the roof load is transferred directly to the foundation.
Adding Siding and Roofing
The final structural step is to enclose the shed and make it weather-tight. Siding panels like T1-11 or OSB are nailed directly to the wall studs, which adds significant lateral strength to the entire building. For the roof, sheathing is covered with a layer of roofing felt or synthetic underlayment before the final layer of asphalt shingles or metal roofing is installed. This multi-layered approach is the best defense against rain and snow, ensuring that the contents of your shed remain dry and protected for many years.
Navigating Local Permits and Zoning Regulations
Answer Capsule: Local zoning laws and building permits vary significantly by municipality, often dictated by the shed’s square footage or height. Most regions allow structures under 120 square feet without a formal permit, but checking with your local building department is mandatory to ensure compliance with setback requirements and utility easements.
Local zoning laws and building permits vary significantly by municipality, often dictated by the shed’s square footage or height. Most regions allow structures under 120 square feet without a formal permit, but checking with your local building department is mandatory to ensure compliance with setback requirements and utility easements. This step is often overlooked by DIYers, but it is the only way to avoid potential fines and the forced removal of a newly completed structure.
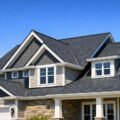
According to the International Code Council (2021), accessory structures like sheds must adhere to specific wind-load and snow-load requirements depending on the local climate zone. This ensures that the building is safe and stable, even in extreme weather conditions. For those who live in coastal areas or regions with heavy snowfall, it is especially important to follow these guidelines to prevent catastrophic failure of the roof or walls during a storm.
Frequently Asked Questions
Is it cheaper to build or buy a shed?
Building a wood shed yourself is typically 40% to 60% cheaper than purchasing a pre-fabricated kit of similar quality. By sourcing your own materials and providing the labor, you avoid the retail markup and delivery fees associated with commercial units. This approach also allows you to use higher-quality lumber and fasteners than those often found in budget-friendly store-bought models.
What is the easiest shed to build?
The lean-to shed is widely considered the easiest design for beginners due to its single-sloped roof and simple rectangular framing. Because it can be built against an existing wall, it requires fewer structural components and is much easier to level and square than a standalone gable-roof building. This design is perfect for those who have limited carpentry experience but want a functional storage space.
Do I need a permit for a 10×12 shed?
In many jurisdictions, a 10×12 shed (120 square feet) is the maximum size allowed without a building permit. However, this rule is not universal, and some cities require permits for any structure over 80 or 100 square feet. You should always consult your local building department or zoning office before starting construction to confirm the specific requirements for your neighborhood.
How much does it cost to build an 8×10 shed?
The cost to build an 8×10 wood shed typically ranges from $800 to $1,500, depending on the materials used and current lumber prices. Pressure-treated lumber, high-quality siding, and architectural shingles will increase the total cost but provide a much longer-lasting structure. Utilizing wood shed building plans free of charge is a great way to keep the overall budget manageable while ensuring a professional result.
How do I prevent my wood shed from rotting?
The most effective way to prevent rot is to use pressure-treated lumber for all components that are within six inches of the ground. Additionally, ensuring proper drainage around the foundation and applying a high-quality exterior stain or paint to the siding will protect the wood from moisture and UV damage. A well-ventilated design also helps to keep the interior dry and prevent the growth of mold and mildew.
Conclusion
Building a backyard structure using wood shed building plans free of charge is a rewarding DIY project that combines practical utility with significant cost savings. By selecting the right design for your space, using durable materials like pressure-treated lumber, and following a systematic building process, you can create a high-quality storage or seasoning shed that will serve your needs for many years. Whether you are a seasoned carpenter or a first-time builder, the keys to success are careful planning, attention to detail, and a commitment to quality craftsmanship.
References
- Environmental Protection Agency (2024). Burn Wise: How to Build a Wood Shed. Available at: https://www.epa.gov/burnwise/burn-wise-how-build-wood-shed
- American Wood Council (2024). Preservative-Treated Wood. Available at: https://www.awc.org/
- International Code Council (2021). International Residential Code: Accessory Structures. Available at: https://codes.iccsafe.org/