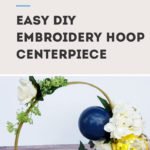
Looking for beautiful DIY centerpiece ideas for an upcoming party, shower or wedding? You’ll love this easy to customize embroidery hoop centerpiece with flowers and mini balloons! Created for our school’s 50th Anniversary Party, this versatile centerpiece will be a lovely addition to the decor at your next big event! Keep scrolling for all the supplies and instructions and discover how simple it will be to put these centerpieces together for your next big event!

Embroidery Hoop Centerpieces
I recently helped put together some decor pieces for our children’s 50th Anniversary Montessori school auction and dinner. It was a big event and we wanted some extra special decor pieces to signify the important milestone we were celebrating. Our concept started with the idea to do a special photo booth and we knew we wanted to use a hanging hoop decorated with balloons, flowers and greenery. You can see me posing in front of it at the auction below…

I love how this large hoop turned out and it was a relatively easy project! From there we decided to carry the hoop theme through to the centerpiece decor and that’s when we decided to utilize embroidery hoops for the main design element. Here’s a simple, step-by-step tutorial to help you recreate this look for your next party!
Easy Embroidery Hoop Centerpiece Tutorial
The first thing you’ll need to do is decide on your color scheme for your event. We were doing a 50th Anniversary party, so gold was the obvious choice and we paired that with navy, one of the school’s colors. We opted for a soft cream color for our florals as our third color. Once you’ve nailed down your colors, you can select supplies accordingly.

Here’s what you’ll need for each hoop:
- Embroidery hoop (I used a 14″ hoop)
- Wooden plank for stand
- Screws/nails (to attach hoop to stand)
- 3 mini balloons (5″) in your colors (I used mini gold confetti balloons, mini navy balloons and chrome gold balloons)
- Flowers (mix of sizes and styles)
- Greenery (mix of sizes and styles)
- Spray paint (I used metallic gold)
Step 1: Attach Your Hoop to Your Stand

I began by separating my embroidery hoops into 2 circles, so one hoop made 2 centerpieces. I had to clip off the metal attachment so it would smoothly attach to the stand as well. Depending on the style of the hoop you purchase, you may need to do the same. Then you’ll want to nail or screw the hoops onto the center of the stands. Again, this will depend on the style of hoop you have and whether or not there are pre-made holes.
Step 2: Paint Your Hoop and Stand
Using your spray paint, fully cover your embroidery hoop and stand. The round shape can be a little tricky, so make sure you get it from all angles.
Step 3: Attach Your Decor

Once your paint is dry, you’re ready to attach your flowers, greenery and balloons. I used a low heat glue gun and attached the greenery on the base first, then moved to the top left of the hoop, attaching my greenery and flowers.
Then I attached my mini balloons by tying them on with fishing line to the right lower angle of the hoop. Finally, I finished out the design by adding flowers in between the balloons so there were no holes in the design.
It’s important to look at your centerpiece from all angles to make sure there are no holes since it’s a 360-degree design and will be seen from all angles when placed in the center of your table.


And that’s it! Easy peasy! I made 13 of these, so even though it was easy, it was rather time consuming. However, the end result and seeing these on all of our tables was totally worth the effort!
We ended up adding gold table numbers to the center base of the design inside the hoop. It was an elegant way to let people know where they were sitting and the table numbers didn’t compete with the design.

I hope this easy DIY centerpiece tutorial inspired you to use hoops in your design! Our guests loved the playful centerpieces and I know yours will too! Be sure to Pin this post for later party planning!