Tile flooring and installation is an achievable DIY project when the area is small and the subfloor is flat, and a real project to hand to a professional when it is large, over radiant heat, or on a damaged subfloor. The process is the same either way: check the base, put down backer board or leveling if needed, plan the layout, spread thinset, lay the tile, then grout and seal. A small bathroom floor runs about $1,500 to $4,000 installed by a pro, and a DIY job saves the labor but costs your time and tools.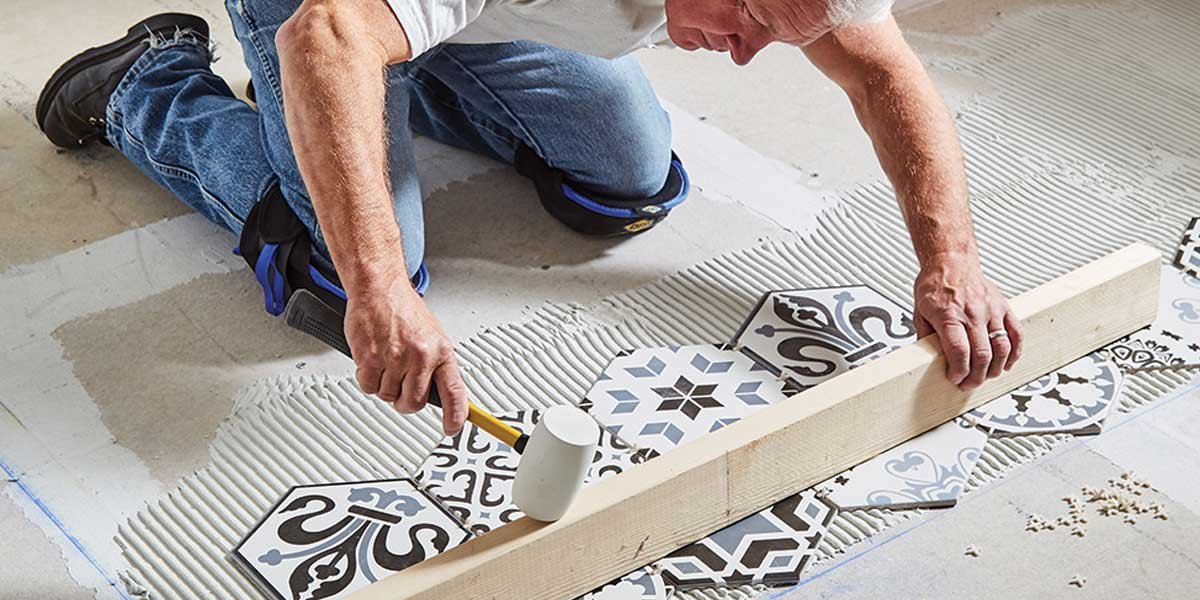
Most of the damage that shows up in a finished tile floor, loose tiles, hollow sounds, cracks along a seam, is set in the first hour, not in the last. It comes from a subfloor that moved, thinset that did not fully coat the tile, or grout that was spread too soon. Getting the base and the thinset right matters more than how evenly you set the finish.
Below is the whole sequence with the checkpoints that tell you whether each step worked, the common failures that ruin a floor, and a cost example you can reuse.
Is tile installation DIY or a job for a pro?
Tile a small, flat floor yourself when you have the tools and the patience; hire a professional for a large area, a radiant-heat floor, or a subfloor that needs serious work. The table below turns the decision into questions you can answer before you rent a trowel.
| Consider | DIY works well | Hire a pro |
|---|---|---|
| Floor area | Under about 200 sq ft, a bathroom, laundry, or entry | Large open rooms, whole-floor redo |
| Subfloor | Flat, dry, clean, no rot | Uneven, squeaky, or wet that needs repair and leveling |
| Under-floor heat | Rarely DIY | Yes; it needs a matched system and careful setting |
| Your experience | You have laid tile before or learn quickly from a guide | First ever job at full-room scale is risky |
| Tools on hand | You can rent or borrow a wet saw and trowels | You do not want to buy or rent the tooling |
| Cost goal | You want to save the labor | You would rather pay for the guarantee of a flat floor |
A realistic yardstick is effort and risk, not just cost. The Tile Council of North America, the industry body for ceramic and stone tile, publishes installation methods that professionals follow, and the gap between a professional install and a first-time DIY job is the wall-flatness and thinset coverage, not the tile pattern. If the room is small and the floor is flat, a careful DIY install can look professional; if it is large or the base needs work, the labor you save can be spent twice when you have to lift and redo it.
What you put down before tiling
What goes under the tile decides whether the floor stays put. On a concrete slab you tile directly over a clean, flat surface; on a wooden subfloor you add a cement backer board to stop movement; and on a damp area you waterproof before the tile. Skip this and the tile cracks at the seams.
Over a wood subfloor, cement backer board is the standard base: it is rigid, will not swell, and does not transfer subfloor movement to the tile. Fit it with the right screws, leave a small gap at the joints, and tape and set those joints before tiling. On a concrete slab, check that it is flat within about a quarter inch over ten feet and not cracked; use a self-leveling compound or mortar to smooth low spots. In a shower or a wet floor, apply a waterproof membrane to the walls and floor before the thinset so moisture cannot get behind the tile and cause mold.
One more base check is moisture. A damp slab or a subfloor with a slow leak will ruin any tile finish from below. If a room in the house stays damp, trace that first, and an AC unit that drips or fails to ventilate is a common cause, which a ac repair description or a look at the HVAC can confirm before you spend on tile.
Tools and materials you actually need
The tool list is short and most of it can be rented. You need tile, thinset, grout, backer board and screws, a trowel, a wet saw or tile cutter, spacers, a level, a rubber float, spacers for the joints, and a sponge. A notched trowel and a wet saw are the two tools that separate a clean job from a frustrating one.
| Material or tool | What it is for | Rent or buy |
|---|---|---|
| Cement backer board + screws | Rigid base over wood subfloor | Buy |
| Thinset mortar | Bonds tile to the base | Buy |
| Notched trowel | Spreads a ribbed bed of thinset | Buy (cheap) |
| Wet saw or tile cutter | Cuts tile safely and square | Rent from a store |
| Tile spacers | Keep uniform joints | Buy |
| Level and straightedge | Check flat and even spacing | Buy |
| Grout + rubber float + sponge | Fill the joints and clean the face | Buy |
If a tool is missing, renting the wet saw for a day is cheaper than buying one and skipping the cut you actually need. Measure the room in square feet and add 10% waste for cuts and cracks, so a 100-square-foot floor needs about 110 square feet of tile.
The tile flooring and installation sequence
The install runs in a set order, and each phase has a checkpoint that tells you it worked. Plan the layout and test-fit, spread thinset and lay the tile, cut and level, then grout and seal. Pause at each checkpoint rather than rushing to the next step, because a hollow tile set too early stays hollow.
Plan the layout and test-fit
Start from a straight reference line and dry-lay a row or two without adhesive to see how the cuts land at the walls. Mark the layout so the visible cuts at an entry or a center line are even, then set spacers into the joints.
The checkpoint: the dry mock-up lies flat, the edge cuts are balanced, and you know where the wet saw will be needed.
Spread thinset and lay the tile
Mix the thinset to a stiff peanut-butter consistency and comb it with the notched trowel so the ridges are even. Set each tile with a slight twist and press so the back is fully bedded; lift one corner and check that the thinset transferred to most of the back, then adjust ridges if it did not. Work in sections small enough to stay ahead of the thinset drying, and keep the surface level with a straightedge. Checkpoint: the tile sits flat, is level with its neighbors, and the back shows full coverage when you spot-check one.
Cut, space, and level
Measure each cut against the gap and the wall, mark it, and cut it on the wet saw with the surface facing up on most saws. Keep the joints even with spacers, and after a short set time before the thinset hardens, pull any lippage by easing tiles level with the straightedge. Checkpoint: the floor is flat, joints are uniform, and no tile rocks on its bed.
Grout and seal
Let the thinset cure for the time the bag says, usually 24 hours, before grouting. Pack the grout into the joints with a rubber float, then wipe the face with a damp sponge before it hardens, changing the water as it dirties. After the grout cures, apply a grout sealer unless the grout is pre-sealed, and address any floor that sits near a sink or shower with a sealer the manufacturer recommends. Checkpoint: joints are full and even, the face is clean with no grout haze, and the sealer cured before traffic.
Common failure points and how to avoid them
Most tile-floor problems have predictable causes, and each is avoidable at the right step. Hollow, loose tiles come from thinset that did not cover the back; cracks along a seam come from a base that flexed; grout haze and cracking come from grouting too early or too wet; and a damp, musty floor points to missing waterproofing or a moisture source beneath. The fix for all of them is to respect the step that came before.
Hollow tiles are the most common complaint, and they trace to thin thinset coverage. Confirming full back-coverage on a test tile and working in sections small enough that the thinset stays wet prevents most of it. Cracks trace to a base that moves, which is why the backer board and the flat-slab check matter before any tile goes down.
Grout haze is a finishing mistake. It comes from over-watering the sponge or grouting before the thinset cured, and it is avoided by following the timings on the bag.
If a floor keeps feeling damp no matter how well it is installed, the problem is underneath, not in the tile. A leak or high humidity will work up through the grout and joints, and chasing it with surface work does not fix it. Once the moisture source is corrected, the tile install you protect is the one that lasts.
What a small room costs
A small tile floor, such as a 10-by-10 bathroom, runs roughly $1,500 to $4,000 installed by a professional, and the DIY version costs mainly the material, grout, thinset, and tool rental. The figure scales with tile price, labor rate, and how much base prep the room needs, so it is a starting point rather than a fixed price.
| Cost component | What it covers | Ballpark for a 100 sq ft room |
|---|---|---|
| Tile material | Ceramic or porcelain, mid-grade | $200-$800 |
| Thinset, grout, sealer, backer board | Setting materials and base | $150-$400 |
| Tool rental (wet saw, trowels) | One-day rental | $50-$100 |
| Professional labor | Install + prep, varies by region | $1,000-$3,000 |
DIY, the same 100-square-foot bathroom saves the labor line, leaving the material and tools, roughly $400 to $1,300. The gap is real, but it assumes you have the time and the tolerance for a first-timer’s pace. Homewyse publishes regional tile-install cost breakdowns that track the labor and prep swings, and checking one for your zip code beats a national average for an accurate budget.
Frequently asked questions
How much does it cost to have a tile floor installed? Professional tile installation runs about $10 to $50 per square foot installed depending on material and region, with a typical bathroom floor coming in around $1,500 to $4,000. Material is $5 to $35 per square foot of the project total, and labor and base prep make up the rest.
What do you put down before tiling a floor? Over a wooden subfloor you install a cement backer board, and on a concrete slab you tile on a clean, flat, moisture-tested surface, using a self-leveling compound where it dips. A wet area gets a waterproofing layer before the tile.
What does Home Depot charge to install floor tile? Home Depot and other big-box stores quote tile installation by the project, and their price varies with tile type, room size, and local labor, generally landing in the same $10 to $50 per square foot range as independent installers. Getting a written quote for your measurements beats relying on a list price.
How much does it cost to tile a 10×10 bathroom floor? A 10-by-10, or 100-square-foot, bathroom floor typically costs $1,500 to $4,000 professionally installed, and about $400 to $1,300 as a DIY material-and-tool cost. The spread is tile grade, base prep, and regional labor.
Can I install tile over my old floor? Tile over a sound, flat old tile floor is possible with the right preparation, but it adds height and must be flat; over old wood it needs backer board. If the old floor is loose, cracked, or uneven, remove it first rather than tiling over the problem.
Ask the base, then the tools, then the tile
The floor tells you whether to DIY or hire, because a flat, dry, room-scale subfloor is what a first-timer can manage, and a large, wet, or uneven one is a professional job. Respect the sequence, verify each checkpoint, and a tile floor that looks and sounds solid is within reach; rush the base or the thinset and the work comes back as hollow tiles.