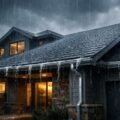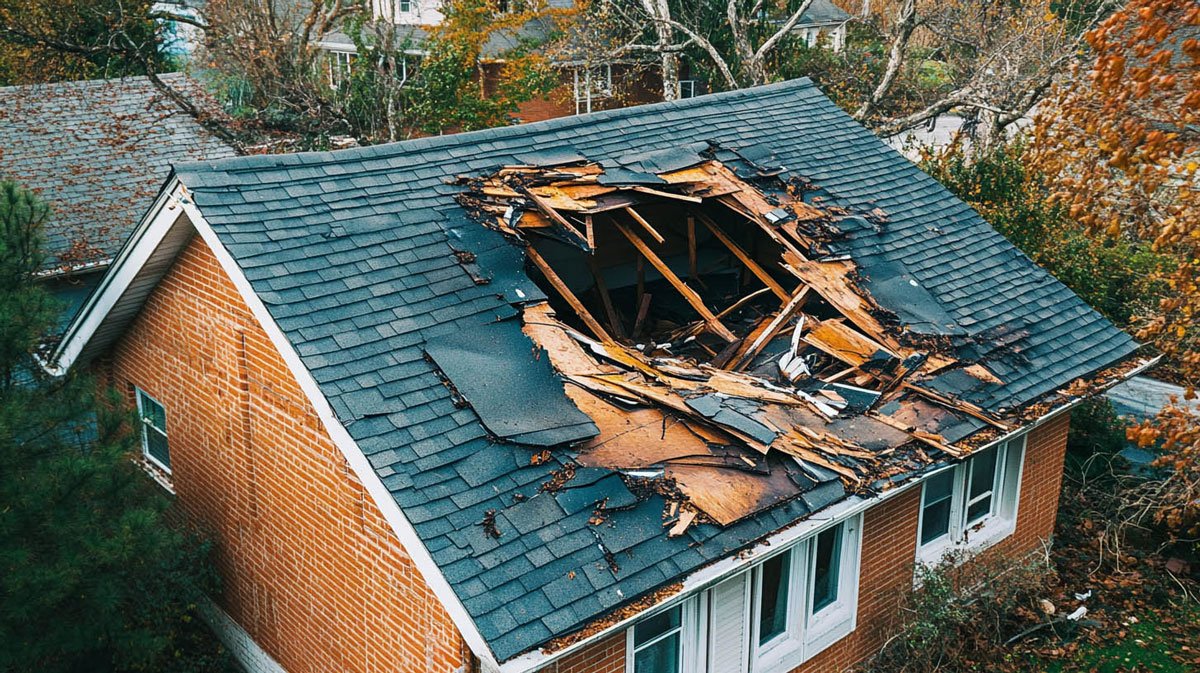
After a hail or wind event, roof damage often shows up as missing shingles, granule loss in gutters, dented vents, and fresh ceiling stains. Those signs look straightforward, but the claim outcome depends on what you can prove and how the damage is classified under the policy. A few clear photos, the date of the weather event, and basic roof records can make the first call far more productive.
Filing too early or with thin documentation can lead to wear-and-tear pushback, a smaller approved scope, or delays while more proof is requested. Filing too late can run into reporting deadlines or added deterioration that is not covered. Owners need to know if the numbers work after the deductible and what an adjuster is likely to accept on site, since commercial roofing claims often involve more line items and a closer review of visible damage. Start by checking five points that can be verified before the claim is opened.
Which Documents Should Be Ready Before You Call Your Insurance Carrier?
Your insurance policy pages need to be in front of you, not just the declarations sheet, because coverage limits, exclusions, and loss-settlement terms can change how roof damage is handled. Pull the deductible amount and any separate wind or hail deductible wording, then gather any invoices or permits from recent roof work. Maintenance notes, warranty paperwork, and a prior inspection report help establish the roof’s pre-storm condition and reduce back-and-forth once the claim is opened.
Time-stamped photos carry more weight when they show both the exterior and the related interior evidence. Capture missing shingles, dented gutters, vent and flashing hits, and any debris impact points, then match them with ceiling stains, attic moisture, or wet insulation that lines up with the same area. Keep a simple file with the storm date, the first date you noticed each issue, and receipts for temporary mitigation like tarps or drying equipment.
Is the Damage Clearly Storm-Related or More Likely To Be Treated as Wear and Tear?
Storm-related damage typically lines up with a specific date and leaves patterns that match the event, such as hail hits concentrated on slopes facing the storm path or wind lift along ridge caps and edges. When you can match visible roof impacts to a documented hailstorm, wind gust report, or a branch strike, the cause is easier to tie to a covered loss. Note where the damage is clustered, what materials are affected, and if nearby exterior items show the same type of impact.
Wear and tear often shows up as long-term issues that don’t track to one weather event, like widespread granule loss, brittle shingles, recurring leak spots, or flashing that has been separating over time. Insurers usually look for age-related deterioration, prior patch work, and staining that suggests slow intrusion instead of a sudden opening. Compare the storm date to any earlier repair receipts, prior leak notes, and inspection records so the claim discussion stays focused on cause, not just what looks damaged.
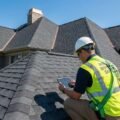
Has a Roofing Contractor Confirmed What the Damage Actually Includes?
Soft spots underfoot, lifted shingle edges, and bent metal at valleys can point to damage that isn’t obvious from the street. A roofing contractor can check field shingles and the areas where leaks usually start, including flashing transitions, pipe boots, ridge vents, and penetrations. They can verify if the problem is limited to a few tabs or if water has reached underlayment, seams, or decking, which changes both repair method and material quantities.
A written inspection package gives you something specific to compare against the adjuster’s notes. Marked photos should call out locations by slope and detail what is damaged, what is stained, and what is intact, so there’s less room for missed line items. Ask for a clear scope that separates temporary mitigation from permanent work and notes any insulation moisture or attic staining tied to a roof plane.
Will the Claim Actually Help After the Deductible and Possible Out-of-Pocket Costs?
Deductibles and depreciation can shrink the check even when the roof damage is legitimate and clearly tied to a storm date. Start with the deductible amount, then look at whether the policy pays replacement cost or actual cash value, since older shingles often trigger higher depreciation. If the likely payout lands close to the deductible, the claim may not change the repair budget much, especially when code upgrades or matching limits leave part of the work outside coverage.
Interior items can tilt the math in either direction, since water staining, wet insulation, drywall replacement, and paint are often handled under separate sublimits or deductibles. Ask the contractor for a written repair range for the roof and any interior scope, then compare that to what you expect the carrier to approve based on the adjuster’s typical line items in your area. A quick call to confirm how depreciation is released after repairs can clarify the cash flow timing.
Are You Ready To Handle the Adjuster Meeting and Review the Scope Carefully?
An adjuster will usually take their own photos, test a few areas, and write an estimate based on what they can verify during the visit. Have your contractor’s marked photos and inspection notes available, along with the storm date, any mitigation receipts, and the relevant policy pages on deductibles and loss settlement. Keep a simple list of each affected roof plane and related exterior items like vents, flashing, and gutters so nothing gets skipped during the walk-through.
Scope details are where coverage decisions show up in practical terms, including if flashing, underlayment, ridge caps, and steep or high work charges are included. Ask what line items they are allowing and why, then compare that to your contractor’s scope while both are on site. Before the meeting ends, confirm how supplements are handled, what documentation is required, and where to send any additional photos or measurements.
Smart roof damage claims start with a simple standard for filing: you should be able to tie the damage to a specific event, show clear proof, and see a real financial gap after the deductible. If any of those pieces are missing, pause and get them in place before you open the claim. Keep your policy pages, storm date notes, photos, and repair records together, then use a roofing contractor’s inspection to confirm what needs repair and what the adjuster should include. Review the scope line by line and submit any supplements promptly.