Why Paint Your Kitchen Cabinets?
Painting your kitchen cabinets is a budget-friendly, transformative DIY project that revitalizes your kitchen’s look without a full remodel says CMG, a leading property management Aurora company. This project allows for complete style customization, significantly boosts your home’s value, and offers the immense satisfaction of a successful home improvement, making it a popular choice for homeowners looking to update their space.
Beyond the immediate visual upgrade, learning how to paint kitchen cabinets presents a multitude of benefits. Financially, it’s a significantly more affordable option compared to replacing entire cabinetry, which can easily run into tens of thousands of dollars. A fresh coat of paint can instantly modernize an outdated kitchen, making it appear brighter, more spacious, and aligned with contemporary design trends. This not only improves your daily living experience but also significantly boosts your home’s resale value. Furthermore, a properly executed paint job acts as a protective barrier, shielding your cabinets from moisture, grease, and daily wear and tear, thereby extending their functional lifespan. The DIY aspect of this project also offers immense personal satisfaction, allowing you to infuse your unique style into the heart of your home.
Essential Tools and Materials for Cabinet Painting
To properly paint your kitchen cabinets, you must gather the right tools and materials. This includes preparation supplies like degreasers and sandpaper, high-quality primers and paints specifically designed for cabinetry, and application tools such as brushes and rollers. Having everything on hand before you start ensures a smooth, efficient workflow and a professional-quality finish.
Tools for Preparation
- Screwdrivers (for removing hardware)
- Degreaser (e.g., TSP or specialized cabinet cleaner)
- Fine-grit sandpaper (150-220 grit)
- Wood filler and putty knife
- Tack cloths or microfiber cloths
- Painter’s tape
- Drop cloths or plastic sheeting
- Optional: Electric sander for larger flat surfaces
Paint Application Tools
- High-quality synthetic paint brushes (angled for detail work)
- Foam rollers or microfiber rollers (for smooth finishes on flat surfaces)
- Paint trays
- Optional: Paint sprayer for a factory-smooth finish
Protective Gear and Cleanup
- Gloves
- Safety glasses
- Respirator mask (especially when sanding or using oil-based paints)
- Buckets for cleaning solutions
- Old rags or towels
Choosing the Right Paint and Primer
Selecting the correct paint and primer is critical when determining how to paint kitchen cabinets for a durable, beautiful finish. The right products ensure superior adhesion, a smooth application, and long-term resilience against the daily wear and tear of a busy kitchen. Understanding paint types and the vital role of primer will dictate your project’s success.
Primer Selection
Primer is not an optional step; it’s essential for adhesion and coverage, especially when changing colors drastically or painting over glossy surfaces. A high-quality bonding primer is recommended for kitchen cabinets. Look for primers that offer excellent stain-blocking properties and strong adhesion to various surfaces, including previously painted or varnished wood, laminate, or even metal. Oil-based primers are excellent for blocking stains and providing a strong base, but water-based acrylic primers are easier to clean up and dry faster. Ensure the primer is compatible with your chosen topcoat paint [1].
Paint Types for Cabinets
For kitchen cabinets, durability is key. You need a paint that can withstand frequent cleaning, grease, and general wear. Here are the most common and recommended types:
| Paint Type | Pros | Cons | Best For |
|---|---|---|---|
| Acrylic-Latex Enamel | Durable, easy cleanup, low VOC, quick drying | May require more coats for full coverage | Most DIY projects, good balance of durability and ease of use |
| Oil-Based Enamel | Extremely durable, smooth finish, excellent adhesion | Strong odor, longer drying time, difficult cleanup (mineral spirits required), yellows over time | High-traffic kitchens, professional results, excellent durability |
| Water-Based Alkyd (Hybrid) | Combines durability of oil with easy cleanup of water-based, non-yellowing | Can be more expensive, limited color options | Best of both worlds, excellent for a professional, long-lasting finish |
Many paint brands offer specific cabinet paints designed for enhanced durability and a smooth finish. Examples include Benjamin Moore Advance® and Sherwin-Williams Emerald Urethane Trim Enamel [2]. Always check the manufacturer’s recommendations for application and drying times. Consider the sheen level as well; semi-gloss and satin finishes are popular for cabinets due to their ease of cleaning and subtle luster, while high-gloss can highlight imperfections.
Step-by-Step Preparation for Painting Kitchen Cabinets
Proper preparation is the most crucial phase in the process of how to paint kitchen cabinets. It directly impacts the quality and longevity of the final finish. Rushing or skipping these steps can cause poor adhesion, visible flaws, and a less durable result. This section provides a detailed guide to each essential preparation task.
Disassembly and Thorough Cleaning
Begin by emptying all cabinets and drawers. Carefully remove all cabinet doors, drawer fronts, and hardware (hinges, handles, knobs). Label each piece with painter’s tape to ensure they are reinstalled in their original positions. This meticulous labeling prevents alignment issues later. Next, clean all surfaces thoroughly with a degreaser, such as trisodium phosphate (TSP) or a specialized kitchen cabinet cleaner, to remove grease, grime, and food residue. Even seemingly clean cabinets can harbor invisible layers of grease that will prevent paint adhesion. Rinse with clean water and allow to dry completely [3]. Pay particular attention to areas around the stove and sink, which tend to accumulate more grease and moisture.
Repairs and Initial Sanding
Inspect your cabinets for any imperfections like dents, scratches, or chipped areas. Fill these with wood filler, allowing it to dry completely according to product instructions, then sand smooth. Once repairs are done, lightly sand all cabinet surfaces with 150-grit sandpaper. The goal is not to remove the existing finish entirely but to scuff the surface, creating a profile for the primer to adhere to. For laminate cabinets, use a fine-grit sandpaper (220-grit) and avoid sanding too deeply. After sanding, wipe away all dust with a tack cloth or a slightly damp microfiber cloth, ensuring a dust-free surface [4]. This step is crucial for ensuring proper paint adhesion and a smooth final appearance. Don’t forget to sand inside corners and detailed areas.
Masking and Protection
Protect your countertops, flooring, appliances, and any areas not being painted with painter’s tape and drop cloths or plastic sheeting. This step prevents accidental paint splatters and ensures clean lines. Ensure all edges are taped securely to avoid bleed-through. Proper masking saves significant cleanup time later. Consider using self-adhesive plastic sheeting for larger areas and blue painter’s tape for precise edges. Ventilate your workspace by opening windows or using fans to ensure proper air circulation and to dissipate fumes from cleaners and paints.
The Painting Process: Primer, Paint, and Topcoat
With meticulous preparation complete, you are ready to apply primer and paint. This section outlines the best practices for each coat, emphasizing proper application techniques, drying times, and the importance of multiple thin coats for a professional, durable finish. Patience during this stage is key to achieving flawless results when you paint kitchen cabinets.
Priming the Cabinets
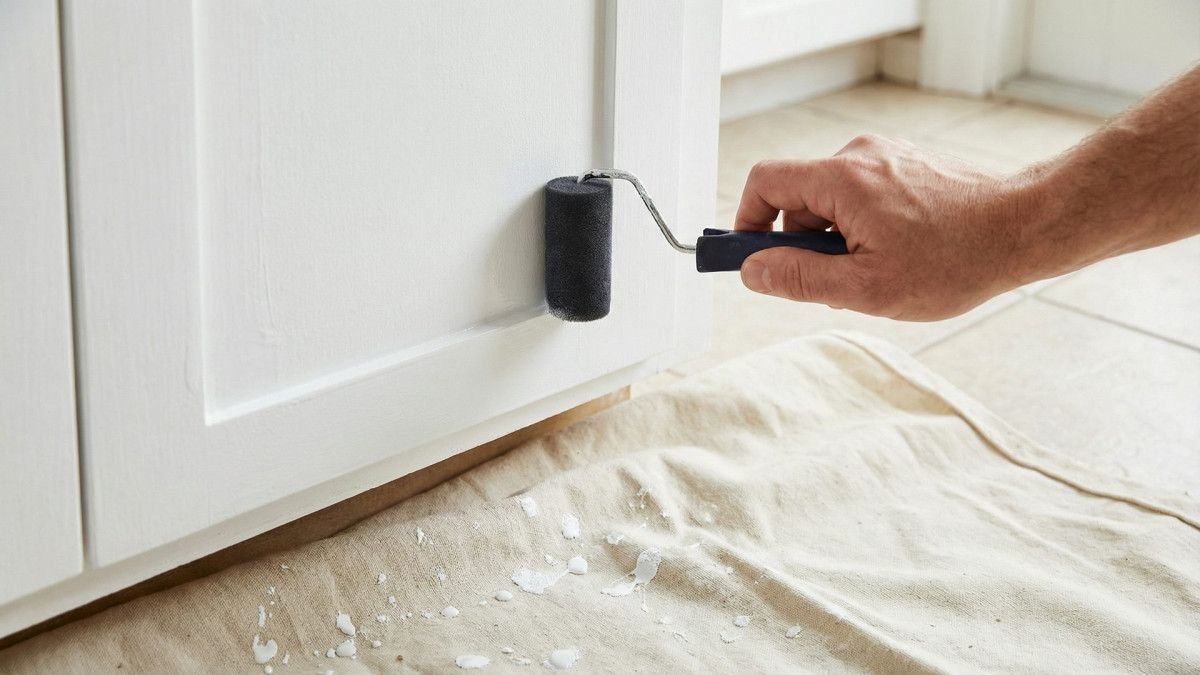
Apply a thin, even coat of your chosen primer to all cabinet surfaces. Use a high-quality synthetic brush for detailed areas and corners, and a foam or microfiber roller for larger flat surfaces. Avoid applying too much primer, as this can lead to drips and an uneven finish. Allow the primer to dry completely according to the manufacturer’s instructions, typically 1-4 hours. Once dry, lightly sand with 220-grit sandpaper to smooth out any raised grain or imperfections, then wipe clean with a tack cloth. This intermediate sanding step is crucial for a super-smooth final finish [5]. Ensure you cover all surfaces evenly, including edges and recessed panels.
Applying the Paint
Apply the first thin coat of your chosen cabinet paint using the same technique as with the primer: brush for details, roller for flat surfaces. Work in a systematic manner, painting the backs of the doors first, then the fronts. For cabinet frames, work from the inside out. Ensure even coverage and avoid overloading your brush or roller. Allow the first coat to dry completely, which can take anywhere from 4-24 hours depending on the paint type and humidity. Do not rush this step. Once dry, lightly sand again with 220-grit sandpaper to remove any minor imperfections, and clean with a tack cloth [6]. Always follow the grain of the wood when brushing to minimize visible brush strokes.
Multiple Coats and Curing Time
Apply a second, and if necessary, a third thin coat of paint, repeating the drying and light sanding process between each coat. Multiple thin coats provide a more durable and professional finish than one thick coat. After the final coat, allow the cabinets to cure for an extended period. While paint may feel dry to the touch in a few hours, it takes several days, or even weeks, for the paint to fully harden and achieve maximum durability. Avoid heavy use or cleaning during this curing period to prevent damage to the new finish [7]. The longer you allow the paint to cure, the harder and more resilient the finish will become. Refer to your paint manufacturer’s guidelines for specific curing times.
Common Mistakes to Avoid When Painting Kitchen Cabinets
Even with careful planning, certain pitfalls can derail your cabinet painting project. Being aware of these common mistakes can help you sidestep them, ensuring a smoother process and a more satisfying outcome. Avoiding these errors will save you time, effort, and potential frustration when tackling this popular home improvement task.
Skipping or Rushing Preparation
The most frequent mistake is underestimating the importance of preparation. Failing to thoroughly clean, degrease, sand, and prime your cabinets will inevitably lead to poor paint adhesion, chipping, and an unprofessional finish. Proper preparation is the foundation of a successful paint job; cutting corners here will compromise the entire project.
Using the Wrong Paint or Primer
Not all paints and primers are created equal, especially for high-traffic areas like kitchen cabinets. Using standard wall paint instead of durable cabinet-specific enamels or skipping a bonding primer can result in a finish that quickly shows wear, scratches, and stains. Invest in high-quality products designed for cabinetry to ensure longevity and performance.
Applying Thick Coats of Paint
While it might seem faster to apply one or two thick coats of paint, this often leads to drips, uneven coverage, and a longer drying time, increasing the risk of dust and imperfections settling on the surface. Multiple thin coats, with adequate drying and light sanding in between, will always yield a smoother, more durable, and professional-looking finish.
Ignoring Curing Time
Paint may feel dry to the touch within hours, but it takes days or even weeks to fully cure and harden. Reinstalling doors and hardware or subjecting newly painted cabinets to heavy use before they are fully cured can lead to scratches, dents, and sticky surfaces. Patience during the curing phase is essential for a long-lasting finish.
Frequently Asked Questions About Painting Kitchen Cabinets
Q: What is the best way to paint kitchen cabinets to avoid brush strokes?
A: To minimize brush strokes, use high-quality synthetic brushes and foam or microfiber rollers. Apply thin, even coats of paint and avoid overworking it. Lightly sanding between coats with fine-grit sandpaper (220-grit) and wiping away dust with a tack cloth will also help achieve a smoother finish. For the absolute smoothest, factory-like finish, using a paint sprayer is the best method [5].
Q: What kind of paint do you use on kitchen cabinets?
A: Water-based alkyd (hybrid) enamels are often considered the best choice for kitchen cabinets due to their combination of oil-based paint durability and water-based paint’s easy cleanup and low VOCs. High-quality acrylic-latex enamels are also excellent options, offering good durability and ease of use for any project focused on how to paint kitchen cabinets [2].
Q: Is it better to spray or roll kitchen cabinets?
A: Both methods can yield great results. Spraying provides the smoothest, most professional finish but requires more prep work (masking) and equipment. Rolling is more DIY-friendly and requires less setup, and when combined with a quality brush for details, can still produce a very smooth, high-quality finish. The choice depends on your budget, skill level, and desired outcome.
Q: Do I need to seal my painted kitchen cabinets?
A: Most modern, high-quality cabinet paints (like acrylic-latex or alkyd enamels) are self-sealing and do not require a separate topcoat. These paints are designed to cure to a hard, durable finish. Adding a polyurethane topcoat can sometimes cause yellowing over time, especially over light colors. Always check your paint manufacturer’s recommendations [7].
Q: How long does it take to paint kitchen cabinets?
A: The entire process, including preparation, priming, painting multiple coats, and adequate drying/curing time, typically takes several days to a week. Rushing the drying times between coats can compromise the durability of the finish. Plan for at least 2-3 days of active work and several days of curing before heavy use [3].
Conclusion
Painting your kitchen cabinets is a rewarding DIY project that can dramatically transform your kitchen’s appearance and extend the life of your cabinetry. By following these detailed steps—from thorough preparation and careful material selection to precise application and patient curing—you can achieve a professional, durable, and beautiful finish that will enhance your home for years to come. Remember, patience and attention to detail are your best tools for success in this endeavor.
References
[1] Benjamin Moore. “How to Paint Kitchen Cabinets Like an Expert in 9 Steps.” Benjamin Moore, https://www.benjaminmoore.com/en-us/interior-exterior-paints-stains/how-to-advice/interiors/paint-kitchen-cabinets.
[2] Lowe’s. “How to Prep and Paint Kitchen Cabinets.” Lowe’s, https://www.lowes.com/n/how-to/how-to-paint-kitchen-cabinets.
[3] Architectural Digest. “How to Paint Kitchen Cabinets Like a Pro in 9 Simple Steps.” Architectural Digest, https://www.architecturaldigest.com/story/how-to-paint-kitchen-cabinets.
[4] The Palette Muse. “The Best Way to Paint Kitchen Cabinets (No Sanding!).” The Palette Muse, https://thepalettemuse.com/best-way-paint-kitchen-cabinets/.
[5] KILZ. “A Step-by-Step Guide to Painting Kitchen Cabinets with KILZ Primer.” KILZ Blog, https://www.kilz.com/blog/project-spotlight-a-step-by-step-guide-to-painting-your-kitchen-cabinets/.
[6] Sherwin-Williams. “Paint Kitchen Cabinets in 5 Steps.” Sherwin-Williams, https://www.sherwin-williams.com/en-us/project-center/paint/how-to-update-kitchen-cabinets.
[7] N-Hance. “The Ultimate FAQ Guide to Painted Kitchen Cabinets.” N-Hance Wood Renewal, https://www.nhance.com/dewoodrenewal/the-ultimate-faq-guide-to-painted-kitchen-cabinets/.