Maintaining a pristine home environment often requires addressing the inevitable wear and tear that occurs on interior surfaces says Advanced Solutions West Jordan Management. Learning how to fix drywall holes in wall is an essential skill for any homeowner, as it allows for cost-effective and professional-quality repairs that restore the structural and aesthetic integrity of your living space. Whether you are dealing with a minor indentation from a picture frame or a significant breach caused by a doorknob, the principles of seamless repair remain the same: preparation, patience, and the right materials.
Drywall, also known as gypsum board or plasterboard, is the standard material for modern interior walls due to its durability and fire-resistant properties. However, its composition makes it susceptible to impact damage. Mastering the techniques required to repair these imperfections not only enhances the value of your property but also provides a sense of accomplishment in maintaining your home’s appearance. This guide will walk you through the comprehensive process of identifying the damage, selecting the appropriate tools, and executing a repair that is virtually indistinguishable from the surrounding wall surface.
Essential Tools and Materials for Drywall Repair
Professional drywall repair requires a specific set of tools including a putty knife, joint compound, and sanding blocks. For small holes, spackle and a 2-inch knife suffice, while larger repairs necessitate mesh tape, drywall saws, and furring strips to ensure structural integrity and a smooth finish. Having the correct equipment on hand before you begin the process of how to fix drywall holes in wall ensures that each step is executed with precision and efficiency.
Selecting the right compound is the first step toward a successful repair. Spackle is a lightweight, fast-drying compound ideal for filling small nail holes and minor dents. It shrinks less than joint compound and is easy to sand, making it a favorite for quick fixes. For larger holes or when structural support is needed, joint compound—also known as drywall mud—is the professional choice. Joint compound provides a stronger bond and is available in various drying times, from “hot mud” that sets in minutes to standard air-dry formulas.
The tools you use are just as important as the materials. A set of putty knives in different widths, typically 2-inch, 6-inch, and 10-inch, allows for the gradual layering and feathering of compound that creates a seamless transition. A drywall saw is essential for cutting out damaged sections, while a utility knife is used for scoring and fine-tuning the edges of a patch. For larger repairs, furring strips—thin pieces of wood—provide the necessary backing to secure a new drywall patch into place.
| Repair Type | Recommended Material | Essential Tools |
|---|---|---|
| Nail Holes / Dents | Lightweight Spackle | 2-inch Putty Knife, Fine Sanding Sponge |
| Medium Holes (1–3″) | Joint Compound & Mesh Patch | 6-inch Taping Knife, Mesh Tape, Utility Knife |
| Large Holes (>3″) | Joint Compound & Drywall Sheet | Drywall Saw, 10-inch Taping Knife, Furring Strips, Screws |
According to Lowe’s (2026), selecting the appropriate method based on the size of the damage is critical for a durable finish. Using a mesh patch kit for a hole that is too large may result in a weak spot that eventually cracks, while using a full drywall patch for a tiny nail hole is an unnecessary expenditure of time and resources. By matching the material and tool to the specific repair, you ensure that the final result is both aesthetically pleasing and structurally sound.
Step-by-Step Guide for Small to Medium Holes
Fixing small to medium drywall holes involves cleaning the area, applying a mesh patch or spackle, and feathering the edges with joint compound. By applying multiple thin layers and sanding between each, you create a flush surface that blends perfectly with the existing wall texture. This systematic approach to how to fix drywall holes in wall ensures a durable repair that will not crack or bulge over time, even with regular home use.
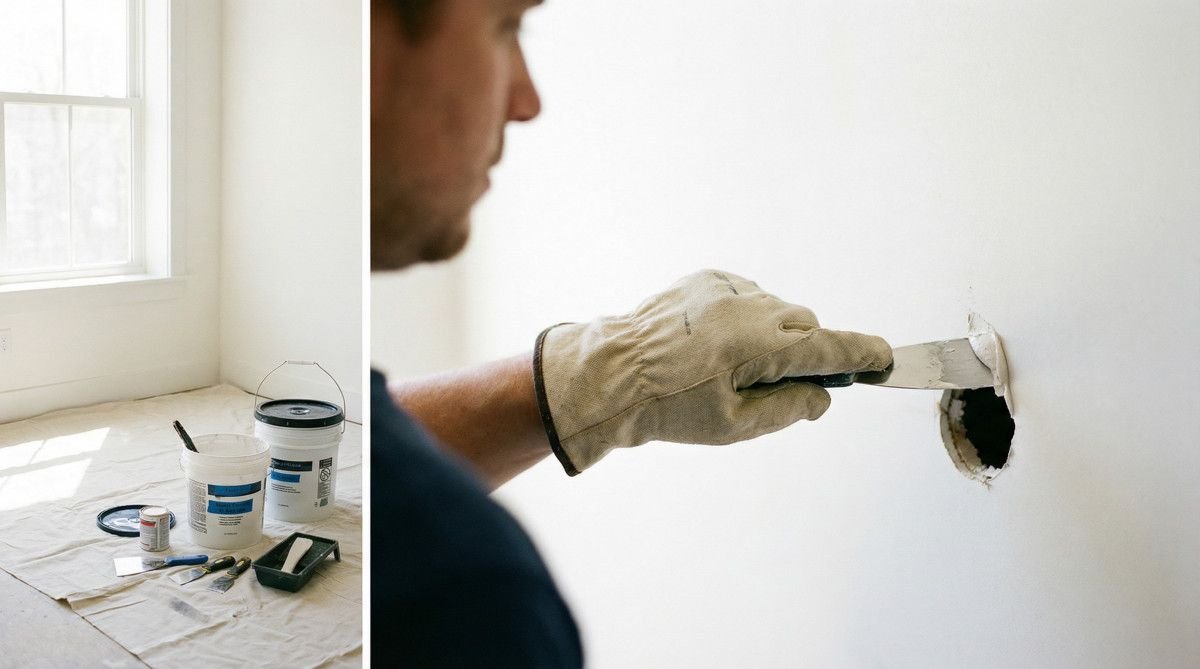
For the smallest imperfections, such as nail holes or minor dents from furniture, a simple application of lightweight spackle is often sufficient. Start by using a 2-inch putty knife to remove any loose debris from the hole and then apply a small amount of spackle. Press the spackle firmly into the hole and then use a single, smooth stroke to scrape away any excess, leaving the surface slightly proud of the wall. Once the spackle is dry, a light sanding with a fine-grit sanding sponge will bring it flush with the surrounding surface.
When dealing with medium-sized holes—typically between 1 and 3 inches—a self-adhesive mesh patch is the professional solution. This patch provides a bridge over the hole that the joint compound can adhere to, preventing it from falling into the wall cavity. After applying the mesh patch over the hole, use a 6-inch taping knife to apply a thin layer of joint compound in a crisscross pattern. The goal is to “feather” the edges, which means thinning the compound out as you move away from the center of the patch to create a gradual transition that is invisible to the eye.
According to Lowe’s (2026), the secret to a professional finish is the application of multiple thin coats rather than one thick layer. A thick layer of compound is more likely to crack as it dries and is much harder to sand smooth. By applying two or three thin coats and allowing each to dry completely before sanding, you build a strong, flat surface that is ready for priming and painting. This patience in the early stages of the repair process pays off with a final result that is indistinguishable from the rest of the wall.
Mastering Large Drywall Hole Restoration
Repairing large drywall holes requires cutting a square section around the damage and installing a new piece of drywall secured to furring strips or studs. This method ensures the patch is structurally sound before applying joint tape and compound to create a seamless, invisible transition to the surrounding wall. For larger repairs, the process of how to fix drywall holes in wall moves from a simple filling task to a structural restoration that requires more precision and a few more tools.
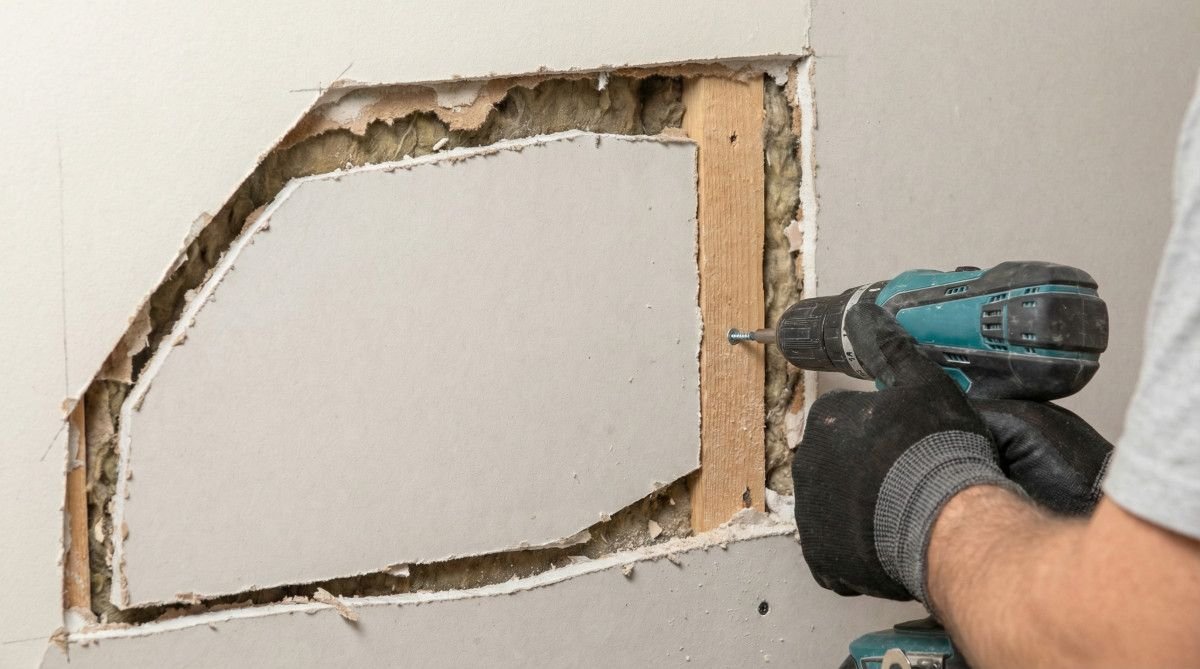
The first step in a large repair is to cut a clean, square section around the damaged area using a drywall saw. This square cut makes it much easier to fit a new piece of drywall into the hole. Once the hole is squared off, you will need to provide support for the new patch. If the hole is near a wall stud, you can screw the patch directly into the stud. If no stud is available, you can use furring strips—small pieces of wood or plywood—that are placed behind the existing drywall and secured with screws. This provides a solid backing that the new patch can be screwed into.
After the new drywall patch is securely screwed into place, the next step is to tape the seams. Drywall mesh tape or paper tape is applied over the joints where the new patch meets the existing wall. This tape provides the necessary reinforcement to prevent the joint compound from cracking as the house settles or as temperature and humidity change. Apply a thin layer of joint compound over the tape, using a 10-inch taping knife to feather the edges out at least 6 to 8 inches from the seam. This wide feathering is essential for creating a smooth, flat surface that does not show a visible hump.
According to The Home Depot (2025), a common mistake in large drywall repairs is failing to properly secure the backing or not feathering the compound far enough from the seam. A poorly secured patch will move and crack over time, while a patch that is not feathered far enough will result in a visible bulge on the wall. By taking the time to properly install furring strips and apply wide, thin layers of joint compound, you ensure a professional-quality repair that will last for years. This attention to detail is what separates a DIY fix from a professional-grade restoration.
Professional Finishing and Texturing Techniques
Achieving a professional finish on drywall repairs depends on proper feathering and matching the existing wall texture. Using a damp sponge for blending and applying specialized texture sprays—such as orange peel or knockdown—ensures the repaired area is indistinguishable from the rest of the wall after painting. Mastering these final steps in how to fix drywall holes in wall is the difference between a patch that is invisible and one that is a constant reminder of the repair.
Feathering is the technique of applying joint compound in thin, wide layers that gradually taper off into the surrounding wall surface. This process creates a flat, seamless transition that is invisible to the eye and touch. Start with a 6-inch taping knife for the first coat, and then move to a 10-inch or 12-inch knife for the second and third coats. Each subsequent coat should be feathered out further than the previous one, covering a wider area and thinning the compound out as you reach the edges. This wide feathering is essential for hiding the seam and creating a smooth, flat surface.
Once the final coat of joint compound is dry, the next step is to match the existing wall texture. Most modern walls have a subtle texture, such as orange peel or knockdown, that must be replicated on the repaired area. Texture sprays are available in aerosol cans that allow you to adjust the nozzle to match the specific pattern on your wall. Practice on a piece of cardboard before applying the texture to the wall to ensure you have the right spray pattern and consistency. After the texture is applied and dry, a light sanding with a fine-grit sanding sponge will help to blend it with the surrounding area.
According to The Home Depot (2025), a common mistake in drywall repair is skipping the texturing step or failing to properly prime the repaired area before painting. Joint compound is highly porous and will absorb paint differently than the surrounding wall, resulting in a visible patch known as “flashing.” By applying a coat of high-quality primer to the repaired area, you seal the porous surface and ensure that the paint will adhere evenly and match the color and sheen of the rest of the wall. This final step is critical for a truly professional-quality finish.
Frequently Asked Questions About Drywall Repair
Fixing drywall is a common DIY project, but it often brings up specific questions about safety, materials, and techniques. Here are some of the most frequently asked questions regarding how to fix drywall holes in wall to help you achieve the best results.
What is the easiest way to fix a small hole in drywall?
The easiest way to fix a small hole, such as a nail hole or minor dent, is to use a lightweight spackle and a small putty knife. Apply a small amount of spackle to the hole, scrape away the excess, and then sand it smooth once it is dry. This simple process is fast, effective, and requires minimal tools or materials.
Can I patch a drywall hole without a stud behind it?
Yes, you can patch a drywall hole without a stud by using a self-adhesive mesh patch for small to medium holes or by installing furring strips for larger holes. Furring strips are small pieces of wood that are placed behind the existing drywall and secured with screws, providing a solid backing for the new drywall patch to be screwed into.
How long does joint compound take to dry before I can sand it?
The drying time for joint compound depends on the type of compound used and the humidity and temperature in the room. Standard joint compound typically takes 24 hours to dry completely, while “hot mud” or setting-type compounds can set in as little as 20 to 90 minutes. Always check the manufacturer’s instructions for the specific drying time of the product you are using.
Should I be concerned about lead paint or asbestos when repairing old drywall?
Yes, if your home was built before 1978, there is a risk that the existing paint contains lead, and older joint compounds may contain asbestos. Before sanding or cutting into old drywall, it is essential to test for these hazardous materials using a lead test kit or by consulting a professional. Safety should always be the first priority in any home repair project.
Why is my drywall patch still visible after I paint it?
A visible drywall patch, often called “flashing,” occurs when the repaired area is not properly primed before painting. Joint compound is highly porous and absorbs paint differently than the surrounding wall, resulting in a change in color or sheen. Applying a high-quality primer to the patch before painting will seal the surface and ensure a uniform finish that matches the rest of the wall.
Conclusion
Mastering the skill of how to fix drywall holes in wall is a valuable asset for any homeowner, providing a cost-effective way to maintain the beauty and value of your home. By following a systematic approach—from selecting the right materials and tools to executing a precise repair and professional finish—you can achieve results that are indistinguishable from the work of a professional contractor. Whether you are addressing minor dents or major breaches, the key to success lies in patience, attention to detail, and a commitment to quality at every step of the process.
With the right preparation and a bit of practice, you can confidently tackle any drywall repair project, knowing that you have the knowledge and tools to restore your walls to their original, pristine condition. Remember to always prioritize safety, especially in older homes, and never skip the final steps of texturing and priming to ensure a truly seamless and professional-quality finish.
References
1. Lowe’s (2026), “How to Patch and Repair Drywall”
2. The Home Depot (2025), “How to Patch and Repair Drywall”
3. Instructables (2025), “How to Patch Large Holes in Drywall”
4. DIY Playbook (2025), “How to Patch Small Holes in Drywall (Easy DIY Repair)”