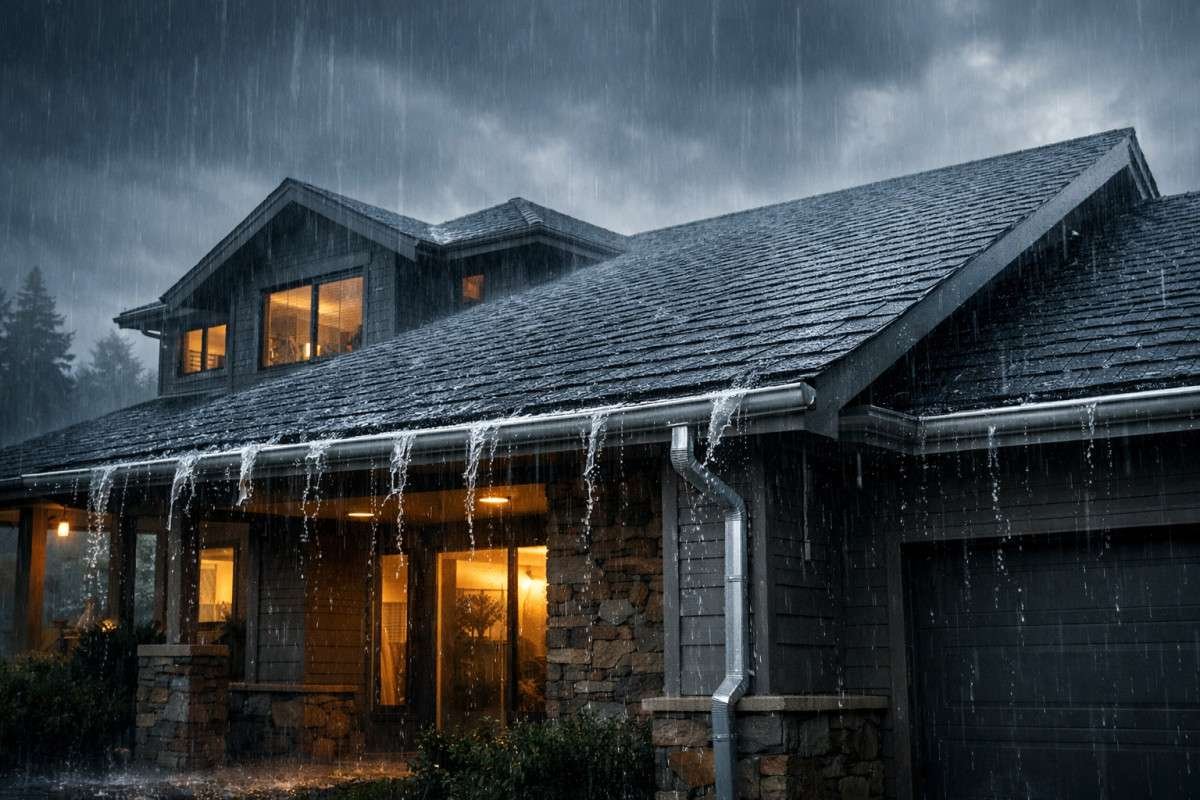
A roof leak is more than just a nuisance; it is a direct threat to your home’s structural integrity and your family’s health. What begins as a small, seemingly harmless water stain on the ceiling can quickly escalate into rotted rafters, ruined insulation, and dangerous mold growth, warn Real Property Management Viking experts. Preventing roof leaks requires a shift from a reactive mindset to a proactive one, where you understand the vulnerabilities of your roofing system before the next storm hits. In this comprehensive guide, we will explore the professional strategies and technical details that ensure your home remains watertight, even in the face of extreme weather.
The Anatomy of a Leak-Proof Roof: A Multi-Layer Defense
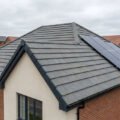
Answer Capsule: A leak-proof roof is not just a layer of shingles; it is a complex system of overlapping barriers designed to shed water and prevent moisture penetration. This multi-layer defense includes the drip edge, ice and water shield, underlayment, and the final layer of shingles, all working together to direct water away from the roof deck.
To prevent leaks, you must first understand the layers that protect your home. The first line of defense is the drip edge, a metal flashing installed along the eaves and rakes that directs water into the gutters and away from the fascia. Beneath the shingles lies the underlayment, which acts as a secondary water barrier. While traditional felt paper was once the standard, modern synthetic underlayment is far superior due to its tear resistance and ability to shed water even if shingles are damaged or missing.
In regions prone to ice and snow, a critical component is the ice and water shield. This self-adhering membrane is installed along the eaves, valleys, and around penetrations to prevent water from seeping under the shingles during ice damming. According to the International Residential Code (IRC), these barriers are mandatory in many jurisdictions to ensure a watertight seal. By ensuring each layer is correctly installed and maintained, you create a robust defense that can withstand the most severe environmental stressors.
| Roof Layer | Primary Function | Prevention Benefit |
|---|---|---|
| Drip Edge | Directs water into gutters | Prevents fascia rot and edge leaks |
| Ice & Water Shield | Self-sealing waterproof barrier | Prevents leaks from ice dams and wind-driven rain |
| Synthetic Underlayment | Secondary water barrier | Superior tear resistance and moisture protection |
| Shingles | Primary water-shedding layer | Protects underlying layers from UV and physical damage |
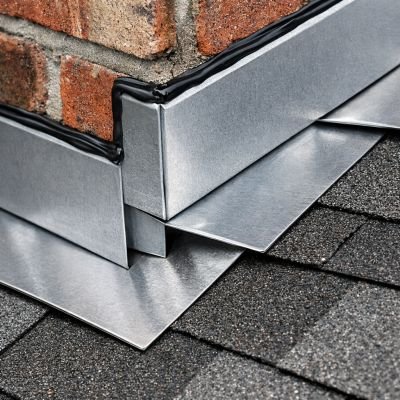
1. Master the Critical Points: Flashing and Sealants
Answer Capsule: Flashing acts as the primary seal for roof penetrations and transitions, including chimneys, vents, and skylights. When flashing is improperly installed or sealants fail, it creates direct pathways for water entry. Preventing leaks at these critical points requires high-quality, UV-resistant sealants and proper flashing techniques like step and counter-flashing.
Flashing is the most common point of failure on a roof, as it is where different materials meet and expand at different rates. To prevent leaks, you must ensure that your flashing is correctly installed and maintained. Step flashing is used along walls and chimneys, where each piece of flashing is woven into the shingles to create a watertight seal. Apron flashing is used at the base of a chimney or wall, while counter-flashing is embedded into the masonry to provide a secondary layer of protection.
A critical but often overlooked component is kick-out flashing. This specialized flashing is installed at the end of a wall-to-roof transition to direct water away from the wall and into the gutter. Without it, water can seep behind the siding and into the wall cavity, causing extensive damage. Additionally, the sealants used around vent pipes and skylights must be high-quality and UV-resistant. Over time, traditional caulking can dry out and crack, creating gaps for water to enter. Regularly inspecting these seals and replacing them with professional-grade products like polyurethane or silicone-based sealants is a simple but effective way to prevent leaks.
2. Defeating Capillary Action and Wind-Driven Rain
Answer Capsule: Capillary action is the process by which water can “climb” under shingles through narrow gaps, defying gravity. Preventing this requires proper shingle overhang and offset, as well as the use of starter shingles and high-quality underlayment to block wind-driven rain from penetrating the roof deck.
Many homeowners are surprised to learn that water can actually travel uphill on a roof. This phenomenon, known as capillary action, occurs when water is drawn into narrow gaps between shingles or under the flashing. To prevent this, shingles must be installed with the correct overhang (typically 1/2 to 3/4 of an inch) and offset (the horizontal distance between shingle joints). This ensures that water is shed away from the gaps and onto the next layer of shingles.
Wind-driven rain is another major threat, as it can force water under shingles and into the roof deck during severe storms. To combat this, professional roofers use starter shingles along the eaves and rakes, which provide a continuous seal and prevent water from being blown under the first course of shingles. Additionally, ensuring that your shingles are fastened with the correct number of nails and in the proper pattern is essential for preventing wind lift, which can expose the underlying layers to moisture. By understanding the science of how water moves, you can design a roofing system that is truly watertight.
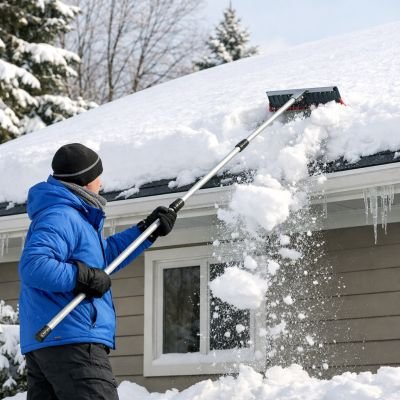
3. Winter Warfare: Preventing Ice Dams and Snow Damage
Answer Capsule: Strategies for preventing ice dams through attic temperature control and physical barriers are essential for winter roof protection. This includes the “Cold Roof” concept, which balances insulation and ventilation to keep the roof deck at a consistent temperature, and using “Roof Rakes” safely to remove heavy snow accumulation.
In cold climates, ice dams are a major cause of roof leaks. These formations occur when heat escaping through your roof melts snow, which then refreezes at the roof’s edge where temperatures remain below freezing. The resulting ice barrier prevents proper drainage, forcing water underneath shingles. To prevent this, your attic should have a balanced system of intake (soffit) and exhaust (ridge) vents. Additionally, ensuring your attic insulation meets the recommended R-value for your region—typically R-38 to R-60 in colder climates—will keep heat where it belongs: inside your living space.
The “Cold Roof” concept is a fundamental principle of winter roof protection. By balancing insulation and ventilation, you keep the roof deck at a consistent temperature, preventing the melt-freeze cycle that leads to ice dams. Additionally, using a roof rake to safely remove heavy snow accumulation from the eaves can prevent ice dams from forming in the first place. However, it is important to use a roof rake with care to avoid damaging the shingles. By taking these proactive steps, you can protect your roof from the damaging effects of winter weather.
4. The Post-Storm Inspection Protocol
Answer Capsule: A systematic approach to checking your roof after severe weather events is essential for early leak detection. This includes identifying “Nail Pops” and “Wind Lift,” checking for “Hail Bruising” on asphalt shingles, and performing an “Interior Attic Check” to look for daylight and water tracks.
Severe weather events can cause immediate damage to your roof, even if it is not visible from the ground. To prevent leaks, you should perform a systematic post-storm inspection. Start by looking for nail pops, which occur when nails are driven too high or at incorrect angles, causing them to push through the shingles. Also, check for wind lift, which can occur when high winds lift shingles and break the sealant bond, exposing the underlying layers to moisture.
Hail bruising is another common post-storm issue. While it may not cause an immediate leak, it can damage the granules and weaken the shingles, leading to premature failure. Finally, perform an interior attic check to look for signs of water tracks or daylight coming through the roof deck. These are clear indicators of an active or developing leak. By identifying these issues early, you can perform targeted repairs that prevent the need for a full roof replacement. Professional roofers recommend a comprehensive structural audit every 3 to 5 years, or after a major storm.
5. Long-Term Prevention: The Cost of Delay
Answer Capsule: Analyzing the financial and health impacts of ignoring minor leaks is essential for long-term roof preservation. This includes mold remediation costs vs. simple shingle repair, structural rot, and the “Compounding Damage” effect.
A minor roof leak may seem like a small problem, but it can quickly escalate into a major financial and health crisis. The cost of delay is high, as water can seep into the wall cavity and cause extensive damage to the structural components of your home. This includes rotted rafters, ruined insulation, and dangerous mold growth. According to the Federal Emergency Management Agency (FEMA), mold can begin to grow within 24 to 48 hours of water exposure, making it essential to address leaks immediately.
The “Compounding Damage” effect is a major concern. What starts as a simple shingle repair can quickly turn into a full roof replacement if left unaddressed. Additionally, the cost of mold remediation can be thousands of dollars, far exceeding the cost of a simple repair. By taking a proactive approach to roof maintenance, you can prevent these expensive and dangerous issues. A few hours of maintenance each year can prevent thousands of dollars in future repairs and add a decade or more to the life of your roof. Protect your investment, and it will continue to protect you.
Frequently Asked Questions (FAQ)
- Q1: How do I stop my roof from leaking in heavy rain?
- A: To stop a roof from leaking in heavy rain, you must first identify the source of the leak. This often involves checking the flashing around chimneys, vents, and skylights, as well as looking for damaged or missing shingles. Once the source is identified, you can perform a temporary repair using a roof sealant or tarp until a professional can perform a permanent repair. However, the best way to stop leaks is to prevent them through regular maintenance and inspections.
- Q2: What is the most common place for a roof to leak?
- A: The most common place for a roof to leak is around penetrations and transitions, such as chimneys, vents, and skylights. These areas are vulnerable because they are where different materials meet and expand at different rates. Other common leak points include valleys, where water concentrates, and the roof’s edge, where ice dams can form. Regularly inspecting and maintaining the flashing and sealants in these areas is essential for preventing leaks.
- Q3: Can a roof leak be fixed from the inside?
- A: While you can perform a temporary fix from the inside, such as using a bucket to catch water or applying a sealant to the underside of the roof deck, a permanent repair must be performed from the outside. This is because the source of the leak is on the exterior of the roof, and fixing it from the inside will not prevent water from continuing to penetrate the roofing system. A professional roofer should be hired to perform a permanent repair from the outside.
- Q4: How much does it cost to prevent a roof leak?
- A: The cost of preventing a roof leak is far less than the cost of repairing the damage caused by a leak. A professional roof inspection typically costs between $100 and $300, while cleaning your gutters can cost between $100 and $200. Performing minor repairs, such as replacing a few shingles or resealing flashing, can cost between $200 and $500. In contrast, a full roof replacement can cost $10,000 or more, and mold remediation can cost thousands of dollars.
- Q5: Does a new roof guarantee no leaks?
- A: While a new roof significantly reduces the risk of leaks, it does not guarantee that no leaks will occur. Improper installation is a major cause of leaks in new roofs, as is damage from severe weather events. Additionally, even a new roof requires regular maintenance and inspections to ensure it remains watertight. By following a proactive maintenance plan, you can ensure that your new roof provides many years of leak-free protection.
Conclusion: Your Home’s First Line of Defense
Preventing roof leaks is an active process, not a passive hope. By adopting a watertight mindset, you shift from reacting to expensive problems to proactively preserving your home’s most critical shield. The strategies outlined in this guide—understanding the anatomy of a leak-proof roof, mastering flashing and sealants, defeating capillary action, preventing ice dams, and performing post-storm inspections—are not isolated tasks but interconnected components of a holistic roof care system. A few hours of maintenance each year can prevent thousands of dollars in future repairs and add a decade or more to the life of your roof. Protect your investment, and it will continue to protect you.