Transforming your home with new flooring can dramatically enhance its aesthetic appeal and functionality. Among the myriad options available, vinyl plank flooring (VPF), particularly luxury vinyl plank (LVP), stands out as a popular choice for its durability, water resistance, and aesthetic versatility. This comprehensive DIY guide is designed to empower homeowners and aspiring DIYers with the knowledge and steps needed to successfully install vinyl plank flooring, achieving a professional-looking finish without the need for costly professional services. From understanding the benefits of VPF to mastering subfloor preparation, planning your layout, and executing the installation process, we will cover every essential detail. We will also highlight common pitfalls to avoid and provide valuable tips for maintaining your new floors, ensuring they remain a beautiful and lasting addition to your home.

Why Choose Vinyl Plank Flooring?
Vinyl plank flooring has rapidly gained traction in the home improvement market, becoming a preferred option for many due to its unique combination of practical benefits and aesthetic appeal. Its rise in popularity is largely attributed to its ability to mimic natural materials like hardwood and stone, offering a high-end look at a more accessible price point. Beyond its visual advantages, VPF provides a host of functional benefits that make it suitable for various residential and even light commercial applications.
Benefits of LVP
Luxury Vinyl Plank (LVP) offers several compelling advantages that contribute to its widespread adoption. Firstly, its exceptional durability makes it resistant to scratches, dents, and general wear and tear, standing up well to heavy foot traffic, pets, and children. This resilience ensures a longer lifespan for your flooring, maintaining its appearance for years. Secondly, LVP is 100% waterproof, making it an ideal choice for moisture-prone areas such as kitchens, bathrooms, and basements. This feature prevents warping, swelling, and mold growth, common issues with other flooring types when exposed to water. Thirdly, the ease of maintenance is a significant draw; LVP requires only regular sweeping and occasional damp mopping to keep it clean, eliminating the need for special polishes or extensive cleaning routines. Lastly, LVP provides realistic wood or stone aesthetics through advanced photographic and embossing technologies, offering a vast array of styles, colors, and textures that can complement any interior design scheme.
Common Applications
The versatility of vinyl plank flooring allows it to be installed in virtually any room of the house. Its waterproof nature makes it particularly well-suited for kitchens and bathrooms, where spills and humidity are common. In living rooms and bedrooms, LVP offers the warmth and elegance of hardwood without the associated cost and maintenance. For basements, it provides a durable and moisture-resistant solution that can transform an otherwise damp space into a comfortable living area. Furthermore, its resilience makes it an excellent choice for hallways and entryways, areas that experience high traffic and are prone to dirt and debris. The ease of installation also makes it a favorite for DIY enthusiasts looking to upgrade their flooring in various spaces.
Essential Tools and Materials for Installation
Before embarking on your vinyl plank flooring installation project, gathering all the necessary tools and materials is crucial. Proper preparation ensures a smooth and efficient process, minimizing interruptions and potential frustrations. Having everything on hand will not only save you time but also contribute to a higher quality finish. This section outlines the essential items you’ll need to successfully complete your DIY flooring project.
Tools You’ll Need
The good news is that vinyl plank flooring installation typically requires only a few basic tools, many of which you might already own. For precise cuts and measurements, a utility knife or vinyl cutter is indispensable, along with a tape measure and a T-square or straightedge to ensure accuracy. To properly secure planks and achieve tight seams, a tapping block and a rubber mallet are essential. Spacers are critical for maintaining the necessary expansion gap around the perimeter of the room, allowing the flooring to expand and contract with temperature changes. A level will help you identify and address any unevenness in your subfloor, while safety gear, including gloves, kneepads, and safety glasses, is vital for protecting yourself throughout the project. For more intricate cuts around doorframes or obstacles, a jigsaw or oscillating tool can be highly beneficial.
Materials Required
In addition to your tools, you’ll need to procure the right materials. The most obvious is the vinyl plank flooring itself, ensuring you purchase about 10% extra to account for cuts, waste, and potential future repairs. Depending on your specific VPF product and subfloor, underlayment may be required. Some modern VPF products come with an attached underlayment, while others necessitate a separate layer for added comfort, sound dampening, or moisture protection. For concrete subfloors, a moisture barrier is often essential to prevent moisture from seeping up and damaging your new flooring. Finally, trim or molding will be needed to cover the expansion gaps around the perimeter of the room, providing a clean and finished look. Always consult the manufacturer’s guidelines for your chosen VPF product, as specific requirements for underlayment and moisture barriers can vary.
Step-by-Step Vinyl Plank Flooring Installation Process
Installing vinyl plank flooring is a rewarding DIY project that can significantly enhance your home. By following a systematic approach, you can achieve a durable and aesthetically pleasing result. This section breaks down the installation process into manageable steps, guiding you from initial preparation to the final touches.
Step 1: Acclimation and Subfloor Preparation
The foundation of a successful vinyl plank flooring installation lies in meticulous preparation. This involves two critical phases: acclimating your flooring and preparing the subfloor. Neglecting these steps can lead to issues such as warping, gapping, or an uneven finish, compromising the longevity and appearance of your new floor.
Acclimating Your Vinyl Planks
Before installation, it is crucial to allow your vinyl planks to acclimate to the room’s climate. This process helps the material adjust to the ambient temperature and humidity, preventing future expansion or contraction that could lead to buckling or gapping. Place the unopened boxes of vinyl planks in the installation area for at least 48 to 72 hours. Ideally, the room temperature should be maintained between 65–85°F (18–29°C), with humidity levels between 35–65%. Spreading the planks out, if possible, can further aid in this acclimation. According to Millennium Hardwood Flooring, failure to acclimate can result in significant issues over time, especially in climates with fluctuating temperatures and humidity [1].
Preparing the Subfloor
A clean, dry, and level subfloor is paramount for a smooth and stable vinyl plank installation. Begin by thoroughly cleaning the subfloor, sweeping and vacuuming to remove all dust, dirt, and debris. Next, level the surface using a straightedge to identify any dips or humps. The subfloor should be flat within 3/16 inch over 10 feet. Use a self-leveling compound for low spots and sand down high spots. Repair any damage to the subfloor, such as patching cracks in concrete or replacing damaged plywood panels. For concrete subfloors, a moisture test is recommended, and a vapor barrier may be necessary to prevent moisture intrusion. If your VPF does not have an attached padding, install the recommended underlayment at this stage. A well-prepared subfloor ensures that your vinyl planks lay flat, preventing movement, noise, and potential damage.
Step 2: Planning Your Layout and Design
Careful planning of your flooring layout is essential for achieving a balanced and aesthetically pleasing result. This step involves deciding on the direction of your planks and calculating the amount of material needed, ensuring a seamless and professional finish.
Choosing a Laying Direction
The direction in which you lay your vinyl planks can significantly impact the visual perception of the room. Design experts often recommend laying planks parallel to the longest wall in the room, as this can make the space appear larger and more expansive. Alternatively, laying them parallel to the main source of natural light can help to minimize the appearance of seams. Consider the room’s entry point and how the planks will flow from that perspective. Dry-laying a few rows without locking them in can help you visualize the alignment and pattern, allowing you to make an informed decision before committing to the installation.
Calculating Your Needs
Accurately calculating the amount of vinyl plank flooring required is crucial to avoid running out of material mid-project or having excessive waste. Measure the length and width of your room to determine the total square footage. It is always advisable to purchase an additional 10% of flooring to account for cuts, mistakes, and future repairs. When planning your layout, measure the room’s width and divide it by the width of one plank to estimate the number of rows. Adjust the width of your first row if necessary to ensure that the final row is not too narrow (ideally, no less than 2 inches). Additionally, plan to stagger the joints by at least 6 to 8 inches between rows. This not only creates a more natural and visually appealing look but also enhances the structural integrity of the floor, preventing weak seams.
Step 3: Laying the First Row
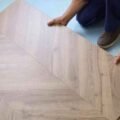
The first row of vinyl plank flooring sets the tone for the entire installation, making accuracy paramount. Begin in a left corner of the room, ensuring the tongue side of the plank faces the wall. Place spacers between the plank and the wall to maintain the crucial ¼-inch expansion gap. This gap is vital for allowing the flooring to expand and contract without buckling. Lay the first plank, then connect the second plank to its end using the click-lock system. Use a tapping block and a rubber mallet to gently secure the fit, ensuring the planks are tightly interlocked without any gaps. Measure and cut the final plank of the first row to fit, using a utility knife or vinyl cutter. The offcut from this plank, if at least 6 inches long, can often be used to start the second row, promoting efficient staggering and reducing waste.
Step 4: Continuing Installation and Cutting Planks
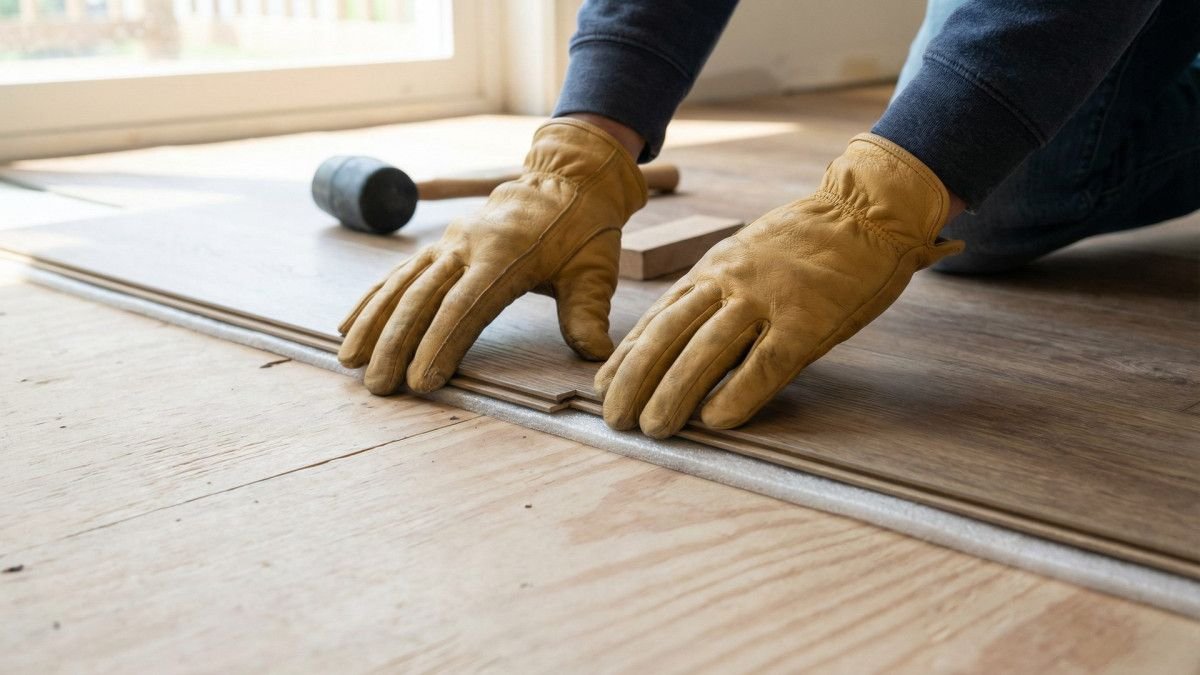
Once the first row is securely in place, continue the installation across the room, row by row. Insert each new plank at an angle, then lower and tap it into place with the tapping block and rubber mallet to ensure a tight, secure connection. Remember to maintain the staggered joint pattern by offsetting seams by at least 6 to 8 inches between rows. This technique distributes stress evenly across the floor and enhances its stability. Continue to use spacers around the entire perimeter of the room to preserve the expansion gap. To ensure a natural appearance, mix planks from multiple boxes as you go, which helps to blend any slight variations in color or pattern. This prevents a repetitive or unnatural look in your finished floor.
Cutting Around Obstacles
Not all rooms are perfectly square, and you will inevitably encounter obstacles such as doorframes, vents, or irregular corners. For straight cuts, mark your cut line with a pencil and a straightedge, then score the top of the plank deeply with a utility knife. Bend the plank along the score line until it snaps cleanly. For more complex shapes or curves, a jigsaw or oscillating tool will be invaluable. When cutting around doorframes, it’s often easier to undercut the frame so the plank can slide underneath, creating a seamless finish. Always measure twice and cut once to minimize waste. For tight spots near walls, a pull bar can be used to draw the final planks into place, ensuring a snug fit. According to Dumpsters.com, if you need to install vinyl plank flooring around a toilet, it is recommended to remove the toilet completely and then cut angles in your VPF to fit the drain, allowing the flooring to lay flat underneath [2].
Step 5: Finishing Touches and Cleanup
With all the planks laid, the final steps involve adding the finishing touches and cleaning up to reveal your beautifully installed vinyl plank flooring. First, remove all the spacers from around the perimeter of the room. Next, install quarter-round or baseboard trim to cover the expansion gaps, providing a neat and professional edge to your new floor. For doorways or where your vinyl plank flooring meets another type of flooring, install transition strips to create a smooth and safe transition. Finally, clean the surface of your new floor using a pH-neutral vinyl floor cleaner, removing any dust or debris from the installation process. It is generally recommended to wait 24 hours before placing heavy furniture back on the floor to allow everything to settle properly. Regular sweeping and occasional damp mopping will keep your new VPF looking pristine for years to come.
Common Mistakes to Avoid During Installation
Even with a straightforward process like vinyl plank flooring installation, certain common mistakes can compromise the quality and longevity of your new floor. Being aware of these pitfalls and taking preventative measures can save you time, effort, and potential repair costs. This section highlights key errors to avoid, ensuring a successful DIY project.
Subfloor Issues
One of the most frequent and detrimental mistakes is neglecting proper subfloor preparation. If the subfloor is not clean, dry, and level, your vinyl planks will not sit correctly. Unevenness can lead to soft spots, gaps between planks, or even premature wear and tear. Moisture in the subfloor, especially concrete, can cause mold growth or damage to the flooring over time. Always ensure your subfloor is meticulously cleaned, thoroughly dry, and perfectly level before laying any planks. According to GoFlooring.com, not leveling the subfloor is a common mistake that can lead to planks shifting or cracking [3].
Expansion Gaps
Another critical error is forgetting or improperly managing expansion gaps. Vinyl plank flooring, like many other flooring materials, expands and contracts with changes in temperature and humidity. Without a sufficient ¼-inch gap around the perimeter of the room and against any fixed objects, the planks can buckle, warp, or lift. This pressure can also cause seams to separate. Always use spacers during installation to maintain the correct expansion gap, and remove them only after the entire floor is laid and secured. This simple step is vital for the long-term stability and appearance of your flooring.
Improper Staggering
Failing to properly stagger the seams between rows is a common aesthetic and structural mistake. If the end joints of adjacent rows are too close together, it creates a weak point in the floor and can result in an unnatural, repetitive pattern. Aim to offset seams by at least 6 to 8 inches between rows. This technique distributes stress more evenly across the floor, enhancing its overall strength and stability, while also creating a more visually appealing and authentic look. Mixing planks from different boxes also helps to ensure a natural blend of colors and patterns, avoiding a manufactured appearance.
Maintaining Your New Vinyl Plank Flooring
Once your vinyl plank flooring is successfully installed, proper maintenance is key to preserving its beauty and extending its lifespan. VPF is renowned for its low maintenance requirements, but a few simple practices can ensure it remains in pristine condition for years. Regular cleaning is fundamental; sweep or vacuum your floors frequently to remove dirt, dust, and grit, which can otherwise scratch the surface. For deeper cleaning, use a damp mop with a pH-neutral cleaner specifically designed for vinyl flooring. Avoid harsh chemicals, abrasive cleaners, or steam mops, as these can damage the protective layer of the planks. Promptly wipe up spills to prevent staining or water damage, even though VPF is waterproof, prolonged exposure to standing water is not recommended. Additionally, use felt pads under furniture legs to prevent scratches and dents, and avoid dragging heavy objects across the floor. Placing doormats at entryways can also help trap dirt and debris, reducing the amount brought onto your floors. By following these straightforward maintenance tips, your vinyl plank flooring will continue to look new and perform exceptionally.
Frequently Asked Questions (FAQ)
This section addresses common questions homeowners have about vinyl plank flooring installation, providing quick and clear answers to help you make informed decisions and troubleshoot potential issues.
Q: Is vinyl plank flooring easy to install yourself?
Yes, vinyl plank flooring is generally considered DIY-friendly. Many products feature click-lock systems that allow planks to easily interlock without adhesive, simplifying the process. With basic tools, careful preparation, and attention to detail, most homeowners can achieve a professional-looking installation. The key is to follow manufacturer instructions and take your time with each step.
Q: What do you put down before vinyl plank flooring?
Before installing vinyl plank flooring, you need a clean, dry, and level subfloor. Depending on the product, you might also need an underlayment for added comfort, sound dampening, or moisture protection. For concrete subfloors, a moisture barrier is often essential to prevent moisture from affecting the flooring. Always check the manufacturer’s recommendations for specific subfloor preparation and underlayment requirements.
Q: Is vinyl plank flooring waterproof?
Yes, most modern vinyl plank flooring, especially luxury vinyl plank (LVP), is 100% waterproof. This makes it an excellent choice for areas prone to moisture, such as kitchens, bathrooms, and basements. Its waterproof properties prevent swelling, warping, and mold growth, offering a durable and long-lasting solution for wet environments.
Q: How long does vinyl plank flooring last?
With proper installation and maintenance, vinyl plank flooring can be very durable. Most high-quality VPF products are designed to last between 15 to 25 years, and sometimes even longer. Factors such as the quality of the product, the amount of foot traffic, and adherence to maintenance guidelines all contribute to its lifespan.
Q: Is glue needed for LVP?
For most residential installations of luxury vinyl plank (LVP), glue is not typically needed. The majority of LVP products feature a floating click-lock system that allows the planks to interlock securely without adhesive. However, some LVP products are designed for glue-down installation, particularly in high-traffic commercial settings where a more permanent bond is desired. Always refer to the manufacturer’s instructions for your specific product.
Conclusion
Installing vinyl plank flooring is a highly achievable and rewarding home improvement project for any DIY enthusiast. By meticulously following the steps outlined in this guide—from thorough subfloor preparation and careful layout planning to precise plank installation and diligent maintenance—you can achieve a durable, beautiful, and professional-looking floor that significantly enhances your living space. The versatility, resilience, and aesthetic appeal of vinyl plank flooring make it an excellent investment for any home, providing years of comfort and style. Remember to prioritize proper acclimation, maintain adequate expansion gaps, and stagger your seams effectively to ensure the longevity and stability of your new floor. With patience and attention to detail, you can confidently transform your home with the enduring elegance of vinyl plank flooring.
References:
[1] Millennium Hardwood Flooring. (n.d.). Vinyl Plank Flooring Installation Guide. Retrieved from https://millenniumhardwood.com/blog/vinyl-plank-flooring-step-by-step-installation-guide/
[2] Dumpsters.com. (n.d.). A Beginner’s Guide to Installing Vinyl Plank Flooring. Retrieved from https://www.dumpsters.com/blog/how-to-install-vinyl-plank-flooring
[3] GoFlooring.com. (n.d.). 10 Common Mistakes When Installing Vinyl Plank Flooring. Retrieved from https://goflooring.com/blog/common-mistakes-when-installing-vinyl-plank-flooring/