You painted a room last year and it looked great for about three months. Then the paint started peeling near the window frame. The roller marks showed every time the sun hit the wall. And the color was splotchy in spots where you patched holes but forgot to prime. The paint itself was not the problem. The preparation was.
Paint has been used as a decorative and protective coating for thousands of years (Wikipedia), but the quality of any paint job depends more on what happens before the paint opens than on the paint itself. The right preparation materials determine whether the finish lasts five years or five months.
The essential paint preparation materials for interior and exterior projects vary by surface type and condition. Here is what each product does and when to choose the premium version over the budget option.
Tape, Drop Cloths, and Surface Protection
Surface protection materials prevent paint from landing where it does not belong. The cost of these materials is small compared to the time it takes to clean paint off windows, floors, and trim after the job is done.
Painter’s tape is not the same as masking tape. Masking tape, which costs $2 to $4 per roll, has a weak adhesive that can fail during painting, allowing paint to bleed underneath. It also leaves a sticky residue if left on the surface for more than 24 hours. Painter’s tape, which costs $5 to $10 per roll, uses a pressure-sensitive adhesive that creates a clean paint line and removes cleanly for up to 14 days. For the best results, blue or green painter’s tape from brands like Scotch-Blue or FrogTape is worth the extra cost.
Delicate surface tape is designed for freshly painted walls, wallpaper, and other surfaces that regular painter’s tape can damage. It has the lowest adhesion level and costs $7 to $12 per roll. Use it when you need to tape off trim that was painted less than 30 days ago.
Drop cloths protect floors and furniture. Canvas drop cloths cost $15 to $40 each and are the best choice for interior work. They lie flat, absorb drips, and do not slide on the floor. Plastic drop cloths cost $3 to $10 each and are useful for covering large areas quickly, but they are slippery when walked on and can trap moisture against the floor. For exterior work, canvas drop cloths on the ground and plastic sheeting over bushes and plants works well.
A painter who has been on the job for 30 years explained the tape rule: “I tell apprentices: do not buy cheap tape. If you spend $3 on tape and it bleeds, you spend an hour fixing it. If you spend $8 on tape, you spend zero hours fixing it.”
Sandpaper and Sanding Tools
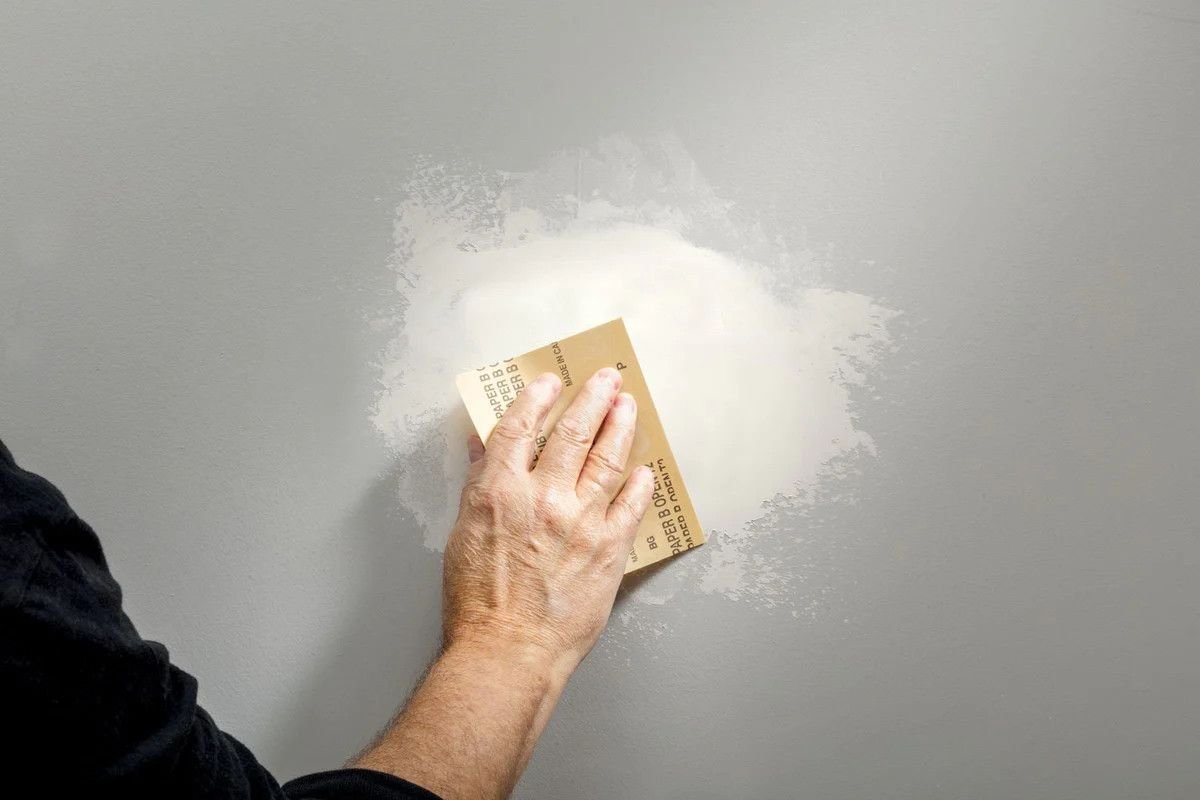
Sandpaper is the most essential paint preparation material for smoothing surfaces and creating a mechanical bond for the new paint. The grit number determines how aggressive the sandpaper is — lower numbers are coarser, higher numbers are finer.
| Grit | Use | Best for
|
| 60u201380 | Heavy sanding | Removing old paint, rough surfaces |
| 100u2013150 | Medium sanding | Smoothing spackle, general prep |
| 180u2013220 | Fine sanding | Final sand before primer or paint |
| 320u2013400 | Very fine | Sanding between coats of paint |
Sanding blocks and sponges are easier to use than flat sandpaper for most jobs. A sanding sponge with medium grit on one side and fine grit on the other costs $4 to $8 and is reusable for multiple projects. Sanding blocks cost $3 to $6 and provide a flat surface that prevents the finger grooves that happen when sanding with just paper.
A pole sander costs $15 to $30 and is essential for sanding ceilings and high walls without a ladder. It uses quarter-sheet sandpaper and attaches to an extension pole. The pole sander produces a flatter surface than hand sanding on large wall areas.
A sanding mask or respirator is not optional. Sanding dust contains paint particles, wood dust, and drywall compound that damage the lungs. A NIOSH-approved N95 mask costs $1 to $3 and should be worn during all sanding. For lead paint removal in homes built before 1978, a half-face respirator with P100 filters is required by EPA regulations.
Fillers, Putties, and Patching Compounds
Fillers and patching compounds repair surface imperfections in walls and trim before painting begins. The right choice depends on the hole size and the material being repaired.
Spackling compound is the standard filler for small holes — nail holes, screw holes, and small dents. It costs $4 to $10 per container, dries in 15 to 30 minutes, and shrinks minimally. Lightweight spackle is easier to sand but less durable for larger holes. For holes larger than a quarter inch, a setting-type joint compound is better because it does not shrink and dries harder.
Wood filler is used for holes and cracks in trim, baseboards, and wood furniture. It costs $5 to $15 per container and is available in different wood tones. Water-based wood filler is easy to sand and accepts stain. Solvent-based filler dries harder and is better for exterior use. For deep holes, apply wood filler in layers — a thick single application shrinks and cracks as it dries.
Caulk is used to seal gaps between trim and walls, around windows and doors, and along baseboards. Acrylic latex caulk costs $3 to $8 per tube and is paintable within 30 minutes. Silicone caulk costs $5 to $12 per tube and is better for bathrooms and kitchens because it resists moisture, but it cannot be painted over without a special primer.
Mesh tape and joint compound are needed for drywall repair — cracks, corner damage, and holes larger than two inches. Self-adhesive mesh tape costs $4 to $8 per roll and is easier to apply than paper tape. A 30-minute setting compound costs $10 to $20 per bag and is preferred over pre-mixed compound for repairs because it dries harder and shrinks less.
Primers and Sealers — When to Use What
Primer is the paint preparation material that homeowners skip most often, and skipping it is the most common cause of paint failure. Primer serves three purposes: it seals the surface, provides a uniform base for the paint, and improves adhesion.
There are four main types of primer, each designed for a different surface condition:
- Water-based primer — best for drywall and previously painted walls; dries in 1–2 hours; does not block stains
- Stain-blocking primer — shellac-based; blocks water stains, smoke damage, and odors; dries in 30 minutes
- Bonding primer — formulated for glossy surfaces like tile, laminate, and metal; prevents peeling
- Masonry primer — for concrete, brick, and stucco; seals porous surfaces for even paint absorption
Stain-blocking primer is required for covering water stains, smoke damage, marker, and crayon marks. Shellac-based primer is the most effective stain blocker and costs $25 to $45 per gallon. It dries in 30 minutes, blocks the toughest stains, and seals odors. The downside is that it requires denatured alcohol for cleanup. Oil-based stain-blocking primer costs $20 to $35 per gallon and also blocks stains effectively but takes longer to dry and requires mineral spirits for cleanup.
Bonding primer is needed for painting over glossy surfaces — previously painted trim, tile, laminate, and metal. It costs $20 to $40 per gallon and contains specialized adhesion promoters that grip slick surfaces. Without bonding primer, paint on glossy surfaces peels within months.
Masonry primer is formulated for concrete, brick, and stucco. It costs $20 to $35 per gallon and seals the porous surface to prevent the paint from soaking in unevenly. Exterior masonry primer also contains additives that resist alkali attack from the concrete.
Cleaning and Degreasing Supplies
Cleaning is the first step in any paint preparation process, and the supplies needed depend on the surface being painted and the type of dirt or grease present.
Trisodium phosphate is the most effective cleaner for heavily soiled walls, kitchen cabinets, and trim. It costs $8 to $15 per container and must be mixed with water. TSP degreases, removes mildew, and etches glossy surfaces for better paint adhesion. The drawbacks are that it requires rubber gloves, can damage some surfaces, and must be rinsed thoroughly before painting.
A TSP substitute — sodium metasilicate — costs $6 to $12 per container and is less caustic than TSP while still providing effective cleaning. It is the better choice for general wall cleaning and for surfaces that do not have heavy grease buildup.
Mildew cleaner is needed for bathrooms, basements, and exterior walls with mold or mildew growth. A bleach-based mildew cleaner costs $5 to $10 per quart and kills mildew spores on contact. The surface must be rinsed and dried completely before painting. Paint applied over active mildew will peel as the mildew continues to grow underneath.
Degreaser is essential for kitchen painting projects. Kitchen walls and cabinets accumulate cooking oil that prevents paint adhesion. A citrus-based degreaser costs $8 to $15 per quart and cuts through grease more effectively than all-purpose cleaners. For exterior painting, a pressure washer with a detergent attachment is the most effective cleaning method.
How to Choose the Right Preparation Materials for Your Project
Choosing paint preparation materials depends on three main factors: the surface material you are painting, the condition of the existing finish, and the room moisture level.
For a standard interior room repaint — walls in good condition, previously painted with flat or eggshell paint — the minimum preparation materials are: blue painter’s tape, canvas drop cloths, 150-grit sandpaper or a sanding sponge, lightweight spackle for nail holes, water-based primer, and a TSP substitute for cleaning. Total cost: $40 to $70 for a standard 12-by-12-foot room.
For a kitchen or bathroom repaint — walls with grease, moisture, or mildew — add degreaser, mildew cleaner, shellac-based stain-blocking primer, and silicone-safe caulk. Budget $60 to $100 for preparation materials. Do not skip the degreasing step. Paint applied over grease will fail within months regardless of the primer or paint quality used.
For an exterior paint project — wood siding, trim, or stucco — the material list changes. Exterior grade caulk, masonry primer or exterior wood primer, a pressure washer with detergent, mildew cleaner, and 80- to 100-grit sandpaper for loose paint removal. Budget $80 to $150 for exterior preparation materials.
For a cabinet or trim painting project — high-gloss surfaces, heavy wear areas — bonding primer, high-quality sandpaper up to 220 grit, wood filler, and degreaser are essential. The extra cost for bonding primer over standard primer is $10 to $20 per gallon, but it prevents the peeling that occurs when paint is applied to slick surfaces without proper adhesion.
Frequently Asked Questions
What paint preparation materials do I need for a room repaint?
Tape, sandpaper, spackle, primer and cleaner are essential. Budget $40 to $70 per room.
Can I skip primer if I am painting over the same color?
Primer is always recommended. It seals the surface and provides a uniform base. Skipping primer results in uneven coverage even when painting the same color.
What sandpaper grit should I use before painting?
Use 120 to 150 grit for general wall prep. Use 180 to 220 grit for final sanding before paint.
Is blue painter’s tape worth the extra cost?
Yes. Painter’s tape costs $5 to $10 per roll versus $2 to $4 for masking tape. It creates sharper lines and removes cleanly without residue.
Can I use spackle for large holes in walls?
Spackle works for holes under 1/4 inch. For larger holes, use setting-type joint compound or mesh tape with compound to prevent cracking.
Do I need to wash walls before painting?
Yes. Dirt, grease, and oils prevent paint adhesion. Use TSP or a TSP substitute for best results. Kitchen walls need extra degreasing attention.
What type of caulk is best for painting over?
Acrylic latex caulk accepts paint within 30 minutes. Silicone caulk needs special primer before painting.
Should I sand between coats of paint?
Light sanding with 320 grit between coats removes dust nibs. Recommended for trim and cabinets.