The timeless appeal of hardwood flooring continues to define high-quality residential design, offering a blend of natural beauty and long-term durability that few other materials can match. For homeowners considering wood flooring and installation, the decision represents a significant investment that enhances both the aesthetic character and the market value of a property. Understanding the intricate relationship between material selection, environmental conditions, and proper installation techniques is essential for ensuring that these floors remain a centerpiece of the home for decades. This guide explores the critical phases of the flooring journey, from choosing the right species to mastering the technical requirements of subfloor preparation and maintenance.

Choosing Between Solid and Engineered Wood Flooring
Choosing between solid and engineered wood depends on your subfloor type and environmental humidity levels. Solid wood offers the longest lifespan through multiple refinishings but is sensitive to moisture, whereas engineered wood provides superior stability in high-moisture areas like basements. Both options deliver the same visual appeal once installed, provided the wear layer is sufficient.
The structural differences between these two types of wood flooring are fundamental to their performance and installation requirements. Solid hardwood is milled from a single piece of timber, typically 3/4-inch thick, which allows it to be sanded and refinished multiple times over its 100-year lifespan. This traditional choice is ideal for above-grade rooms where humidity levels are consistently controlled. However, because solid wood expands and contracts across its grain, it is prone to cupping or gapping if exposed to significant moisture fluctuations.
Engineered wood flooring, by contrast, is constructed from multiple layers of wood veneers glued together in a cross-grain pattern, topped with a real hardwood wear layer. This multi-ply construction makes the boards significantly more stable than solid wood, as each layer restricts the movement of the others. According to the National Wood Flooring Association (2024), engineered wood is the preferred choice for installation over concrete slabs or in regions with high seasonal humidity, as it resists the warping that often plagues solid timber in these environments.
When selecting between these options, homeowners must also consider the thickness of the wear layer on engineered products. A thick wear layer of 4mm or more can be refinished two to three times, bridging the gap between the durability of solid wood and the stability of engineered planks. Ultimately, the choice should be guided by the specific conditions of the installation site and the long-term maintenance expectations of the household.
Essential Subfloor Preparation and Moisture Control
Successful wood flooring and installation require a perfectly level and dry subfloor to prevent long-term squeaking or structural failure. Preparing the subfloor involves checking for moisture content, leveling any uneven areas, and ensuring the surface is clean and structurally sound. This foundational step is critical for both solid and engineered wood.
The preparation of the subfloor is arguably the most critical phase of any wood flooring project, as any imperfections in the base will eventually manifest in the finished surface. A common issue in older homes is an uneven subfloor, which can cause boards to flex and rub together, leading to persistent squeaks and potentially damaging the tongue-and-groove joints. Homeowners should use a straightedge to identify high and low spots, sanding down high areas and filling low spots with a high-quality leveling compound.
Moisture control is equally important, as wood is a hygroscopic material that will absorb and release moisture based on its environment. According to the Forest Products Laboratory (2021), wood flooring should be installed over a subfloor with a moisture content within 2% to 4% of the flooring material itself to prevent excessive movement. This often requires the installation of a vapor barrier, such as 6-mil polyethylene or asphalt-saturated felt, which acts as a shield against moisture rising from a concrete slab or crawlspace.
In addition to leveling and moisture control, the subfloor must be structurally sound and securely fastened to the floor joists. Loose subfloor panels should be screwed down to eliminate movement and noise. Once the subfloor is clean, dry, and flat, it provides the ideal foundation for the wood flooring to be installed, ensuring that the final result is both visually stunning and structurally durable for generations.
The Professional vs. DIY Wood Flooring Installation Process
Deciding between professional or DIY wood flooring and installation depends on your budget, time availability, and comfort with specialized tools. Professional installers bring expertise in complex layouts and moisture testing, while a DIY approach can save significant labor costs if you follow precise manufacturer guidelines. Both paths require a dedicated acclimation period.
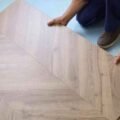
The installation process begins with the acclimation of the wood flooring, which involves bringing the material into the house and letting it sit in the installation area for several days. This allows the wood to reach equilibrium with the home’s humidity and temperature, preventing excessive expansion or contraction after it has been installed. During this time, the layout should be planned, starting from the longest straight wall and working across the room to ensure a consistent appearance.
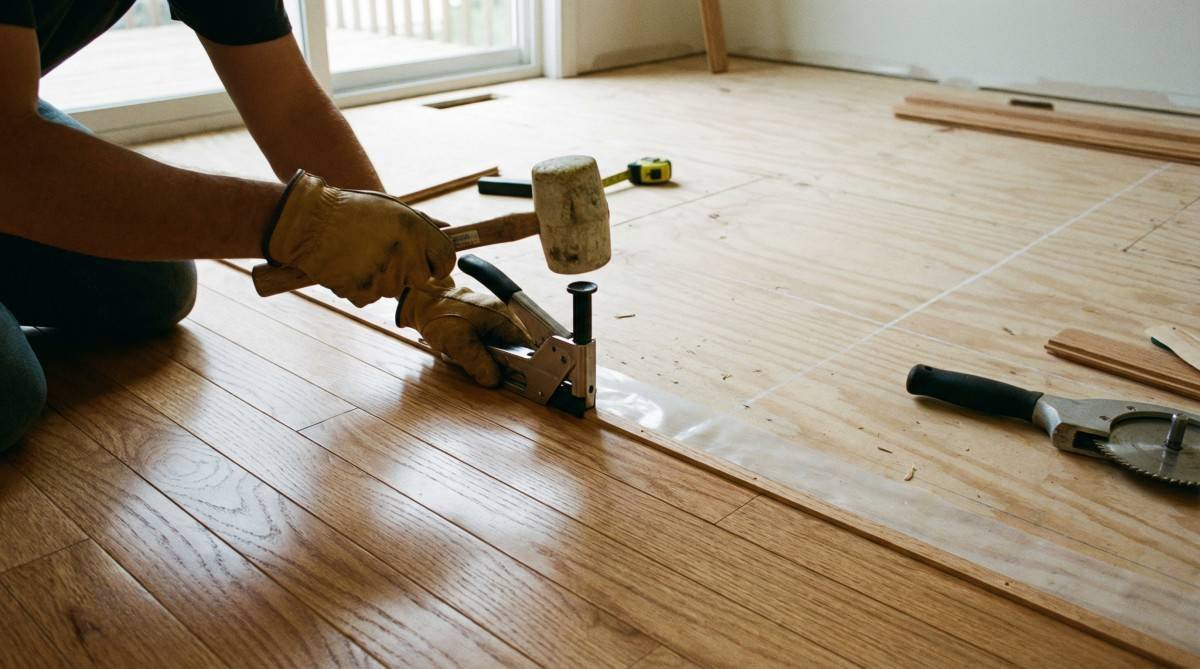
For a successful DIY install, homeowners must be prepared to use specialized tools such as a flooring nailer, a miter saw, and a table saw for rip cuts. The nail-down method is the most common for solid wood floors, while engineered wood can often be glued down or installed as a floating floor. According to the National Wood Flooring Association (2024), maintaining a 1/2-inch expansion gap around the perimeter of the room is essential for allowing the floor to move naturally with seasonal changes.
Choosing a professional installer is often the best choice for large or complex projects, such as installing wood floors on stairs or in rooms with multiple angles. Professionals also have the experience to handle moisture-related issues and ensure that the subfloor is perfectly prepared before any wood is laid. Regardless of the chosen path, the quality of the installation will ultimately determine the longevity and beauty of the wood floor for years to come.
Long-Term Maintenance and Sustainability of Wood Floors
Maintaining your wood flooring and installation requires a consistent cleaning routine and periodic refinishing to preserve its beauty and durability. By using a pH-neutral cleaner and avoiding excessive water, you can protect the finish and extend the lifespan of your floor for generations. Sustainability is also a key consideration for eco-conscious homeowners.
The longevity of wood flooring is one of its most attractive features, as it can be sanded and refinished multiple times to restore its original luster. For homeowners looking to maximize their investment, a long-term maintenance roadmap is essential. Daily cleaning should involve sweeping or vacuuming with a hard-floor setting to remove abrasive dust and debris. Monthly deep cleaning with a specialized wood floor cleaner will help to maintain the finish and prevent the buildup of grime.
Sustainability is a growing concern for many homeowners, and choosing FSC-certified wood ensures that the material is sourced from responsibly managed forests. According to the Forest Stewardship Council (2023), choosing wood flooring with this certification helps to protect the environment and support local communities. This commitment to sustainability is an important consideration for any homeowner looking to invest in high-quality wood flooring and installation.
For a comprehensive maintenance schedule, homeowners can follow the roadmap below to ensure their wood floors remain in peak condition for years to come.
| Frequency | Maintenance Task |
|---|---|
| Daily | Sweep or vacuum with a soft-bristle brush or hard-floor setting to remove dust and grit. |
| Weekly | Use a microfiber mop with a pH-neutral wood floor cleaner for a light surface clean. |
| Monthly | Deep clean with a specialized wood floor cleaner to remove any buildup of grime or residues. |
| Yearly | Inspect for signs of wear or damage, and apply a maintenance coat if necessary. |
| 10-15 Years | Sand and refinish the floor to restore its original appearance and protect the wood. |
By following this maintenance schedule and choosing sustainable wood species, homeowners can enjoy the timeless beauty of their wood flooring while also contributing to a healthier environment. This long-term commitment to care and sustainability is the key to a successful wood flooring and installation project.
Frequently Asked Questions
How much does wood flooring and installation cost?
The total cost of wood flooring and installation typically ranges from $6 to $15 per square foot, depending on the wood species and labor complexity. Solid hardwood is often more expensive to install than engineered wood due to the specialized tools and time required.
How long does the acclimation process take?
The acclimation process for wood flooring generally takes three to seven days, depending on the moisture content of the wood and the home’s humidity. This allows the boards to reach equilibrium with the indoor environment, preventing gaps or cupping after installation.
Can wood flooring be installed over radiant heat?
Engineered wood flooring is the best choice for installation over radiant heat systems because its multi-layer construction resists warping from temperature changes. Solid wood is not recommended for this application as it is more prone to shrinking and cracking when exposed to direct heat.
What is the best wood species for high-traffic areas?
Oak, hickory, and maple are excellent wood species for high-traffic areas because of their high Janka hardness ratings and dense grain patterns. These species resist dents and scratches better than softer woods like pine or cherry, making them ideal for hallways and kitchens.
How do I fix minor scratches in my new wood floor?
Minor scratches in a wood floor can often be repaired using a matching wood touch-up pen or a small amount of wood filler. For deeper scratches, light sanding and a fresh coat of finish may be required to restore the surface to its original condition.
Is underlayment always necessary for hardwood?
Underlayment is necessary for most wood flooring and installation projects to provide a moisture barrier and sound insulation. While some engineered floors come with a pre-attached underlayment, solid wood typically requires a layer of asphalt-saturated felt or a specialized vapor barrier.
Conclusion
The enduring value of wood flooring and installation lies in its unique combination of natural beauty, structural durability, and long-term sustainability. Whether you choose the classic appeal of solid hardwood or the versatile stability of engineered planks, a successful project depends on meticulous subfloor preparation and a commitment to proper maintenance. By understanding the technical requirements of wood flooring and following a consistent care routine, homeowners can ensure that their floors remain a stunning and valuable feature of their home for generations. Whether you opt for a professional installation or a DIY approach, the result is a timeless investment that enhances the quality and character of any living space.