Restaining hardwood floors is one of the most transformative home improvement projects a homeowner can undertake. Whether you are breathing new life into a century-old Victorian or simply updating the aesthetic of a modern suburban home, the process of stripping away years of wear and applying a fresh, vibrant stain can completely redefine a living space. While the task may seem daunting, a systematic approach to sanding, staining, and sealing allows even a dedicated DIY enthusiast to achieve results that rival professional services. This guide provides a comprehensive roadmap to mastering the art of floor restoration, ensuring your hardwood surfaces remain a stunning focal point for decades to come.
Essential Preparation and Tool Selection
Successful floor restaining begins with rigorous preparation and selecting professional-grade tools like drum sanders and high-quality stains. Ensuring the room is clear, dust-sealed, and the wood is properly assessed via a water test determines the project’s ultimate durability and aesthetic finish. Before any sanding begins, every piece of furniture, window treatment, and rug must be removed to provide an unobstructed workspace. Sealing air vents and doorways with plastic sheeting is equally critical to prevent the fine dust generated during sanding from infiltrating the rest of the home’s ventilation system and living areas.
The first technical step is performing a water droplet test to evaluate the current state of the floor’s protective seal. According to Home Depot (2025), a water test is the most reliable way to check if a floor needs a full refinish [1]. By splashing a few drops of water on a high-traffic area, you can quickly determine the wood’s condition: if the water beads, the existing finish is still intact and may only require a deep clean; if it soaks in immediately, the wood is exposed and requires a full restaining process to prevent moisture damage and rot.
Selecting the right equipment is the difference between a smooth, professional-looking floor and one marred by uneven patches and swirl marks. A standard DIY toolkit for this project includes a heavy-duty drum sander for the main floor areas, an edge sander for perimeter work, and a variety of sandpaper grits ranging from coarse to fine. While renting these tools can be more cost-effective than purchasing them, it is essential to familiarize yourself with their operation on a piece of scrap plywood before attempting to use them on your actual flooring.
| Tool Category | DIY Rental Option | Professional Standard | Purpose |
|---|---|---|---|
| Main Sander | Drum Sander | Belt Sander | Removing old finish and leveling wood |
| Edge Work | Orbital Edge Sander | Disc Edger | Sanding corners and wall perimeters |
| Final Buffing | Pole Sander | Industrial Floor Buffer | Smoothing out sanding marks |
| Dust Control | Shop Vacuum | Integrated Dust Containment | Maintaining a clean workspace |
| Application | Foam Applicator | Lambswool Applicator | Applying stain and sealer evenly |
The Multi-Stage Sanding Process
Sanding is a progressive multi-stage process involving coarse (36-40 grit), medium (60-80 grit), and fine (100-120 grit) sandpaper to remove old finishes and level the wood. Precision at this stage is critical, as any missed spots or swirl marks will be magnified once the new stain is applied. This stage of the process is often the most labor-intensive and requires a steady hand to avoid gouging the wood with the heavy-duty drum sander. Each round of sanding should be followed by a thorough cleaning of the floor to remove all dust and debris, which can otherwise interfere with the next stage of the sanding process.
The rough sanding phase uses coarse 36-40 grit sandpaper to strip away the old finish and any surface imperfections. Working with the grain of the wood in manageable sections, the drum sander should be moved slowly and steadily across the floor. According to HGTV (2025), skipping sandpaper grits is the most common cause of uneven floor finishes [2]. By progressing from coarse to medium and then fine grit, you ensure that the deep scratches left by the initial sanding are gradually smoothed out, resulting in a perfectly level surface that is ready for staining.
For areas that the large drum sander cannot reach, such as corners and along the baseboards, an edge sander or orbital sander is used. This requires the same progression of sandpaper grits to ensure a uniform finish across the entire floor. Once the final sanding with 100-120 grit paper is complete, the floor should be buffed with a fine-grit screening pad to remove any minor unevenness and sanding marks. This final step is what gives the floor its professional-quality look and ensures the stain will penetrate the wood evenly.
Mastering the Art of Staining and Sealing
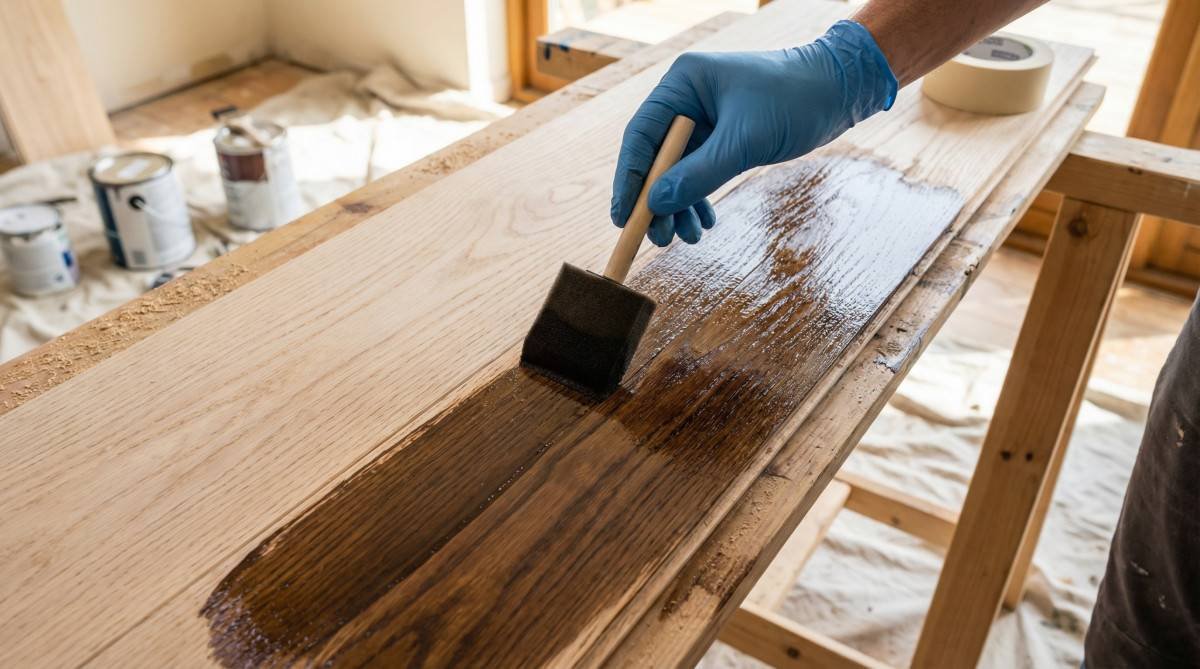
Applying stain requires working in small sections with the wood grain to ensure even penetration and avoid lap marks. Once the desired color is achieved and fully dried, multiple coats of polyurethane sealer are applied to provide a protective, long-lasting barrier against daily wear and moisture. This stage of the process is where the floor’s new aesthetic truly begins to take shape, as the stain brings out the natural beauty and grain of the wood. It is essential to work in a well-ventilated area and wear a respirator mask to protect yourself from the harmful vapors emitted by the stain and sealer.
Choosing the right type of finish is a critical decision that will affect both the appearance and durability of your floors. According to Benjamin Moore (2024), oil-based polyurethanes offer a deeper amber glow but require longer drying times compared to water-based alternatives [3]. Water-based finishes, on the other hand, dry more quickly and have lower VOC emissions, making them a more environmentally friendly choice for many homeowners. Regardless of the finish you choose, applying multiple thin coats is always better than one thick coat, as it allows for a more even and durable protective layer.
For a more professional-looking finish, some DIYers use a technique called water popping before applying the stain. This involves lightly spraying the floor with a mixture of water and denatured alcohol to raise the wood grain, which allows the stain to penetrate more deeply and evenly. This technique is particularly effective on woods like maple or pine, which can sometimes be difficult to stain evenly. Once the stain has been applied and allowed to dry for at least 24 hours, the first coat of sealer can be applied, followed by additional coats as needed to achieve the desired level of protection and shine.
Troubleshooting Common DIY Restaining Mistakes
Common restaining errors like swirl marks, bleeding at the edges, or uneven color can often be fixed by re-sanding the affected area or adjusting the application pressure. Understanding these pitfalls before starting allows DIYers to achieve a professional-grade result without the professional price tag. One of the most frequent issues encountered by novice restainers is the appearance of swirl marks, which are typically caused by a drum sander being held in one spot for too long or by skipping sandpaper grits. These marks can be corrected by re-sanding the area with a medium-grit sandpaper and then progressing through the finer grits to smooth out the wood.
Another common mistake is bleeding at the edges, which occurs when too much stain is applied to the perimeter of the room, causing it to seep into the wood’s grain and create a dark, uneven border. To prevent this, it is essential to work in small sections and wipe away any excess stain immediately. If bleeding does occur, the affected area can be lightly sanded and restained to match the rest of the floor. Uneven color can also be a problem, especially on woods like pine or maple, which can be prone to blotchiness. This can often be avoided by using a wood conditioner before staining or by applying the stain in multiple thin coats to achieve a more uniform appearance.
Cost Analysis: DIY vs. Professional Restaining
While DIY restaining can save homeowners up to 75% in labor costs, the investment in rental equipment and high-quality materials typically ranges from $500 to $1,000 for a standard room. Professional services, conversely, average $3 to $8 per square foot but offer specialized dust-containment systems and guaranteed results. For a typical 200-square-foot room, a professional restaining job could cost anywhere from $600 to $1,600, depending on the complexity of the project and the quality of the materials used. This includes the cost of labor, materials, and any necessary repairs to the floor.
In contrast, a DIY restaining project for the same room would likely cost between $200 and $500, including the cost of renting a drum sander and edge sander, purchasing sandpaper, stain, and sealer. While the savings are significant, it is important to factor in the time and effort required to complete the project, which can take several days of intensive labor. For many homeowners, the satisfaction of completing the project themselves and the substantial cost savings make DIY restaining a highly attractive option. However, for those with limited time or experience, hiring a professional may be the better choice to ensure a high-quality, long-lasting finish.
Frequently Asked Questions
Is it cheaper to restain or replace hardwood floors?
Restaining is significantly more cost-effective than replacing hardwood floors, typically costing between $3 and $8 per square foot for professional services, while new hardwood installation can range from $10 to $20 per square foot.
Can I restain hardwood floors without sanding?
While some products claim to restain floors without sanding, a full sanding process is necessary to remove the old finish and ensure the new stain penetrates the wood evenly for a durable and professional-looking result.
How much does it cost to restain hardwood floors?
The cost to restain hardwood floors varies depending on whether you do it yourself or hire a professional. DIY projects typically cost between $200 and $500 for a standard room, while professional services can range from $600 to $1,600 or more.
How long does it take to restain hardwood floors?
A typical restaining project can take anywhere from three to five days to complete, including the time required for sanding, staining, and multiple coats of sealer to dry properly.
Can you restain hardwood floors a lighter color?
Yes, it is possible to restain hardwood floors a lighter color, but it requires a thorough sanding process to remove all traces of the previous darker stain and may involve using a wood bleach or a specialized light-colored stain.
Conclusion
Restaining hardwood floors is a rewarding DIY project that can dramatically enhance the beauty and value of your home. By following a systematic approach to preparation, sanding, staining, and sealing, you can achieve professional-grade results that will last for years to come. Whether you choose to do it yourself or hire a professional, the investment in restoring your hardwood floors is well worth the effort, providing a stunning and durable surface that will be a source of pride for any homeowner. With the right tools, materials, and a bit of patience, you can transform your tired, worn-out floors into a beautiful focal point that defines your living space.
References
[1] Home Depot (2025), “How to Refinish Hardwood Floors”
[2] HGTV (2025), “DIY Guide: Refinishing Hardwood Floors”
[3] Benjamin Moore (2024), “A Pro’s Guide to Refinishing Hardwood Floors”