A clogged or malfunctioning sink drain plug can quickly turn a minor inconvenience into a major household headache. Whether you’re dealing with slow drainage, an unpleasant odor, or simply need to clean accumulated grime, knowing how to properly remove your sink drain plug is an essential DIY skill says Campus Connection Coburg. This comprehensive guide will walk you through the process, covering various types of drain stoppers, the tools you’ll need, and step-by-step instructions to ensure a smooth and successful removal. We’ll also delve into troubleshooting common issues and provide valuable tips for cleaning and maintenance, empowering you to tackle this common plumbing task with confidence and ease.
1. Understanding Different Types of Sink Drain Plugs
Sink drain plugs come in various designs, each requiring a specific removal approach. Understanding the type of stopper you have—such as pop-up, lift-and-turn, push-and-pull, flip-it, or strainer basket—is the crucial first step before attempting any removal or maintenance. This guide will detail the unique characteristics and removal methods for each common type, ensuring you approach your plumbing task with confidence and the correct technique.
Pop-Up Stoppers
Pop-up stoppers are perhaps the most common type found in bathroom sinks. They are characterized by a small knob or lever, usually located behind the faucet, which controls the stopper’s up-and-down movement. Beneath the sink, a pivot rod connects this lever to the stopper itself. When the lever is pulled up, the pivot rod pushes the stopper down to seal the drain; when pushed down, the stopper rises to allow water to drain. Their mechanism involves several interconnected parts, making their removal slightly more involved than simpler designs.
Lift-and-Turn Stoppers
Lift-and-turn stoppers are often found in older bathroom sinks and some bathtubs. These stoppers feature a small knob on top that you lift and then turn to lock the stopper in either the open or closed position. The mechanism is self-contained within the drain opening, meaning there are typically no external rods or levers beneath the sink. Removal usually involves unscrewing the knob and then the stopper itself from a threaded post within the drain.
Push-and-Pull Stoppers
Similar to lift-and-turn stoppers, push-and-pull stoppers also have a knob on top. However, instead of turning, you simply push down on the knob to close the drain and pull up to open it. Like lift-and-turn models, their mechanism is usually self-contained, making their removal straightforward and often tool-free. These are frequently seen in modern bathroom sinks due to their minimalist design and ease of use.
Flip-It Stoppers
Flip-it stoppers, sometimes called toe-touch or foot-lock stoppers, are operated by pressing down on the stopper with your toe or finger. One press closes the drain, and another press opens it. These stoppers are also self-contained and typically screw into the drain opening. Their removal often involves unscrewing the top cap and then the main body of the stopper from its threaded base.
Strainer Basket Stoppers
Commonly found in kitchen sinks, strainer basket stoppers serve a dual purpose: they prevent large food particles from entering the drain and can also be used to seal the drain for filling the sink. These stoppers usually consist of a removable basket with small holes and a rubber seal. They are often simply lifted out of the drain opening, though some may have a central post that screws into the drain. Their primary function is practical debris management rather than water retention for extended periods.
2. Essential Tools and Materials for Safe and Effective Removal
Before beginning the removal process for any sink drain plug, gathering the right tools and materials is paramount for both safety and efficiency. Basic plumbing tools like adjustable wrenches and pliers are often necessary, alongside household items such as a bucket, towels, and cleaning supplies. Having these items readily available will streamline the process, prevent potential damage, and ensure a clean workspace, making your drain plug removal a smoother experience.
To ensure a smooth and safe removal process, it is highly recommended to have the following tools and materials on hand. The specific items needed may vary slightly depending on the type of drain plug you are removing, but this comprehensive list covers most scenarios. Proper preparation can significantly reduce frustration and prevent potential damage to your plumbing system.
| Tool/Material | Purpose | Notes |
|---|---|---|
| Adjustable Wrench | Loosening and tightening nuts (e.g., pivot nut, P-trap connections) | Essential for most pop-up and some strainer basket stoppers. |
| Pliers (Channel Locks, Needle-Nose) | Gripping and turning stubborn components, disconnecting spring clamps | Channel locks provide better grip for larger nuts; needle-nose for small parts. |
| Flathead Screwdriver | Prying up stuck stoppers, unscrewing small mechanisms (e.g., flip-it stoppers) | Useful for various stopper types and minor adjustments. |
| Bucket and Towels | Catching water and debris, protecting the cabinet beneath the sink | Always place a bucket under the P-trap before disconnecting any pipes. |
| Cleaning Supplies | Cleaning the stopper and drain components (white vinegar, baking soda, old toothbrush) | Helps remove grime, soap scum, and mineral deposits. |
| Plumber’s Putty | Creating a watertight seal during reinstallation | Necessary if you are reinstalling the drain assembly or replacing the stopper. |
| Safety Gloves and Eye Protection | Protecting hands from grime and chemicals, shielding eyes from splashes | Recommended for all plumbing tasks. |
Having these items organized and within reach before you start will make the entire process more efficient and less prone to unexpected delays. It also ensures that you can address any minor issues that may arise during the removal or reinstallation of your sink drain plug.
3. Step-by-Step Guide to Removing a Pop-Up Sink Drain Plug
Removing a pop-up sink drain plug typically involves a series of straightforward steps beneath the sink, focusing on disconnecting the pivot rod mechanism. This common type of stopper is linked to a lever that controls its movement, and access to the under-sink assembly is usually required. By carefully locating and detaching the spring clamp, extension bar, and pivot nut, the stopper can be easily lifted out from above, allowing for cleaning or replacement.
The pop-up drain plug system, prevalent in many bathroom sinks, operates through a mechanical linkage that connects the visible stopper in the basin to a lift rod, usually located behind the faucet. This lift rod extends down into the cabinet beneath the sink, where it connects to a horizontal pivot rod. The pivot rod, in turn, passes through the drainpipe and engages with a hole in the bottom of the stopper. Understanding this basic mechanism is key to a successful removal.
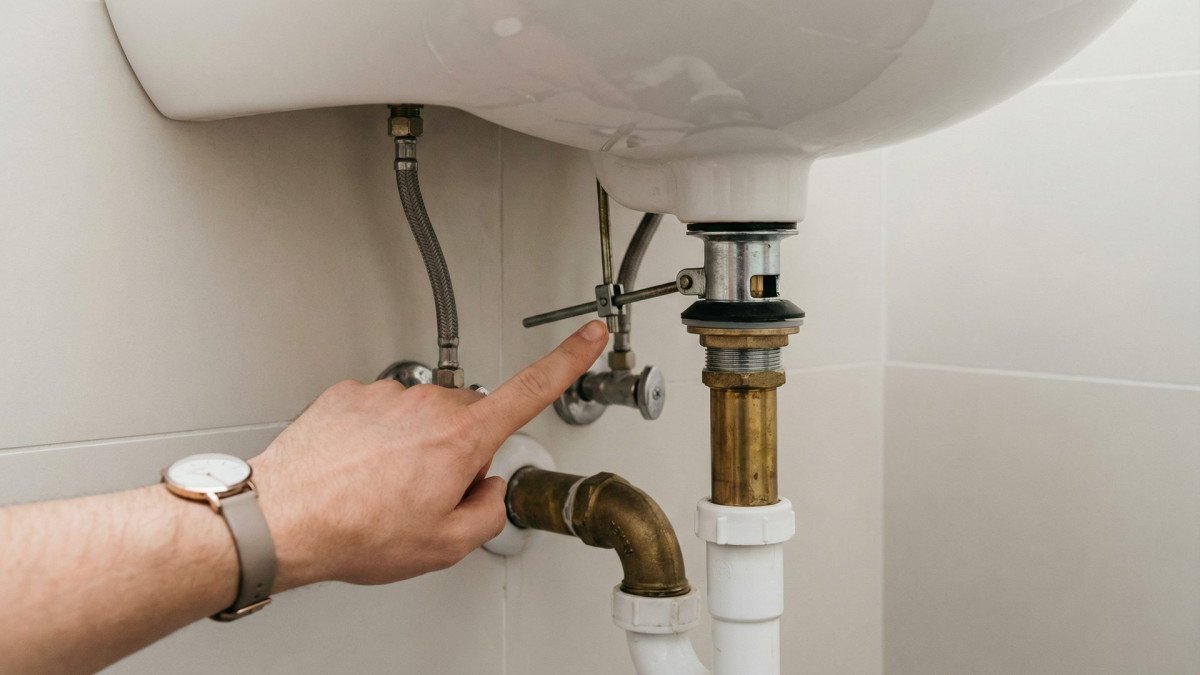
Locating the Pivot Rod and Clevis
Begin by looking directly under your sink, behind the drainpipe. You should see a horizontal rod, known as the pivot rod, extending from the drain assembly. This rod is often connected to a vertical strap or bar, called a clevis, which has several holes. The clevis is then connected to the lift rod that goes up to the faucet. Familiarize yourself with these components before proceeding.
Disconnecting the Spring Clamp and Extension Bar
The pivot rod and clevis are typically held together by a small, V-shaped spring clamp. Pinch the two ends of this spring clamp together to release it from the clevis and the extension bar. Once the clamp is removed, gently pull the extension bar free from the pivot rod. It’s advisable to keep all disconnected parts in a safe place, as you will need them for reassembly.
Unscrewing the Pivot Nut
The pivot rod passes through a small opening in the drainpipe and is secured by a pivot nut. This nut prevents water from leaking out around the pivot rod. Using an adjustable wrench or pliers, carefully unscrew the pivot nut by turning it counter-clockwise. Be prepared for a small amount of water to drip out once the nut is loosened, so have your bucket and towels ready. Once the nut is completely removed, gently pull the pivot rod straight out from the drainpipe.
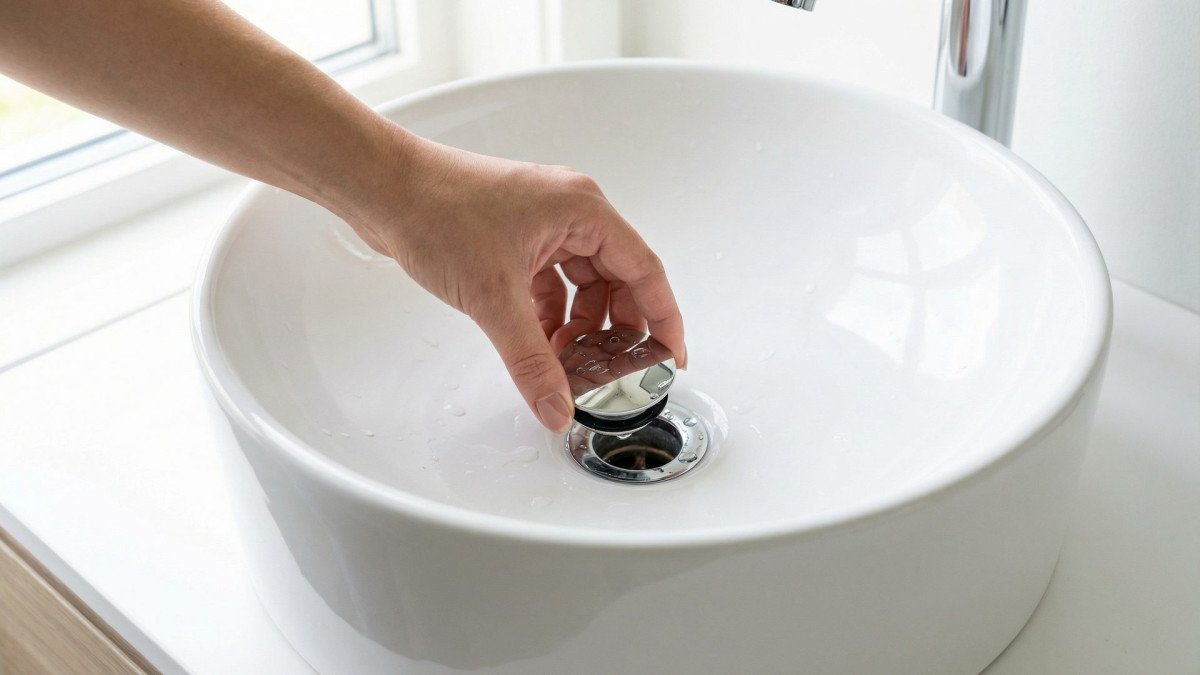
Lifting Out the Stopper
With the pivot rod completely removed, the pop-up stopper inside the sink basin is no longer held in place. You can now simply reach into the sink and lift the stopper straight out. If it feels a bit stuck due to grime or suction, a gentle wiggle or a slight prying motion with a flathead screwdriver around the edge should free it. Once removed, you can proceed with cleaning or replacement as needed.
4. How to Remove Lift-and-Turn and Push-and-Pull Sink Drain Plugs
Lift-and-turn and push-and-pull sink drain plugs are simpler to remove than pop-up mechanisms, often requiring no tools and minimal effort. Lift-and-turn stoppers typically involve twisting the stopper counter-clockwise while lifting, while push-and-pull types can usually be removed by simply pulling them straight up. These designs are popular for their ease of use and maintenance, making their removal a quick task for routine cleaning or replacement.
These types of stoppers are common in both bathroom and some kitchen sinks, valued for their straightforward operation and ease of cleaning. Unlike pop-up stoppers, they do not rely on an external lever or complex under-sink mechanisms, making their removal a much simpler process that most homeowners can accomplish without specialized tools.
Twisting and Lifting for Lift-and-Turn Stoppers
To remove a lift-and-turn drain stopper, begin by ensuring the stopper is in the open position. Grasp the knob or cap at the top of the stopper. While gently lifting, twist the stopper counter-clockwise. This action will disengage the threaded post that secures the stopper within the drain opening. Continue to twist and lift until the stopper is completely free from the drain. If it feels stiff, some gentle wiggling or a small amount of penetrating oil might help loosen any accumulated grime or mineral deposits.
Pulling Straight Up for Push-and-Pull Stoppers
Push-and-pull stoppers are even simpler to remove. With the stopper in the open (up) position, firmly grasp the knob or cap. Apply a steady, upward pull. These stoppers are typically held in place by friction or a simple spring mechanism that releases with a direct pull. There are no threads to unscrew or complex linkages to disconnect. Once pulled free, the stopper can be cleaned or replaced as needed. If it resists, check for any visible screws or retaining clips that might be holding it in place, though this is less common for this type.
5. Removing Flip-It and Strainer Basket Sink Drain Plugs
Flip-it and strainer basket sink drain plugs represent two distinct categories, each with unique removal procedures. Flip-it stoppers, often hinged, can usually be removed by prying them up with a flathead screwdriver or by unscrewing a small mechanism. Strainer basket stoppers, common in kitchen sinks, are typically lifted out or unscrewed from beneath the sink. Understanding these specific methods ensures proper handling and prevents damage during removal.
These two types of drain plugs are often found in different sink environments—flip-it stoppers in bathrooms for their aesthetic appeal and ease of use, and strainer basket stoppers predominantly in kitchen sinks for their practical function in managing food waste. Their removal methods reflect their design and primary purpose.
Prying with a Flathead Screwdriver for Flip-It Stoppers
Flip-it stoppers, also known as toe-touch or foot-lock stoppers, are characterized by their spring-loaded mechanism that allows them to be opened and closed with a simple press. To remove a flip-it stopper, first ensure it is in the open (up) position. Carefully insert a flathead screwdriver under the rim of the stopper and gently pry upwards. Some flip-it stoppers may have a central screw that needs to be unscrewed before prying. Once the stopper is slightly lifted, you can usually grasp it and pull it straight out. Be gentle to avoid scratching the sink basin.
Lifting or Unscrewing for Strainer Basket Stoppers
Strainer basket stoppers are a staple in kitchen sinks, designed to catch food particles and prevent clogs. Most basic strainer baskets can be removed by simply lifting them out of the drain opening. They often have a small handle or a central post for easy gripping. For more secure strainer baskets, particularly those with a central post that screws into the drain, you may need to unscrew the post by hand or with a screwdriver. In some cases, the entire strainer assembly might be secured by a large nut beneath the sink, similar to a pop-up drain, requiring an adjustable wrench for removal. Always check for any visible fasteners before attempting to force a removal.
6. Troubleshooting Common Issues During Drain Plug Removal
Encountering difficulties during sink drain plug removal is common, with issues ranging from stuck pivot nuts to corroded components. Addressing these problems effectively often requires patience and the right technique, such as applying penetrating oil to rusted parts or using specialized tools for stripped screws. Knowing how to troubleshoot these challenges can prevent further damage and save you from calling a professional plumber, ensuring a successful DIY repair.
Even with the right tools and knowledge, plumbing tasks can present unexpected challenges. A stuck or corroded component can quickly turn a simple removal into a frustrating ordeal. Here are some common issues you might encounter and how to effectively address them.
Stuck Pivot Nuts and Corroded Components
One of the most frequent problems encountered when removing pop-up drain plugs is a pivot nut that is seized due to corrosion or overtightening. If the nut won’t budge with an adjustable wrench or pliers, apply a penetrating oil (like WD-40) to the threads and let it sit for 15-30 minutes. This can help break down rust and lubrication. For severely corroded nuts, gentle tapping with a hammer on the wrench handle can sometimes help, but be cautious not to damage the drainpipe. In extreme cases, a nut splitter might be necessary, but this should be a last resort as it can damage the pipe.
Stripped Screws and Broken Stopper Parts
If you encounter a stripped screw, particularly on a clevis or a flip-it stopper mechanism, try using a screw extractor kit. These kits are designed to remove screws with damaged heads. Alternatively, if the screw head is still somewhat intact, a rubber band placed between the screwdriver and the screw head can sometimes provide enough grip to turn it. If a stopper part breaks during removal, it often means the component was already weakened by age or corrosion. In such cases, it’s usually best to replace the entire stopper assembly rather than attempting a repair, as a compromised part can lead to leaks or future malfunctions.
When to Consider Professional Help
While many drain plug removal issues can be resolved with DIY methods, there are instances when calling a professional plumber is the wisest course of action. If you encounter significant leaks that you cannot stop, if pipes appear to be severely damaged, or if you are unable to remove a component after multiple attempts, it’s time to seek expert assistance. Plumbers have specialized tools and experience to handle complex situations without causing further damage to your plumbing system, ultimately saving you time and potentially costly repairs.
7. Cleaning and Maintenance After Drain Plug Removal
Once a sink drain plug is removed, thorough cleaning and regular maintenance are essential to prevent future clogs and maintain optimal drainage. Soaking the stopper in white vinegar or a baking soda solution effectively breaks down grime and mineral deposits, while scrubbing with an old toothbrush ensures all debris is removed. Implementing a routine cleaning schedule significantly extends the lifespan of your drain plug and keeps your sink functioning smoothly.
Removing the drain plug provides an excellent opportunity to perform a deep clean of both the stopper and the drain opening itself. This not only improves hygiene but also helps prevent future blockages and unpleasant odors. Regular cleaning is a simple yet effective way to maintain your sink’s functionality and appearance.
Soaking the Stopper in Vinegar or Baking Soda Solution
For stoppers covered in soap scum, hair, and mineral deposits, a good soak can work wonders. Fill a bowl with white vinegar and submerge the stopper for at least 30 minutes, or even overnight for heavily soiled stoppers. Vinegar is a natural disinfectant and an effective agent for dissolving mineral buildup. Alternatively, a paste made from baking soda and a small amount of water can be applied to the stopper, allowed to sit, and then scrubbed off. For an even more potent cleaning solution, combine equal parts white vinegar and hot water.
Scrubbing with a Toothbrush for Thorough Cleaning
After soaking, use an old toothbrush or a small brush to thoroughly scrub all surfaces of the drain stopper. Pay close attention to crevices, rubber seals, and any moving parts where grime tends to accumulate. This mechanical action, combined with the cleaning solution, will dislodge stubborn debris and leave your stopper sparkling clean. Rinse the stopper thoroughly under running water to remove any remaining cleaning solution and loosened particles.
Tips for Preventing Future Clogs and Buildup
Preventative maintenance is key to avoiding frequent drain plug removals. Consider installing a hair catcher in bathroom sinks to trap hair before it enters the drain. In kitchen sinks, always scrape food scraps into the trash before rinsing dishes. Regularly flush drains with hot water, and occasionally pour a mixture of baking soda and vinegar down the drain, followed by hot water, to help break down grease and minor clogs. These simple habits can significantly reduce the frequency of drain issues and prolong the life of your plumbing.
8. Reinstalling Your Sink Drain Plug (Optional)
Reinstalling a sink drain plug, while optional if replacing with a new unit, is a straightforward process that ensures proper function and prevents leaks. This typically involves reassembling the pivot rod and clevis, tightening the pivot nut, and applying plumber’s putty for a secure seal. Proper reinstallation is crucial for maintaining water retention and preventing drainage issues, ensuring your sink operates as intended.
Whether you are reinstalling the original cleaned stopper or a new replacement, the process is largely the reverse of removal. Careful attention to detail during reassembly will prevent leaks and ensure the stopper operates smoothly. This section focuses on the reinstallation of a pop-up style drain plug, as it involves the most components.
Reassembling the Pivot Rod and Clevis
Begin by inserting the cleaned or new pop-up stopper into the drain opening from above. From beneath the sink, reinsert the pivot rod through the hole in the drainpipe, ensuring it engages with the loop or hole at the bottom of the stopper. Slide the pivot nut back onto the pivot rod and hand-tighten it. Next, reattach the extension bar to the pivot rod and secure it with the spring clamp. Ensure the clevis is positioned correctly to allow the lift rod to operate the stopper effectively.
Tightening the Pivot Nut and Testing for Leaks
Once all components are in place, use an adjustable wrench to gently tighten the pivot nut. Be careful not to overtighten, as this can damage the nut or the drainpipe, and restrict the movement of the pivot rod. The nut should be snug enough to prevent leaks but still allow the pivot rod to move freely. After tightening, fill the sink with water and let it sit for a few minutes, then check beneath the sink for any signs of leaks around the pivot nut. If leaks are present, tighten the nut slightly more or consider applying plumber’s tape to the threads before re-tightening.
Applying Plumber’s Putty for a Secure Seal
If you removed the entire drain assembly, or if you notice persistent leaks around the top of the drain, you may need to apply plumber’s putty. Roll a small amount of plumber’s putty into a rope and place it around the underside of the drain flange before inserting it into the sink opening. As you tighten the locknut from below, the putty will compress, creating a watertight seal between the drain and the sink basin. Wipe away any excess putty that squeezes out around the edges for a clean finish.
Frequently Asked Questions (FAQ)
Q1: How do I remove a sink stopper that doesn’t have a visible pull rod?
If your sink stopper lacks a visible pull rod, it’s likely a lift-and-turn, push-and-pull, or flip-it type. For lift-and-turn, twist the stopper counter-clockwise while lifting. For push-and-pull, simply pull it straight up. Flip-it stoppers may require gentle prying with a flathead screwdriver or unscrewing a central mechanism. These types are typically self-contained and don’t require accessing under the sink.
Q2: What should I do if the drain nut is stuck or corroded?
A stuck or corroded drain nut can be a challenge. First, try applying a penetrating oil (like WD-40) to the threads and let it soak for 15-30 minutes to help loosen rust. Use an adjustable wrench or pliers, applying steady pressure. Gentle tapping on the wrench with a hammer can sometimes help, but be careful not to damage the pipe. If it still won’t budge, consider calling a professional plumber to avoid further damage.
Q3: What tools are absolutely essential for removing a sink drain plug?
For most sink drain plug removals, essential tools include an adjustable wrench, pliers (channel locks or needle-nose), and a flathead screwdriver. Additionally, a bucket and towels are crucial for catching water and protecting your workspace. For cleaning, white vinegar, baking soda, and an old toothbrush are highly recommended. Safety gloves and eye protection are also advisable for any plumbing task.
Q4: How often should I remove and clean my sink drain plug?
The frequency of cleaning depends on usage, but generally, it’s recommended to remove and clean your sink drain plug every 1-3 months. Sinks with heavy use, such as kitchen sinks or bathroom sinks used by multiple people, may require more frequent cleaning. Regular cleaning prevents the buildup of hair, soap scum, and other debris that can lead to slow drains and unpleasant odors.
Q5: Can I remove a sink drain plug if it’s broken or damaged?
Yes, you can often remove a broken or damaged sink drain plug, though it might require extra care. If parts are broken off, you may need needle-nose pliers to grasp remaining pieces or a flathead screwdriver to pry it out. For severely damaged pop-up stoppers, you might need to access the pivot rod mechanism from beneath the sink. If the plug is completely seized or fragments are falling into the drain, it’s best to proceed cautiously or consult a plumber to prevent further complications.