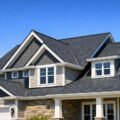
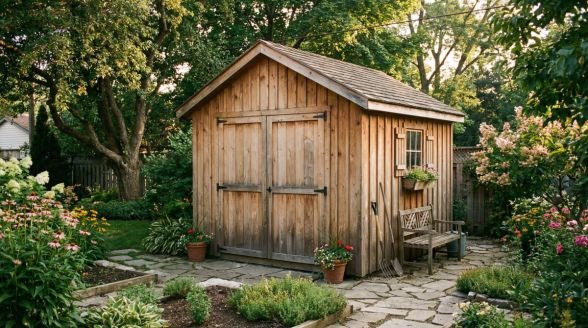
Building a 10×12 shed is one of the most rewarding DIY projects for homeowners who want to increase backyard utility. This 120-square-foot footprint offers a strong balance between generous storage capacity and manageable construction complexity. Whether the plan is for a classic garden shed, a backyard office, or a practical workshop, professional 10×12 shed plans provide the structure needed to support durability and long-term performance, according to USA Real Estate and Property Management team. With a clear step-by-step approach, the finished outbuilding can add both organization and value to the property.
Choosing the Right 10×12 Shed Design for Your Backyard
Selecting a 10×12 design depends on your primary use—storage, workshop, or office—and local zoning laws. Gable roofs offer traditional aesthetics and loft potential, while lean-to styles provide modern looks and simplified drainage. Professional shed building plans 10×12 should always begin with a clear understanding of your site’s requirements and the intended functional modules of the structure.
Gable Roof vs. Lean-To Styles
The choice between a gable roof and a lean-to design is the most significant architectural decision you will make. A gable roof features two sloping sides that meet at a central ridge, providing a classic “house-like” appearance and superior interior headroom. This design is ideal if you plan to incorporate an overhead loft for seasonal storage. In contrast, a lean-to roof consists of a single sloping plane. This style is often preferred for its modern aesthetic and its ability to shed water away from existing structures if the shed is built close to a house or fence. According to Construct101 (2021), lean-to designs are frequently chosen for their simplicity in framing and roofing installation, making them an excellent choice for first-time builders.
Permitting and the 120 Square Foot Rule
Before breaking ground, it is essential to consult your local building department regarding permit requirements. In many North American jurisdictions, outbuildings under 120 square feet do not require a formal building permit, which is precisely why the 10×12 footprint is so popular among DIYers. However, “permit-free” does not mean “regulation-free.” You must still adhere to local setback requirements, which dictate how far the shed must be from property lines and other structures. As noted by iCreatables (2026), failing to verify these local codes can lead to costly fines or the required removal of the structure, regardless of the quality of your shed building plans 10×12.
| Shed Style | Primary Benefit | Best Use Case | Complexity |
|---|---|---|---|
| Classic Gable | Maximum Headroom | Workshop / Loft Storage | Moderate |
| Modern Lean-To | Simple Construction | Garden Tools / Modern Office | Low |
| Gambrel (Barn) | Massive Loft Space | Heavy Storage / Seasonal Gear | High |
| Studio / Modern | Aesthetic Appeal | Home Office / Art Studio | Moderate |
Choosing the right style early in the planning phase allows you to optimize your material purchases and ensure the finished product meets both your functional needs and aesthetic preferences. Whether you opt for the traditional charm of a gable roof or the sleek lines of a modern studio, starting with a validated set of shed building plans 10×12 is the first step toward a successful build.
Essential Materials and Tool Checklist for a 10×12 Build
A standard 10×12 shed requires pressure-treated lumber for the foundation, 2×4 studs for wall framing, and 4×8 siding panels. High-quality shed building plans 10×12 should include a granular shopping list to minimize waste and ensure structural integrity. Selecting the right materials is the foundation of a successful DIY project, and it starts with a clear understanding of the components needed for each phase of the build.
Lumber and Hardware Requirements
The structural stability of your 10×12 shed is largely determined by the quality of the lumber used. For the foundation, 4×4 pressure-treated skids are essential to resist moisture and rot, while 2×6 pressure-treated joists provide a solid base for the floor. Wall framing is typically done with standard 2×4 studs spaced 16 inches on center, which is the industry standard for strength and ease of siding installation. As noted by Shedking (2026), using 3/4-inch tongue-and-groove plywood for the floor decking ensures a rigid surface that can support heavy equipment without flexing. Hardware requirements include 3.5-inch galvanized nails for framing, 2-inch deck screws for the floor decking, and 1.5-inch finishing nails for the exterior trim.
Necessary DIY Tools
To complete a 10×12 shed build, you will need a set of basic power and hand tools. A circular saw is the most important power tool for cutting studs, rafters, and siding to length. A cordless drill or impact driver is necessary for driving screws and securing hardware. For the foundation and framing, a 4-foot level and a framing square are critical to ensure the structure is plumb and square. Additionally, a chalk line and a 25-foot tape measure are essential for accurate layout and marking. Having these tools ready before you begin will streamline the construction process and prevent unnecessary trips to the hardware store.
| Material Category | Item Description | Quantity (Estimated) | Estimated Cost (2026) |
|---|---|---|---|
| Foundation | 4×4 Pressure-Treated Skids | 3 x 12′ | $120 |
| Floor | 2×6 Pressure-Treated Joists | 12 x 10′ | $240 |
| Floor Decking | 3/4″ T&G Plywood | 4 Sheets | $180 |
| Wall Framing | 2×4 Standard Studs | 60 x 8′ | $360 |
| Siding | T1-11 Exterior Siding | 13 Sheets | $650 |
| Roofing | Asphalt Shingles / Underlayment | 5 Bundles | $250 |
| Hardware | Nails, Screws, Hinges, Latch | 1 Set | $150 |
| Total Est. Cost | Full Build Materials | – | $1,950 |
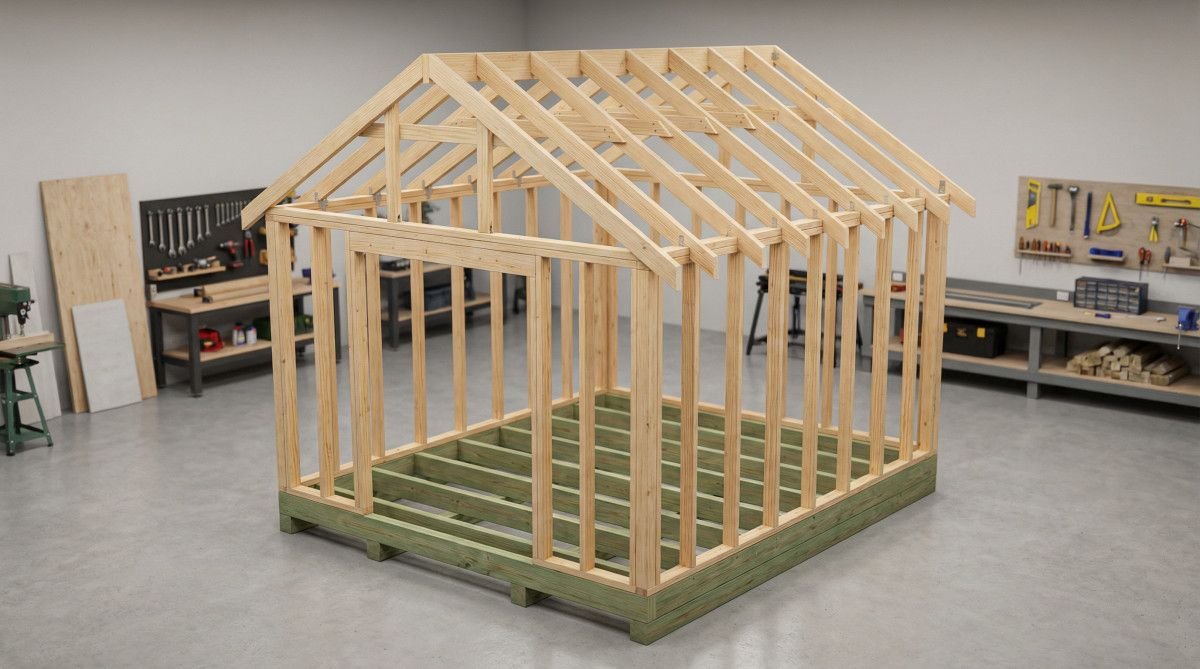
Step-by-Step Construction: From Foundation to Roof
Building a 10×12 shed involves four main phases: setting a level foundation, framing the floor and walls, raising the roof rafters, and installing weather-tight siding. Precision in the initial floor squaring is critical for a professional finish. Each step must be completed with care to ensure the structure remains stable and weather-resistant for years to come.
Foundation and Floor Framing
The first step in constructing your 10×12 shed is to prepare a level site and install the foundation. Most shed building plans 10×12 recommend a skid foundation, which involves placing 4×4 pressure-treated skids on a bed of leveled gravel. Once the skids are in place, the 2×6 floor joists are laid across them and secured with framing nails. It is vital to square the floor frame by measuring the diagonals; both measurements must be identical before you proceed. According to Construct101 (2021), a square foundation is the most critical factor in ensuring that the walls and roof align correctly during the later stages of construction.
Wall Construction and Door Framing
With the floor deck secured, you can begin framing the walls. The front, back, and side walls are typically built flat on the shed floor and then raised into position. Each wall consists of a bottom plate, a double top plate, and 2×4 studs spaced 16 inches apart. Door framing requires the addition of a 2×6 header to support the weight of the roof over the opening. Standard shed building plans 10×12 often feature a 5-foot or 6-foot double door to allow for easy access with large equipment like lawn mowers or snow blowers. Once all four walls are raised, they are nailed together at the corners and secured to the floor joists.
Roofing and Siding Installation
The final structural phase is the installation of the roof and exterior siding. For a gable roof, you will need to cut and install 2×4 rafters with a central ridge board. Each rafter must be notched with a “bird’s mouth” cut to sit securely on the wall plates. After the rafters are in place, the roof is sheathed with 1/2-inch plywood or OSB and covered with roofing felt and asphalt shingles. Finally, the T1-11 siding panels are nailed to the wall studs, ensuring a 1-inch overlap with the floor frame to prevent water from entering the structure. Proper flashing and trim installation around the doors and corners will complete the weather-tight seal and give your shed a professional, finished look.
Advanced Customizations for Workshops and Home Offices
Customizing your 10×12 shed with insulation, electrical wiring, and windows can transform a basic storage unit into a functional workspace. Incorporating these elements during the framing stage ensures a seamless integration and professional aesthetic. When your shed building plans 10×12 include these specialized modules, you can create a high-performance outbuilding that is both comfortable and versatile.
Adding Windows and Natural Light
For a 10×12 shed used as a workshop or office, natural light is essential. Installing two or three double-pane windows on the front and side walls can provide significant illumination and ventilation. When framing for windows, you will need to add a header over the rough opening to support the weight of the roof rafters. Professional shed building plans 10×12 typically specify a 2×4 or 2×6 header depending on the window width. High-quality vinyl windows are a popular choice for their low maintenance and energy efficiency, helping to regulate the interior temperature of the shed.
Insulation and Interior Finishing
If you plan to use your 10×12 shed year-round, insulation is a critical addition. Fiberglass batts or rigid foam boards can be installed between the 2×4 wall studs and roof rafters to provide a thermal barrier. Once the insulation is in place, the interior walls can be finished with 1/2-inch OSB or plywood for a durable workshop finish, or with drywall for a clean office appearance. According to iCreatables (2026), adding a vapor barrier before the interior finishing can prevent moisture buildup and prolong the life of the structure. This level of customization ensures your shed building plans 10×12 result in a space that is as functional as it is attractive.
Frequently Asked Questions
How much would it cost to build a 10×12 shed?
The total cost to build a 10×12 shed in 2026 typically ranges from $1,800 to $2,500 for materials, depending on the quality of the lumber and the complexity of the design. Premium additions like double-pane windows, professional-grade insulation, and specialized siding can increase the total investment.
Is it cheaper to buy or build your own shed?
Building your own shed is significantly more cost-effective than purchasing a pre-fabricated unit of the same quality. While a pre-built 10×12 shed may cost between $4,000 and $6,000, you can build a superior structure for less than half that amount by following professional shed building plans 10×12.
How far apart should floor joists be for a 10×12 shed?
Floor joists for a 10×12 shed should be spaced 16 inches on center. This industry-standard spacing provides the necessary structural support for heavy storage and equipment while ensuring a rigid floor that will not flex or sag over time.
How long should it take to build a 10×12 shed?
For a moderately experienced DIYer, building a 10×12 shed typically takes between 30 and 40 hours of labor. This timeline includes site preparation, foundation work, framing, roofing, and siding installation, and it can be completed over two or three productive weekends.
Do I need a permit for a 10×12 shed?
In many jurisdictions, outbuildings under 120 square feet do not require a building permit. However, you must still comply with local setback regulations and zoning laws. Always verify these requirements with your local building department before starting your shed building plans 10×12 project.
Conclusion
A 10×12 shed is an ideal DIY project that offers a perfect balance of utility, aesthetics, and construction feasibility. By selecting a validated set of shed building plans 10×12, you can ensure that every phase of the project—from the foundation to the final trim—is completed with professional-grade precision. Whether you are building a simple storage unit or a sophisticated backyard office, the 120-square-foot footprint provides a versatile foundation for any outdoor project. With the right materials, a structured approach, and a commitment to quality, you can create a durable and beautiful structure that will serve your needs for many years to come.