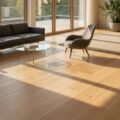
The decision to install wooden floors is one of the most meaningful investments a homeowner can make because it adds both visual elegance and long-term property value. Although a DIY installation may seem intimidating at first, modern materials and refined methods have made the process more accessible. This guide offers a systematic approach to selecting the right method, preparing the workspace, and carrying out a professional-looking installation that stands the test of time, explains Renters Warehouse Milwaukee experts.
Preparing Your Subfloor and Environment
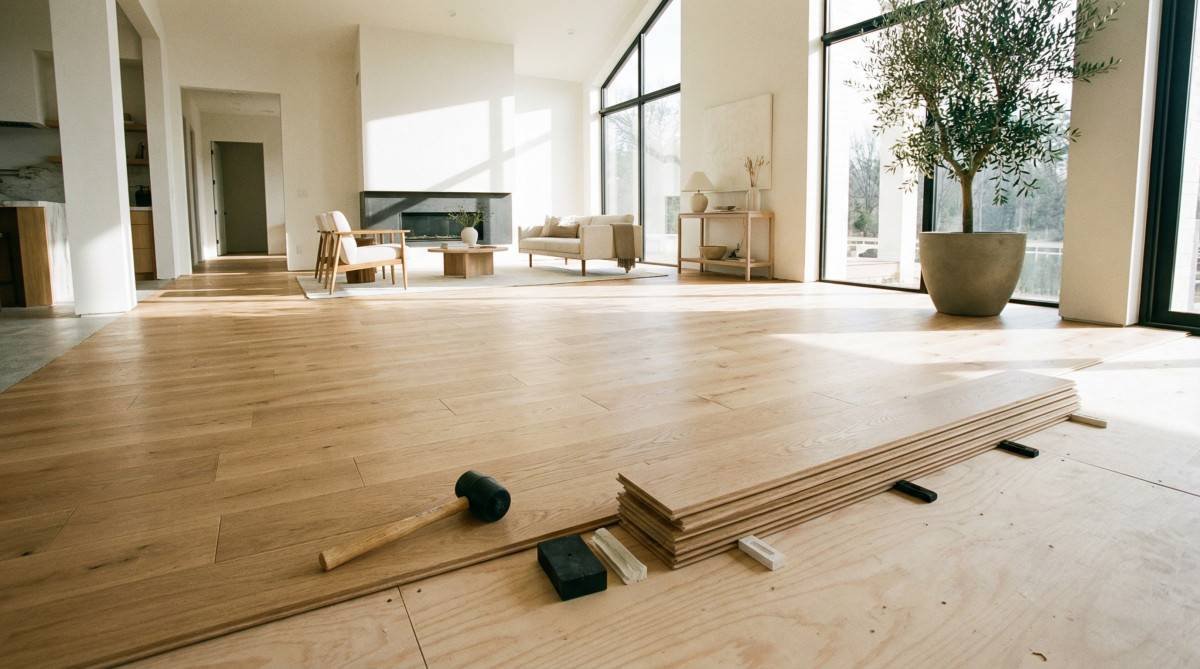
Successful wooden floor installation begins with a clean, level, and dry subfloor, alongside proper wood acclimation. You must ensure the surface is within 1/8-inch levelness over a 10-foot span and allow your planks to acclimate to the room’s humidity for at least 72 hours. This foundational phase is critical because any oversight here will inevitably lead to structural issues like buckling, gapping, or persistent squeaking once the project is finished.
The first step in preparation involves a rigorous assessment of the existing subfloor, whether it is plywood, OSB, or concrete. According to the National Wood Flooring Association (2023), a subfloor must be structurally sound and free of any debris or protruding fasteners that could interfere with the new planks [1]. If you are working with a concrete slab, a moisture test is mandatory to ensure the relative humidity is within the manufacturer’s specified limits. For wooden subfloors, you should sand down high spots and fill low areas with a high-quality leveling compound to create a perfectly flat plane for the installation.
Beyond the physical surface, the environmental conditions of the room play a decisive role in the floor’s stability. Wood is a hygroscopic material, meaning it expands and contracts based on the moisture content of the surrounding air. To prevent excessive movement after installation, you must store the unopened boxes of flooring in the installation room for several days. This acclimation period allows the wood to reach an equilibrium moisture content with its new environment, significantly reducing the risk of post-installation warping or shrinking.
| Preparation Step | Requirement | Purpose |
|---|---|---|
| Subfloor Levelness | 1/8″ over 10 feet | Prevents gapping and squeaks |
| Acclimation Time | 72+ Hours | Stabilizes wood moisture content |
| Moisture Barrier | 15-30 lb Felt or Poly | Protects against subfloor vapor |
| Room Temperature | 65°F – 75°F | Ensures optimal adhesive and wood performance |
Essential Tools and Materials for Installation
Equipping yourself with the right tools, such as a pneumatic flooring nailer, rubber mallet, and moisture barrier, is essential for a professional-grade finish. Most projects require a combination of measuring tools, cutting saws, and safety gear like knee pads and respirators to ensure both precision and personal safety. Without these specialized instruments, the process of fitting and securing each plank becomes significantly more difficult and time-consuming.
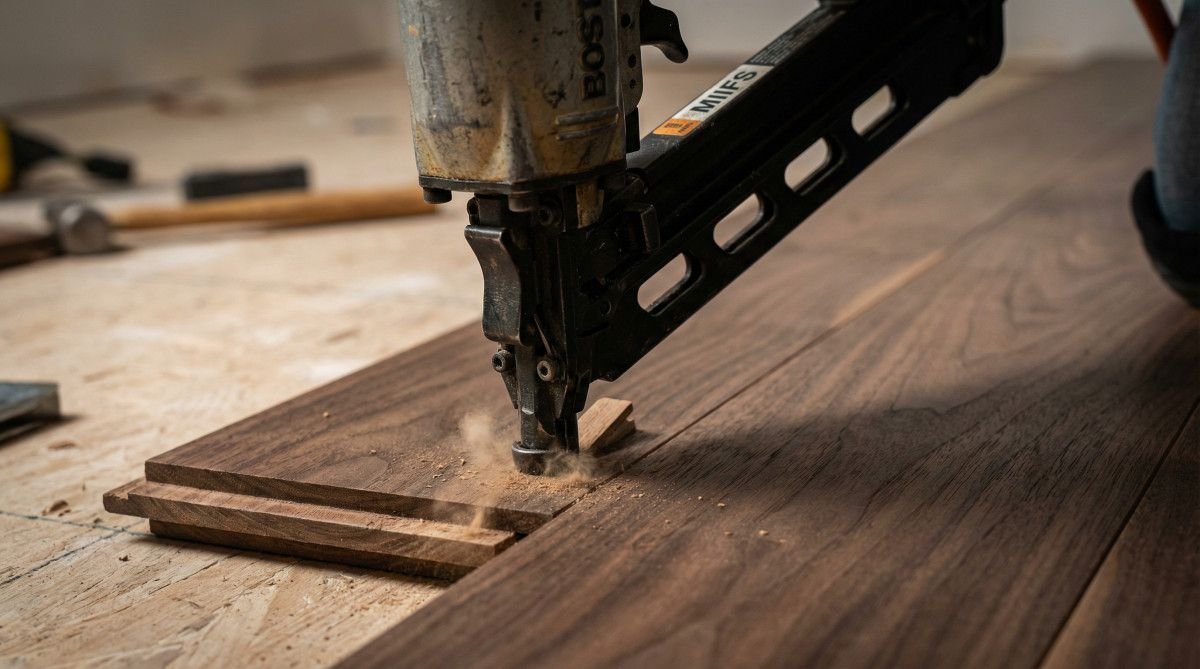
The primary tool for a traditional nail-down installation is the pneumatic flooring nailer, which drives cleats or staples through the tongue of each board at a 45-degree angle. According to Home Depot (2025), a high-quality flooring nailer not only secures the planks but also tightens the joints between rows, ensuring a seamless and durable floor [2]. You will also need a table saw or miter saw for making straight and angled cuts, as well as a jigsaw for navigating around obstacles like door frames or vents.
In addition to power tools, several hand tools are indispensable for a professional finish. A rubber mallet and tapping block allow you to snug the planks together without damaging the wood’s delicate tongue and groove. You should also have a pull bar for tightening the final rows against the wall, where a nailer cannot fit. Safety must be a priority throughout the project, as the dust from cutting wood can be harmful if inhaled. Always wear a NIOSH-approved respirator and use high-quality knee pads to prevent strain during the many hours spent on the subfloor.
| Essential Tool | Primary Function | DIY Recommendation |
|---|---|---|
| Flooring Nailer | Secures planks at 45° angle | Pneumatic for efficiency |
| Tapping Block | Snugs joints without damage | Plastic or wood block |
| Miter Saw | Straight and angled cross-cuts | 10″ or 12″ blade |
| Pull Bar | Tightens final rows near walls | Heavy-duty steel bar |
Step-by-Step Installation Methods
Choosing between nail-down, glue-down, and floating (click-lock) methods depends primarily on your subfloor type and the specific wood product. Nail-down is the standard for solid wood on plywood, while glue-down and click-lock are preferred for engineered wood or concrete surfaces. Each technique has its own set of advantages and challenges, making it crucial to select the one that best fits your skill level and the requirements of your home.
The nail-down method is the most traditional and provides the most permanent and stable floor. For this technique, you must first install a moisture barrier, such as 15-pound asphalt-saturated felt, over the wooden subfloor. According to Lowe’s (2025), you should start by face-nailing the first row along the straightest wall, leaving a 1/2-inch expansion gap for the wood to move naturally [3]. Subsequent rows are blind-nailed through the tongue using a flooring nailer, with the ends of the boards staggered by at least 6 inches to create a strong and visually appealing pattern.
For installations on concrete slabs or where a faster process is desired, the glue-down and floating methods are excellent alternatives. The glue-down method involves spreading a high-quality flooring adhesive with a notched trowel and pressing the boards into the glue. This method is particularly effective for engineered wood, as it provides a solid feel underfoot and prevents the “hollow” sound sometimes associated with floating floors. Floating or click-lock floors, on the other hand, are not attached to the subfloor at all. Instead, the planks click together to form a single, unified surface that rests on a foam or cork underlayment, making it the most DIY-friendly option for many homeowners.
Post-Installation Care and Troubleshooting
Maintaining your new wooden floors involves immediate protection after installation and addressing common issues like gapping or squeaking early. Avoid heavy foot traffic for the first 24 hours and use felt pads on all furniture to prevent scratches and preserve the wood’s finish. This post-installation care is vital for the long-term durability and beauty of your investment.
The first 48 hours after installation are critical for the floor’s stability and finish. According to Wickham Hardwood (2025), you should avoid walking on the floor with heavy footwear or moving heavy furniture for at least two days to allow the wood to settle and any adhesives to fully cure [4]. You should also check the entire floor for any protruding nails or loose boards and address these issues immediately. For floors that have been glued down, ensure that any excess adhesive on the surface is wiped away with a manufacturer-recommended cleaner before it dries.
Even with the most careful installation, some minor issues like gapping or squeaking can occur over time. Gapping is often caused by seasonal changes in humidity, where the wood shrinks in the winter and expands in the summer. You can minimize this by maintaining a consistent indoor environment with a humidifier or dehumidifier. Squeaks, on the other hand, are usually the result of boards rubbing against each other or the subfloor. You can often silence these by applying a small amount of powdered graphite or a specialized floor lubricant into the joints.
Sustainable and Acoustic Flooring Choices
Modern flooring decisions now prioritize environmental sustainability and acoustic performance through the use of FSC-certified wood and specialized sound-dampening underlayments. Selecting eco-friendly adhesives and high-density cork or foam layers can significantly reduce noise transmission in multi-story homes. These choices not only benefit the planet but also enhance the living experience within your home.
The environmental impact of your flooring choice is a consideration for many modern homeowners. According to Architectural Digest (2023), selecting wood from Forest Stewardship Council (FSC) certified sources ensures that your flooring is harvested in a responsible and sustainable manner [5]. You can also look for reclaimed wood or bamboo as eco-friendly alternatives that offer unique textures and durability. For the installation process, choosing low-VOC (volatile organic compound) adhesives and finishes will improve the indoor air quality of your home and reduce the release of harmful chemicals.
Acoustic performance is another critical factor, especially in multi-story residences or apartments. The type of underlayment you choose can make a significant difference in the amount of sound that travels through the floor. High-density cork or specialized acoustic foam underlayments are designed to absorb impact noise, such as footsteps or dropped objects. These materials provide a cushioned layer between the wooden planks and the subfloor, reducing vibration and creating a quieter, more comfortable living environment.
Frequently Asked Questions
How much does it cost to install wooden floors?
The total cost typically ranges from $6 to $25 per square foot, including both materials and labor. This price varies depending on the wood species, the installation method, and the complexity of the project.
Can I install hardwood floors myself?
Yes, many homeowners successfully install hardwood floors as a DIY project, especially with click-lock or floating methods. However, traditional nail-down or glue-down methods may require more specialized tools and experience.
What is the best method for installing wood floors?
The best method depends on your subfloor; nail-down is preferred for plywood subfloors, while glue-down or floating methods are ideal for concrete slabs or engineered wood products.
How long should wood floors acclimate before installation?
You should allow your wooden planks to acclimate in the installation room for at least 72 hours, though five days is often recommended for optimal stability.
Do I need underlayment for hardwood floors?
Yes, underlayment is essential for moisture protection, sound dampening, and creating a smooth surface for the planks. The specific type depends on your installation method and subfloor.
What is an expansion gap and why is it needed?
An expansion gap is a 1/2-inch space left between the flooring and the walls to allow the wood to expand and contract naturally with changes in humidity.
References
[1] NWFA Technical Publications
[2] How To Install Hardwood Flooring – Home Depot
[3] How to Install Wood Flooring – Lowe’s
[4] How to Install a Hardwood Floor – Wickham Hardwood
[5] Hardwood Floor Installation and Selection: A DIY Guide – Architectural Digest