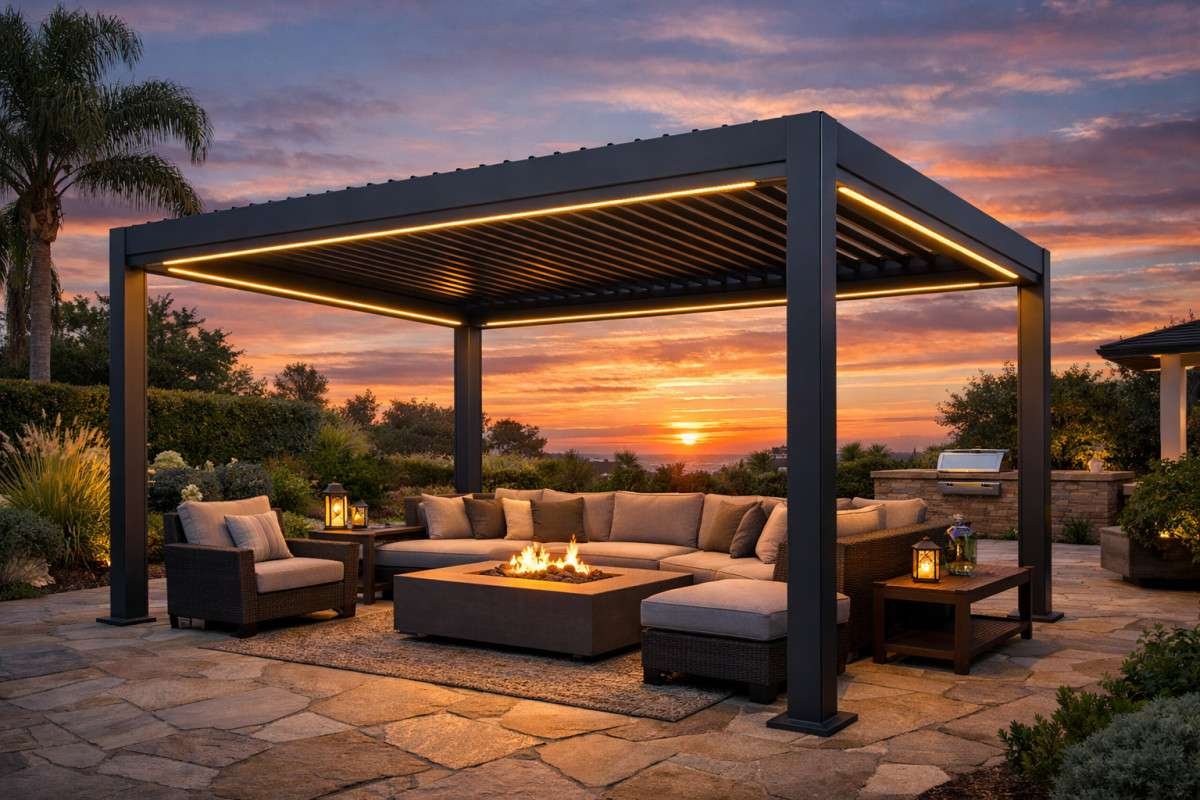
For many homeowners, the dream of a perfect outdoor living space begins with a pergola. This versatile architectural feature does more than just provide shade; it defines an outdoor room, adds significant property value, and creates a stunning focal point for your landscape. Whether you’re envisioning a classic cedar structure draped in wisteria or a modern, motorized aluminum system with integrated lighting, the success of your project depends on a professional installation. In this comprehensive guide, we will walk you through every phase of a pergola installation, from the initial site planning and permit navigation to the final assembly and smart home integration. By following these expert steps, you can transform your backyard into a year-round retreat that is as structurally sound as it is beautiful.
The Foundation of Outdoor Living: Why a Pergola is Your Best Investment
Answer Capsule: A pergola is a versatile outdoor structure that provides shade, architectural interest, and increased property value. By following a professional installation guide, you can ensure your pergola is structurally sound, aesthetically pleasing, and built to withstand the elements for decades. It is a one-time investment that significantly enhances the usability and appeal of your outdoor space.
The decision to install a pergola is often driven by the desire to extend the living space of a home into the outdoors. Unlike a gazebo, which has a solid roof, a pergola features an open-grid roof of rafters and purlins that allows for filtered sunlight and air circulation. This makes it an ideal structure for creating a comfortable dining area, a cozy lounge, or a poolside retreat. According to the American Society of Landscape Architects (ASLA), well-designed outdoor living spaces can provide a return on investment (ROI) of up to 100% or more, making a pergola one of the most cost-effective home improvements you can make.
Beyond the financial benefits, a pergola offers a unique opportunity to express your personal style and enhance your home’s architecture. From the rustic charm of rough-sawn timber to the sleek lines of powder-coated aluminum, there is a pergola design for every taste. However, the “DIY vs. Professional” decision is a critical one. While a simple kit can be a rewarding weekend project for an experienced DIYer, larger or more complex structures—especially those attached to the home or requiring electrical work—often benefit from professional installation. A professional can ensure that your pergola meets local building codes, is properly anchored for wind and snow loads, and integrates seamlessly with your existing landscape.
| Pergola Material | Pros | Cons | Estimated Lifespan |
|---|---|---|---|
| Cedar / Redwood | Natural beauty, rot-resistant | Requires regular staining | 15 – 25 Years |
| Aluminum | Low maintenance, modern look | Higher upfront cost | 30 – 50+ Years |
| Vinyl | Affordable, easy to clean | Limited color options | 20 – 30 Years |
| Steel | Maximum strength, industrial feel | Can rust if not treated | 25 – 40 Years |
1. Planning and Site Selection: The Pre-Build Checklist
Answer Capsule: Careful site selection and planning can prevent expensive mistakes and ensure your pergola integrates perfectly with your home and landscape. By conducting a sun path analysis and checking for underground utilities, you can choose the ideal location for your pergola and avoid any potential conflicts with your home’s infrastructure.
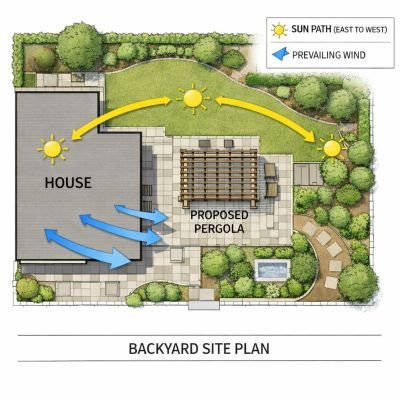
The first step in any successful pergola installation is a thorough site analysis. This includes a sun path analysis to determine the best orientation for your pergola’s rafters and purlins. By understanding how the sun moves across your yard throughout the day, you can maximize shade when you need it most—especially during the peak afternoon hours. You should also consider the prevailing wind direction and how it will affect the comfort of your outdoor space. A well-placed pergola can provide a natural windbreak or a cool breeze, depending on its orientation.
Another critical part of the planning phase is checking for underground utilities. Before you dig any holes for your pergola’s footings, you must call 811 to have your utility lines marked. This simple step can prevent a dangerous and expensive accident and ensure that your pergola is not built over any critical infrastructure. You should also check your property lines and setback requirements to ensure that your pergola is built in a legal and safe location. By taking the time to plan and select the right site, you can avoid any potential conflicts with your home’s infrastructure and ensure that your pergola is a beautiful and functional addition to your landscape.
2. Navigating Permits and Building Codes
Answer Capsule: A guide to the most common permit requirements for pergolas, including size limits, attachment rules, and HOA approvals, is essential for a legal and safe installation. By understanding the “200 Square Foot” rule and the difference between attached and freestanding structures, you can navigate the permit process with confidence and avoid any potential fines or delays.
The permit process for a pergola can be complex, as requirements vary widely by municipality. In many jurisdictions, a permit is required for any outdoor structure over a certain size—typically 200 square feet. However, this rule is not universal, and you should always check with your local building department before you start your project. Another critical factor is whether your pergola is attached or freestanding. Attached pergolas are often considered an extension of the home and are subject to more rigorous building codes and permit requirements than freestanding structures.
Beyond municipal permits, you should also check your HOA (Homeowners Association) rules and regulations. Many HOAs have specific requirements for the size, color, and material of outdoor structures, and you may need to get written approval before you start your project. You should also consider the wind and snow load requirements for your specific region. A pergola built in a high-wind area or a region with heavy snowfall must be engineered to withstand these forces, which may require larger posts, deeper footings, and stronger hardware. By understanding the permit and building code requirements for your area, you can ensure that your pergola is a legal and safe addition to your home.
| Permit Factor | Common Requirement | Why It Matters |
|---|---|---|
| Size (Sq Ft) | > 200 Sq Ft often requires permit | Ensures structural safety |
| Attachment | Attached structures usually need permit | Affects home’s structural integrity |
| Setbacks | Must be X feet from property line | Prevents encroachment on neighbors |
| HOA Approval | Written approval usually required | Maintains community standards |
3. Choosing the Right Foundation: A Decision Matrix
Answer Capsule: Understanding the best foundation for your site, from concrete footings and slabs to pavers and helical screw piles, is essential for a stable and long-lasting pergola. By incorporating a decision matrix, you can choose the ideal foundation for your pergola and ensure that it is properly anchored for wind and snow loads.
The foundation of your pergola is the most critical part of the installation. It must be strong enough to support the weight of the structure and resist the forces of wind and snow. The most common foundation for a pergola is concrete footings, which are poured into holes dug below the frost line. This provides a stable and long-lasting base for your pergola’s posts and ensures that they are properly anchored for wind and snow loads. Another popular option is surface mounting, which involves anchoring the posts directly to an existing concrete slab or deck. This is often the fastest and cleanest installation, but it requires a slab or deck that is strong enough to support the weight of the pergola.
If you have an existing paver patio, you cannot anchor your pergola’s posts directly to the pavers. Pavers are not a load-bearing surface and can move or crack under the weight of a pergola. Instead, you must remove the pavers at each post location and pour concrete footings below the frost line. Alternatively, you can use helical screw piles, which are engineered steel posts that are screwed directly into the ground. Screw piles are a clean and fast alternative to concrete and can be installed in a single day. By choosing the right foundation for your site, you can ensure that your pergola is a stable and long-lasting addition to your home. According to the American Society of Civil Engineers (ASCE), the foundation of an outdoor structure must be designed to withstand the maximum wind and snow loads for its specific region.
4. Step-by-Step Assembly: From Posts to Purlins
Answer Capsule: A detailed walkthrough of the assembly process, including post-setting, beam attachment, and louvered roof installation, is essential for a successful pergola installation. By following these expert steps, you can ensure that your pergola is structurally sound, aesthetically pleasing, and built to withstand the elements for decades.
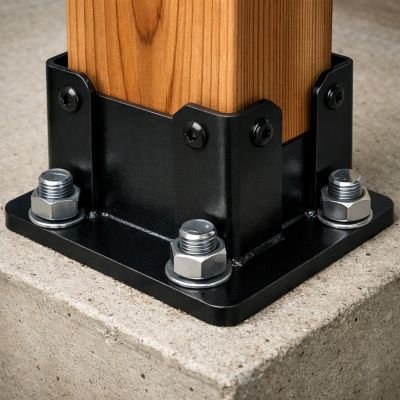
The assembly of your pergola is a multi-step process that requires careful attention to detail. It starts with setting and plumbing the posts, which is the most critical step in the entire installation. The posts must be perfectly level and plumb to ensure that the rest of the structure is straight and true. Once the posts are set, you can attach the beams, which are the horizontal members that support the rafters. The beam-to-post connections must be made with high-quality hardware to ensure that the structure is strong and stable.
After the beams are in place, you can install the rafters and purlins, which create the open-grid roof of the pergola. The spacing and orientation of these members will determine the amount of shade and architectural interest your pergola provides. If you’re installing a motorized louvered roof, you’ll also need to consider the electrical requirements and sensor setup. These systems use a motor to adjust the angle of the louvers, allowing you to control the amount of sunlight and air circulation in your outdoor space. By following these expert steps, you can ensure that your pergola is a beautiful and functional addition to your home. According to InterNACHI, a professional pergola installation is one of the most effective ways to ensure the long-term safety and performance of your outdoor structure.
5. Finishing Touches and Smart Integration
Answer Capsule: Enhancing your pergola with lighting, heating, and smart home integration for year-round comfort is the next step in outdoor living. By incorporating integrated LED lighting and outdoor-rated heaters, you can create a comfortable and inviting outdoor space that can be used throughout the year.
The finishing touches of your pergola installation are what make it a truly unique and functional outdoor space. This includes integrated LED lighting, which can be used to create a warm and inviting atmosphere at night. You can also add outdoor-rated heaters, which can be used to extend the usability of your outdoor space into the cooler months. These heaters are designed to be safe and effective in an outdoor environment and can be controlled with a simple switch or a smartphone app.
Beyond simple lighting and heating, you can also integrate your pergola with your smart home system. This includes smart sensors that can automatically adjust the angle of the louvers based on the amount of sunlight and wind. These sensors can also be used to automatically close the louvers when it rains, protecting your outdoor furniture and electronics. By choosing a smart pergola system, you can create a truly modern and efficient outdoor living space that is as comfortable as it is beautiful. According to the American Society of Landscape Architects (ASLA), smart home integration is one of the fastest-growing trends in outdoor living.
Frequently Asked Questions (FAQ)
- Q1: How much does it cost to install a pergola?
- A: The cost of a pergola installation can vary widely depending on the size, material, and complexity of the structure. A basic wood pergola kit can cost between $1,000 and $3,000, while a custom-engineered aluminum system with integrated lighting and heating can cost $10,000 to $20,000 or more. Additionally, professional installation can add $1,000 to $5,000 to the total cost. However, when compared to the value it adds to your home, a pergola is often a very cost-effective investment.
- Q2: Do I need a permit for a pergola?
- A: The permit requirements for a pergola vary by municipality, but in many jurisdictions, a permit is required for any outdoor structure over 200 square feet. Additionally, attached pergolas are often subject to more rigorous building codes and permit requirements than freestanding structures. You should always check with your local building department and HOA before you start your project to ensure that you are in compliance with all local rules and regulations.
- Q3: Can I install a pergola on an existing deck?
- A: Yes, you can install a pergola on an existing deck, but it requires careful planning and reinforcement. The deck’s posts must align with the structural framing below, and the load path must be carried into the rim joist, beams, or existing posts. You should also check that your deck is strong enough to support the weight of the pergola and that it is properly anchored for wind and snow loads. A professional contractor can help you assess your deck’s structural integrity and ensure a safe and stable installation.
- Q4: What is the best foundation for a pergola?
- A: The best foundation for a pergola depends on your specific site and budget. Concrete footings are the gold standard for bare ground, as they provide a stable and long-lasting base for your pergola’s posts. Surface mounting is often the fastest and cleanest installation for an existing concrete slab or deck. Helical screw piles are a clean and fast alternative to concrete and can be installed in a single day. A professional contractor can help you choose the ideal foundation for your pergola and ensure that it is properly anchored for wind and snow loads.
- Q5: How long does it take to install a pergola?
- A: The time it takes to install a pergola depends on the size and complexity of the structure. A simple wood pergola kit can be installed in a single weekend by an experienced DIYer, while a custom-engineered aluminum system with integrated lighting and heating can take several days or even a week to complete. Additionally, the permit process can add several weeks to the total project timeline. By choosing a professional contractor, you can ensure a fast and efficient installation and avoid any potential delays or mistakes.
Conclusion: Your New Favorite Room is Outdoors
Investing in a professional pergola installation is one of the most important steps you can take to transform your backyard into a year-round retreat. By adopting a proactive outdoor living mindset, you shift from reacting to expensive problems to proactively preserving your home’s most critical resources. The strategies outlined in this guide—understanding the importance of pergola installation, choosing the right foundation, navigating permits and building codes, and exploring smart integration—are not isolated tasks but interconnected components of a holistic home outdoor care system. A few hours of maintenance each year can prevent thousands of dollars in future repairs and add a decade or more to the life of your pergola. Protect your investment, and it will continue to protect you.
You Might Also Like...
 The Ultimate Above Ground Pool Selection Guide: 2026 Edition
 Earth Control Measures: A Complete Guide to Soil Protection and Climate Resilience
 The Ultimate Guide to Earthquake Retrofitting: Protecting Your Home’s Structural Integrity
 The Importance of Structural Integrity: Identifying Foundation Issues Early